Installation
160/293 Revision 11 • INSTALLATION AND OPERATING INSTRUCTIONS • NXPLUS C • 802-9081.9
➭ Mount the arcing plate on the mounting plate in the cable compartment (tightening
torque: 20 Nm).
➭ Mount the floor plate of the floor cover (see page 156, "Mounting the floor plates").
Aligning and mounting
the cable bracket
The cable bracket can be mounted in the cable compartment at two different heights:
• Upper position: For panels with cable-type current transformers at the panel connection
• Lower position: For panels without cable-type current transformers at the panel connection
➭ Align the cable bracket and bolt it tight.
Fig. 119: Cable bracket, type C40
➭ Mount the cable clamps. Use cable clamps made of non-magnetizable materials (plastic,
aluminum) to fasten the high-voltage cables at the cable bracket, e.g. plastic clamps make
id-Technik (cable clamp K26-38 mm, cable clamp K36-52 mm).
INFORMATION
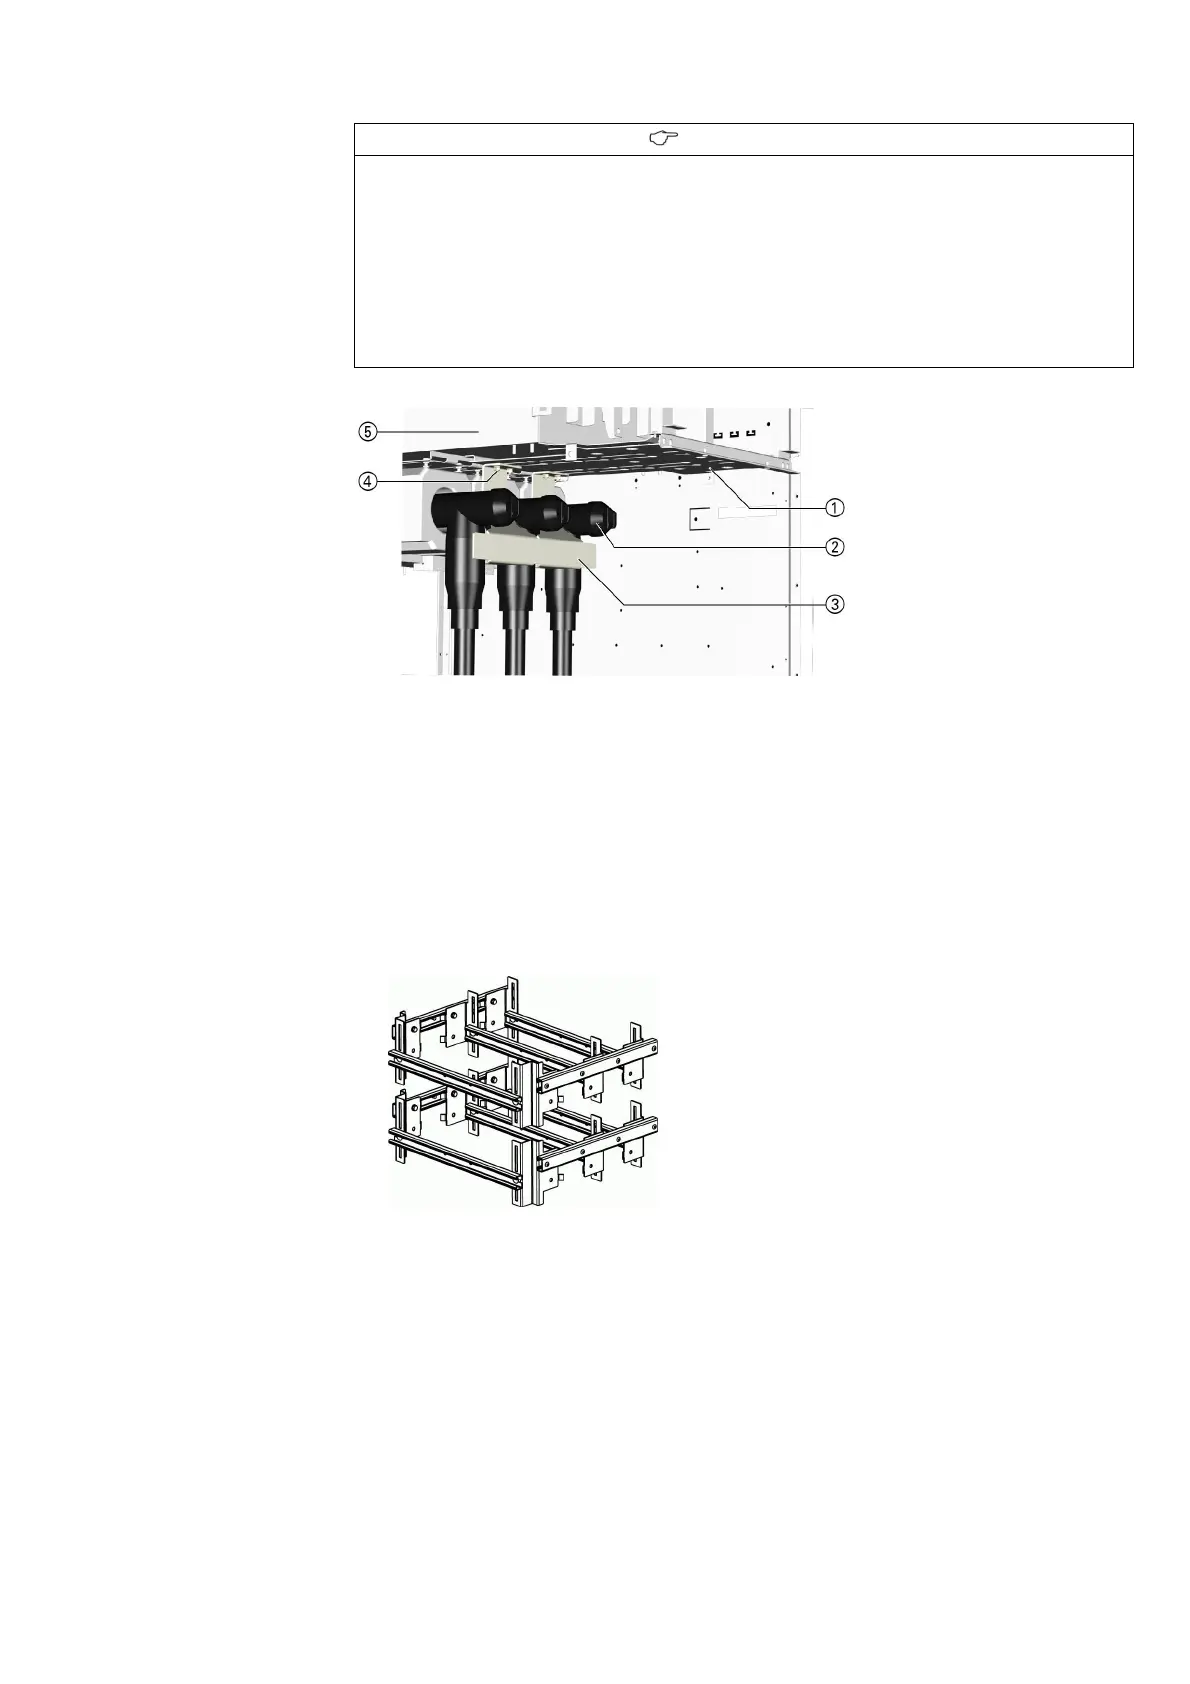
The arcing plates in the cable compartment have been pre-assembled at the factory. For
cable installation, the arcing plates must be removed.
➭ After cable installation, position the arcing plates as close as possible to the front towards
the cables according to the cable T-plugs used.
➭ The distance between the arcing plates and the cable T-plugs must not exceed a maximum
of 15 mm.
➭ The mounted arcing plates must not touch the cable T-plugs.
➭ Do not damage the cable T-plugs while mounting the arcing plates.
Fig. 118: Arcing plate at the cable connection (one cable per
phase)
①
Mounting plate
②
Cable T-plugs
③
Air guide
④
Fixing at the switchgear
vessel
⑤
Switchgear vessel
 Loading...