52 / 62
Siemens RDF302 Basic documentation CE1P3079en
Smart Infrastructure 2022-06-17
4.2 Commissioning
The room thermostats are delivered with a fixed set of applications.
Select and activate the relevant application during commissioning using one of the
following tools:
– Local DIP switch and HMI
– commissioning tools for RS485 Modbus RTU
Set the DIP switches before snapping the front panel to the mounting plate, if you
want to select an application via DIP switches.
All DIP switches need to be set to “OFF” (remote configuration), if you want to
select an application via Modbus commissioning tool.
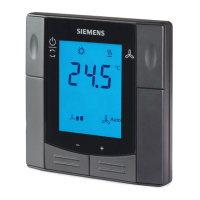
After power is applied, the thermostat starts with all LCD segments flashing for
about 3 seconds. Then, the thermostat will be at normal display mode and is ready
for commissioning by qualified HVAC staff.
If all DIP switches are OFF, the display reads "NONE" to indicate that application
commissioning via a tool is required.
Each time after a different application is selected, the thermostat reloads the
factory settings for all control parameters EXCEPT the parameters for
communication settings. e.g. device addresses (P81), Baud rate (P68) and Parity
(P70)
The thermostat's control parameters can be set to ensure optimum performance of
the entire system. The parameters can be adjusted using
– Local HMI
– commissioning tools
The control parameters of the thermostat can be set to ensure optimum
performance of the entire system (see section 3.13, control parameters).
• The control sequence may need to be set via parameter P01 depending on the
application. The factory setting is as follows:
• When the thermostat is used with a compressor, adjust the minimum output on-
time (parameter P48) and OFF-time (parameter P49) for Y11/Y21 to avoid
damaging the compressor or shortening its life due to frequent switching
• Recalibrate the temperature sensor if the room temperature displayed on the
thermostat does not match the room temperature measured (after min. 1 hour of
operation). To do this, change parameter P05
• We recommend to review the setpoints and setpoint ranges (parameters
P08…P12) and change them as needed to achieve maximum comfort and save
energy
 Loading...
