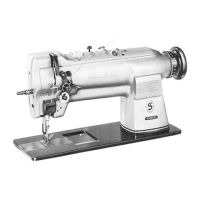
Needle
Bar
Height
(Figs. A
and
B)
Einsteiien
der
Nadelstangenhdhe
{Abb; A
und
B)
1.
Turn
handwheel
until
needle
bar
is
at
the
bottom
dead
center
of
its
stroke.
1.
Handrad
drehen,
bis sich die
Nadelstange
am
unteren
Totpunkt
befindet.
2. Loosen pinch
screw
O .
2.
Klemmschraube
O
losen.
3.
Set
needle
bar
so
that
the
upper
mark O is in line
with
bottom
of
needle
bar
bushing
O
3.
Nadelstange so einsteiien, daft die
obere
Markierung®
mit der Unterkante der Nadelstangenbuchse 0 ab-
4.
Retighten pinch
screw
O .
•
schlieftt.
4.
Klemmschraube
O
wieder
anziehen.
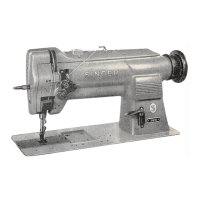
Presser
Bar
(Pigs.
a. c
and
d)
Stoffdruckerstange
(Abb
a.c
und
di
1.
When
presser
foot
is
raised,
the
maximum
clearance
between
the
presser
foot
and
the
throat
1.
Der maximale
Abstand
zwischen
geluftetem
Nahfuft
und
Stichplatte
betragt
3/8"-9,5
mm.
plate
should
be
3/8"-9,5
mm
2.
Zur Einstellung
der
Stoffdruckerstange©
Handrad
2.
To adjust
presser
bar©
. turn handwheel until
lifting
presser foot 0
and
vibrating presser foot ©
drehen, bis
Nahfuft©
und
Transportfuft0
auf der
Stichplatte
aufliegen.
are
resting
on
the
throat
plate.
3.
Klemmschrauben
O
,0
und©
losen.
3.
Loosen pinch
screws
O ,0
and
0 .
4.
Handrad
drehen,
bis
sich
die
Nadelspitze
beim
Ab-
4.
Turn
handwheel
until
the
point
of
the
needle
on
its
downward
stroke
is
about
3/64"
below
the
throat plate level.
{Lifting
Presser
Foot 0
and
senken
ca.
1
mm
unterhalb
der
Stichplattenober-
flache befindet. {Nahfuft 0 und Transportfuft 0
liegen
noch
auf
der
Stichplatte
auf.)
Vibrating
Presser
Foot 0
are
still resting on the
throat
plate.)
5.
Klemmschraube©
anziehen
und
darauf
achten,
daft
zwischen
Gehause
und
Lufterelement
ein
kleiner
5.
Tighten pinch screw 0 thereby ensuring that a
Zwischenraum
bleibt.
small
clearance
remains
between
the
casting
and
the
lifting
element.
6.
Klemmschraube
0
anziehen
und
auf
einen
Zwi
schenraum
zwischen
Fuhrung
und
Gehause
achten.
6.
Tighten
pinch
screw
0
so
that
a
clearance
remains
between
the
guide
and
the
casting.
7.
Kurbel 0 so einsteiien, daft die
Hubbewegung
des
Transportfuftes 0 und des Nahfuftes© gleich ist.
7.
Adjust crank0 so that the
lifting
movement of the
8.
Schraube
©
anziehen.
vibrating
presser
foot 0
and
of the lifting
presser
foot 0 is equal.
8.
Tighten pinch screw 0 .
26
From the library of: Diamond Needle Corp
 Loading...