2
3
24
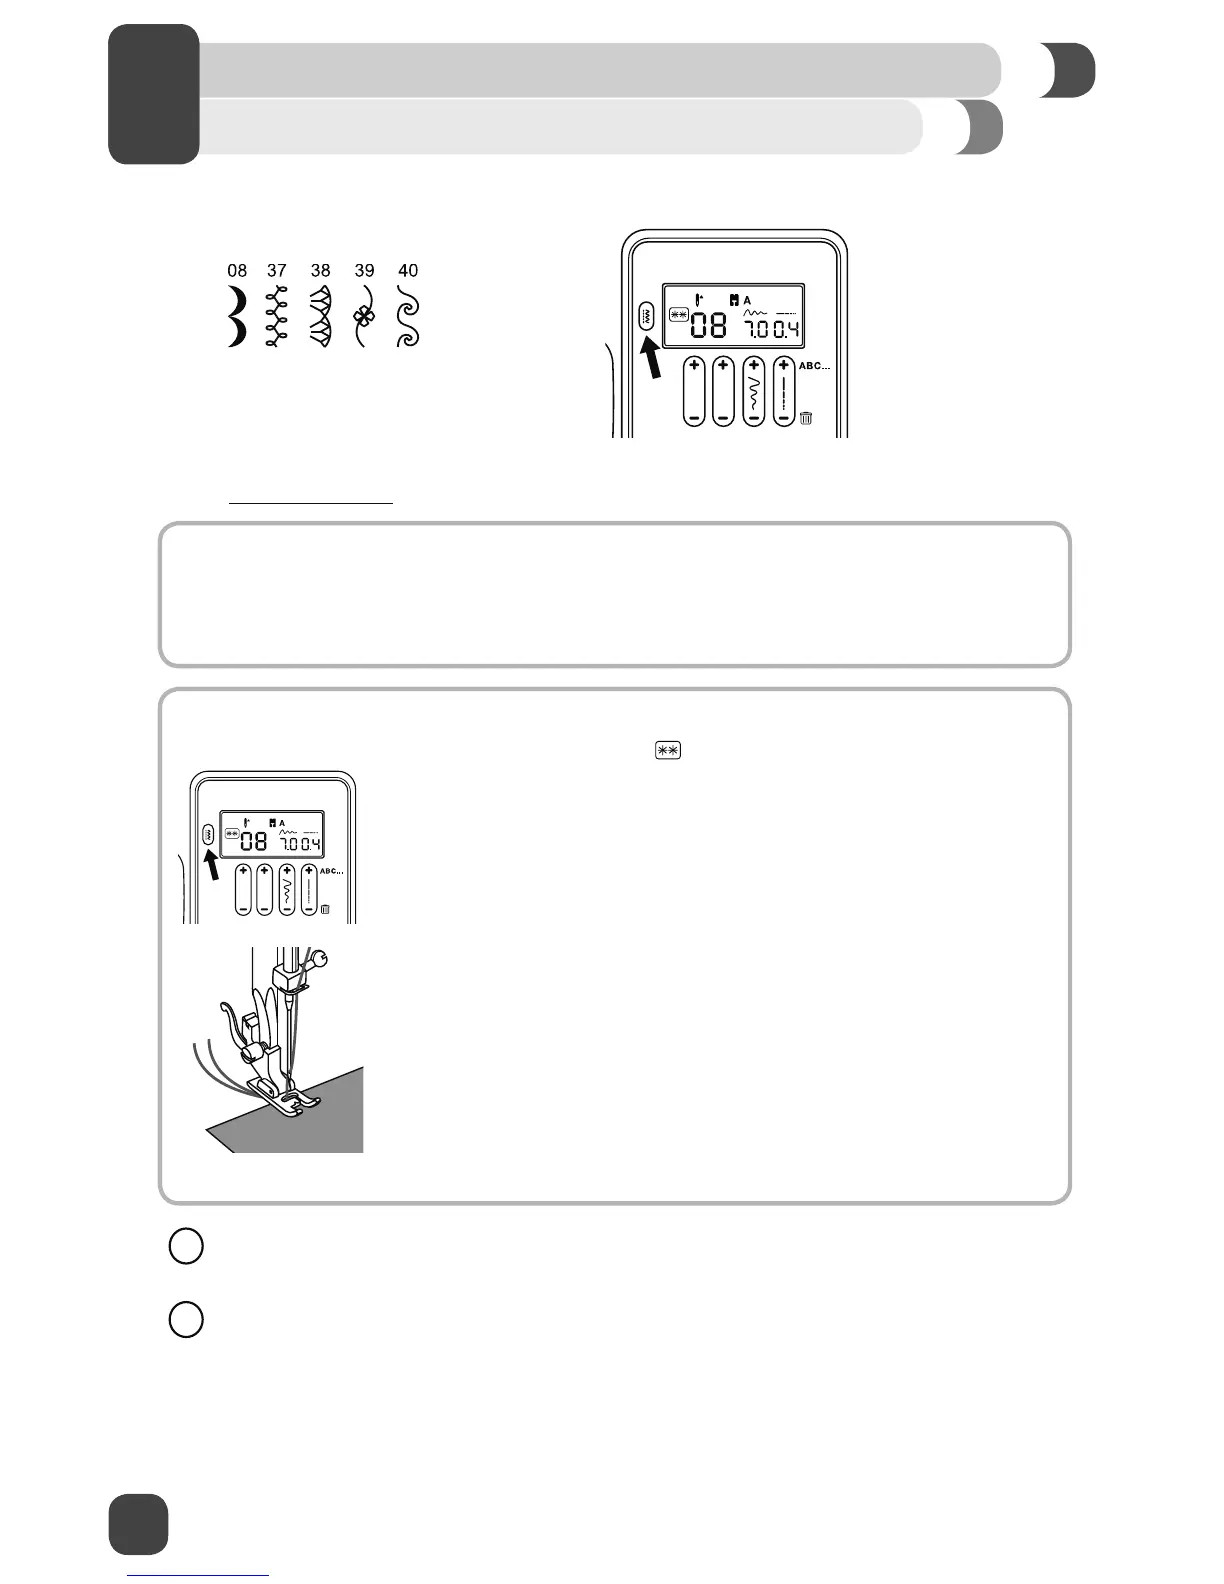
SEW ALONG: Scallop Stitch
1. Set the Mode Button to
and select stitch number 08.
2. The LCD screen on your machine displays the foot that is
recommended for the stitch selected. Remove the All Purpose Foot
and attach the Satin Foot (A). (See Page 29)
3.
Set the Stitch Length to number 0.4. Y
our machine will automatically
default to a stitch length of 0.4 when you select stitch # 08.
4.
Set the Stitch Width to 7.0. Yo
ur machine will automatically default to
stitch width 7.0 when you select stitch # 08.
5. Place the fabric under the presser foot with the right-hand edge of the
fabric lined up with the desired seam guide line on the right side of the
needle plate. Lower the presser foot, then step on the Foot Control or
press the Start/Stop Button to begin sewing. Sew 2 to 3 stitches and
then backstitch (See Page 23) to reinforce the seam.
Sewing a Decorative Stitch
Use a stabilizer (see Appendix) on the underside of the fabric if there is gathering or puckering as
you sew. Decorative stitching can be used almost anywhere on your project!
It may be helpful to decrease the upper tension by 1 or 2 numbers when sewing decorative
stitches. This will help prevent the bobbin thread from possibly showing on the top when sewing
denser stitches.
A decorative stitch is used for embellishing and adding Àair to your sewing projects.
(Go to www.singerco.com to view other decorative stitches that can be used).
HOW TO:
1. Set the machine to the desired stitch by entering the number of the desired stitch. (See Page 22)
2.
Set the Stitch Length between 0.4 and 1.0. (See Page 22)
3.
Set the Stitch Width between 2.0 and 7.0. (See Page 22)
Mode Button and Function Buttons
START SEWING
 Loading...