2
3
26
SEW ALONG: Buttonhole Stitch
1.
Place the button at the back of the buttonhole foot. Mark position and
length of buttonhole on the fabric.
2.
Remove the All Purpose Foot and attach the Buttonhole Foot (See
Page
2
9). Pass upper thread through the hole of the foot and bring thread to
the left.
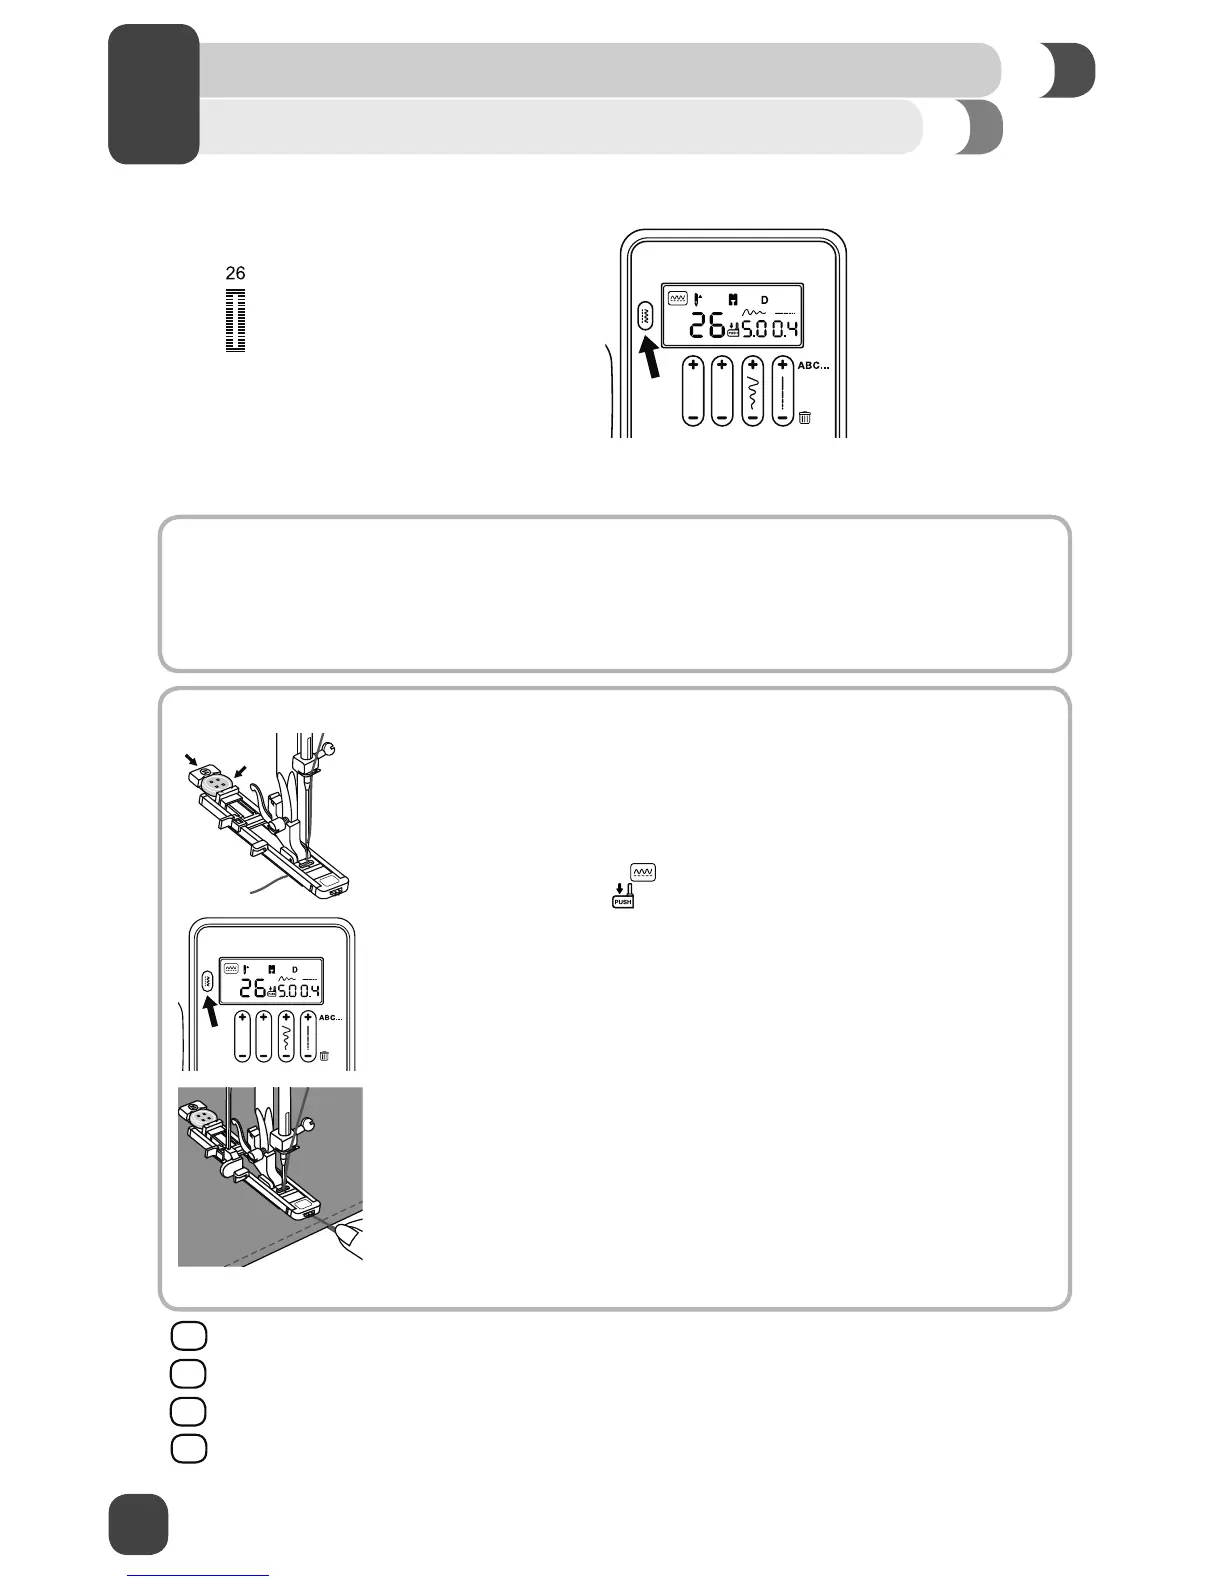
3. Set the Mode Button to
and select stitch number 26, the LCD screen
will display the ¿gure
, to remind you to lower the Buttonhole Lever.
4.
Set the Stitch Length to number 0.4. Your machine will automatically
default to stitch length 0.4 when you select stitch # 26.
5.
Set the Stitch Width to 5.0. Your machine will automatically default to stitch
width 5.0 when you select stitch # 26.
6.
Place the fabric under the foot so that the center line mark on your fabric
is aligned with the center of the Buttonhole Foot and that the cross line
mark on the fabric aligns with the center hole of the Buttonhole Foot.
Lower the presser foot.
7.
Pull the Buttonhole Lever all the way down and then carefully push it back.
The Buttonhole Lever must sit behind the bracket located on the left of the
Buttonhole Foot.
8.
Hold upper thread slightly and start to sew until the buttonhole is
completed.
9.
Return the Buttonhole Lever to its original position once all buttonholes
are completed.
Sewing a 1-Step Buttonhole
Use a stabilizer to support the stitches.
Slightly reducing your upper tension by 1 or 2 numbers will improve results.
Always test sew on a scrap piece of your fabric.
The density of the buttonhole can be adjusted by using the Stitch Length Adjustment Button.
This machine has built-in buttonholes, allowing you to sew buttonholes in one easy step. The
buttonhole stitches are numbered 24 to 31.
HOW TO:
1. Set the machine to the desired stitch by entering the number of the desired buttonhole stitch. (See
Page 22)
2.
The Stitch Length is automatically selected by the machine for optimum results. (See Page 22)
3.
The Stitch Width is automatically selected by the machine for optimum results. (See Page 22)
¤
¤
¤
¤
Mode Button and Function Buttons
START SEWING
 Loading...