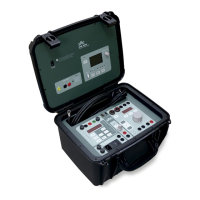
PTE-100-C
33
the output was switched on, and it does it at a very high speed. You
can now exit from Func. mode.
4) If you wish to avoid injecting an excessive amount of current acci-
dentally while regulating your test current, use the Ilim function as
described in Protecting Your Relay.
5) Do the same with the Tlim function entering the longest time for
which you know it is safe to sustain the above specified current limit
through your relay while you are regulating the test current. Do not
forget to press to effectively activate this one and the Ilim
protection (LED should toggle from slow to fast blinking). The speci-
fied time should be longer than the expected instantaneous opera-
tion time.
6) After you exit the Func. mode, the LEDs next to these three functions
should be steadily lit. Otherwise, back up to Func. mode, navigate
to the function and press to toggle its LED to fast blinking.
7) Do NOT press now. Switch the output and try to
reach the instantaneous setting for the current before the Tlim pro-
tection operates and the output is suspended.
8) Retry step 7) until you achieve the desired value for the instantane-
ous test setting in Display #2.
9) Press to zero the timer out and to set the unit to suspend
the output automatically upon relay’s operation.
10) Press to start the test. The relay should operate before the
time specified for Tlim elapses, and the injection will be automati-
cally suspended. The resulting operation time and current will be
shown by displays #1 and #2 respectively.
11) Check the relay’s consistency by repeating steps 9) and 10) a cou-
ple of times and write the results down.
12) Repeat steps 7 thru 11 for each current value that you need to test.
ON
RESET
ON
RESET
Enter/Print
Enter/Prin
USER’S MANUAL
34
Pre-setting a current value
If your test object’s load is consistently linear, the Preset function provides a
method to set a current value while the output switch is in the OFF position.
When Preset is active, the unit calculates the current that would result from
each position of the regulation knob at the ‘flagged’ current tap over the
connected impedance. This theoretical value is shown in Display #2 though
no current is actually being injected. This is possible by applying the formula
||/|||| ZVI
where |V| is the voltage that corresponds to the present position of the
variac at the current tap where impedance |Z| has been previously meas-
ured and stored (see Measurement Functions at the DESCRIPTION chapter).
This calculated current adjustment is useful when you need to test one relay
over multiple settings in the same current tap. Beware, though, that the ac-
curacy of this calculation is compromised when the connected load has a
substantial amount of reactive (inductive or capacitive) components.
If you want to regulate the current before activating the output, do the fol-
lowing:
1) Check that the output is switched off and the variac is at its mini-
mum (“0”) position.
2) Connect the load to the current output that best accommodates the
regulation range and flag it using the button.
3) Go to the |Z|tap function using the and buttons.
4) Without exiting the Func. mode, activate the unit’s output and regu-
late it to a minimum 10 percent of the intended test current’s upper
limit. For example, if you are going to test between 5 and 20 A,
regulate a little bit more than 2 A now.
5) Display #1 will be showing the measured impedance as you regu-
late the current. Press now to save it into memory and
switch the output off.
6) From now on, as long as you don’t move the test load to a different
tap, you can toggle the Preset function on and off to acti-
Enter/Print
Function
 Loading...