Selecting an Edit Mode
3-2 Editing
Chapter 3 Editing
3-1-2 Insert Editing
In insert editing, you insert video,
audio, and timecode at desired
positions on an already recorded tape.
You can insert all three types of data
at the same time, or insert one of the
types separately. For audio, you can
select multiple channels from among
channels 1 to 4. Use insert editing
when you want to do the following:
• Replace video and audio on
unneeded sections of the tape with
other video and audio.
• Insert music and narration into a tape
with edited video.
• Insert video into a tape with edited
audio.
• Record new timecode over already
recorded timecode.
Note
Before you use an unrecorded tape in
insert editing, video signal such as
black signal, CTL and timecode must
be recorded on all over the tape.
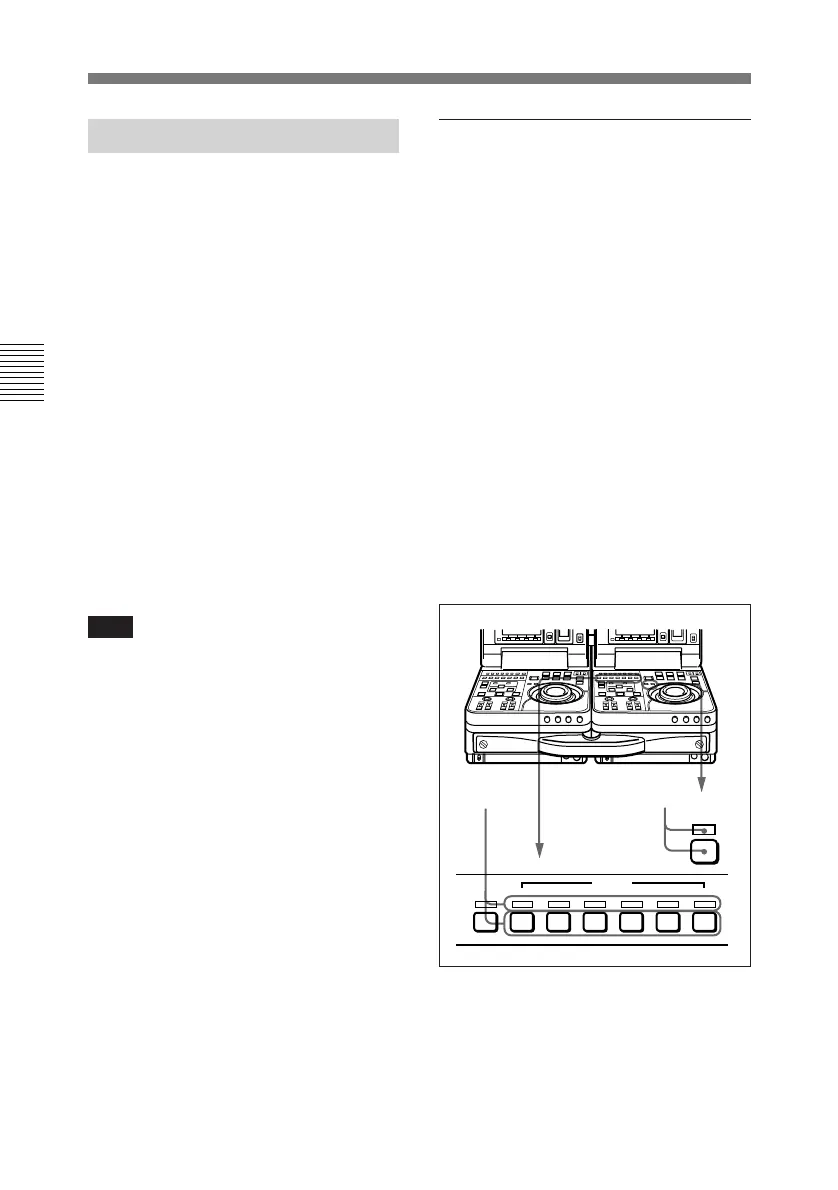
Selecting insert mode
1 Press the RECORDER button on
the recorder unit’s control panel.
The RECORDER indicator lights.
2 Press one or more of the INSERT
buttons on the recorder unit’s
control panel to select the signals
you want to insert.
The corresponding INSERT
indicators light.
To cancel insert mode
Press the lit INSERT buttons again to
turn the corresponding indicators off.
Selection of a signal is canceled when
its indicator goes out.
VIDEO
CH-1 CH-2 CH-3 CH-4
AUDIO
ASSEMBLE INSERT
TC
2
1
RECORDER
 Loading...