Edition
2016
Workshop Manual
PARK 120 - PARK 220
Chapter
6 Control cables
Page
45
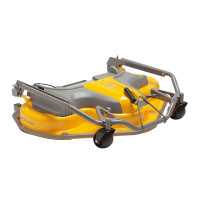
6.2 Angle ball joints
The angle ball joints perform two functions:
• Transmit movement from the control to the actuator.
• Adjust cable tension.
Note! On the adjustment point, at least 5 threads should be used.
Change
B
A
C
1. Tighten nut (A).
2. Unscrew the nut (B).
3. Unscrew the ball joint (C) from cable (D).
4. To reassemble the various parts, repeat the
operations in reverse order.
5. Once assembly is complete, adjust the cable
tension.
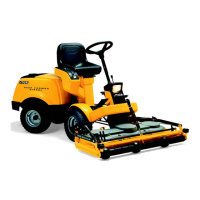
Disassembly
A
B
C
1. Remove the circlip (A).
2. Using a screwdriver or similar tool, remove the
ball pin (B) from its seat (C).
3. To reassemble the various parts, repeat the
operations in reverse order. The ball pin (B)
must be inserted into its seat (C) using a pol-
ygrip pliers or similar tool.
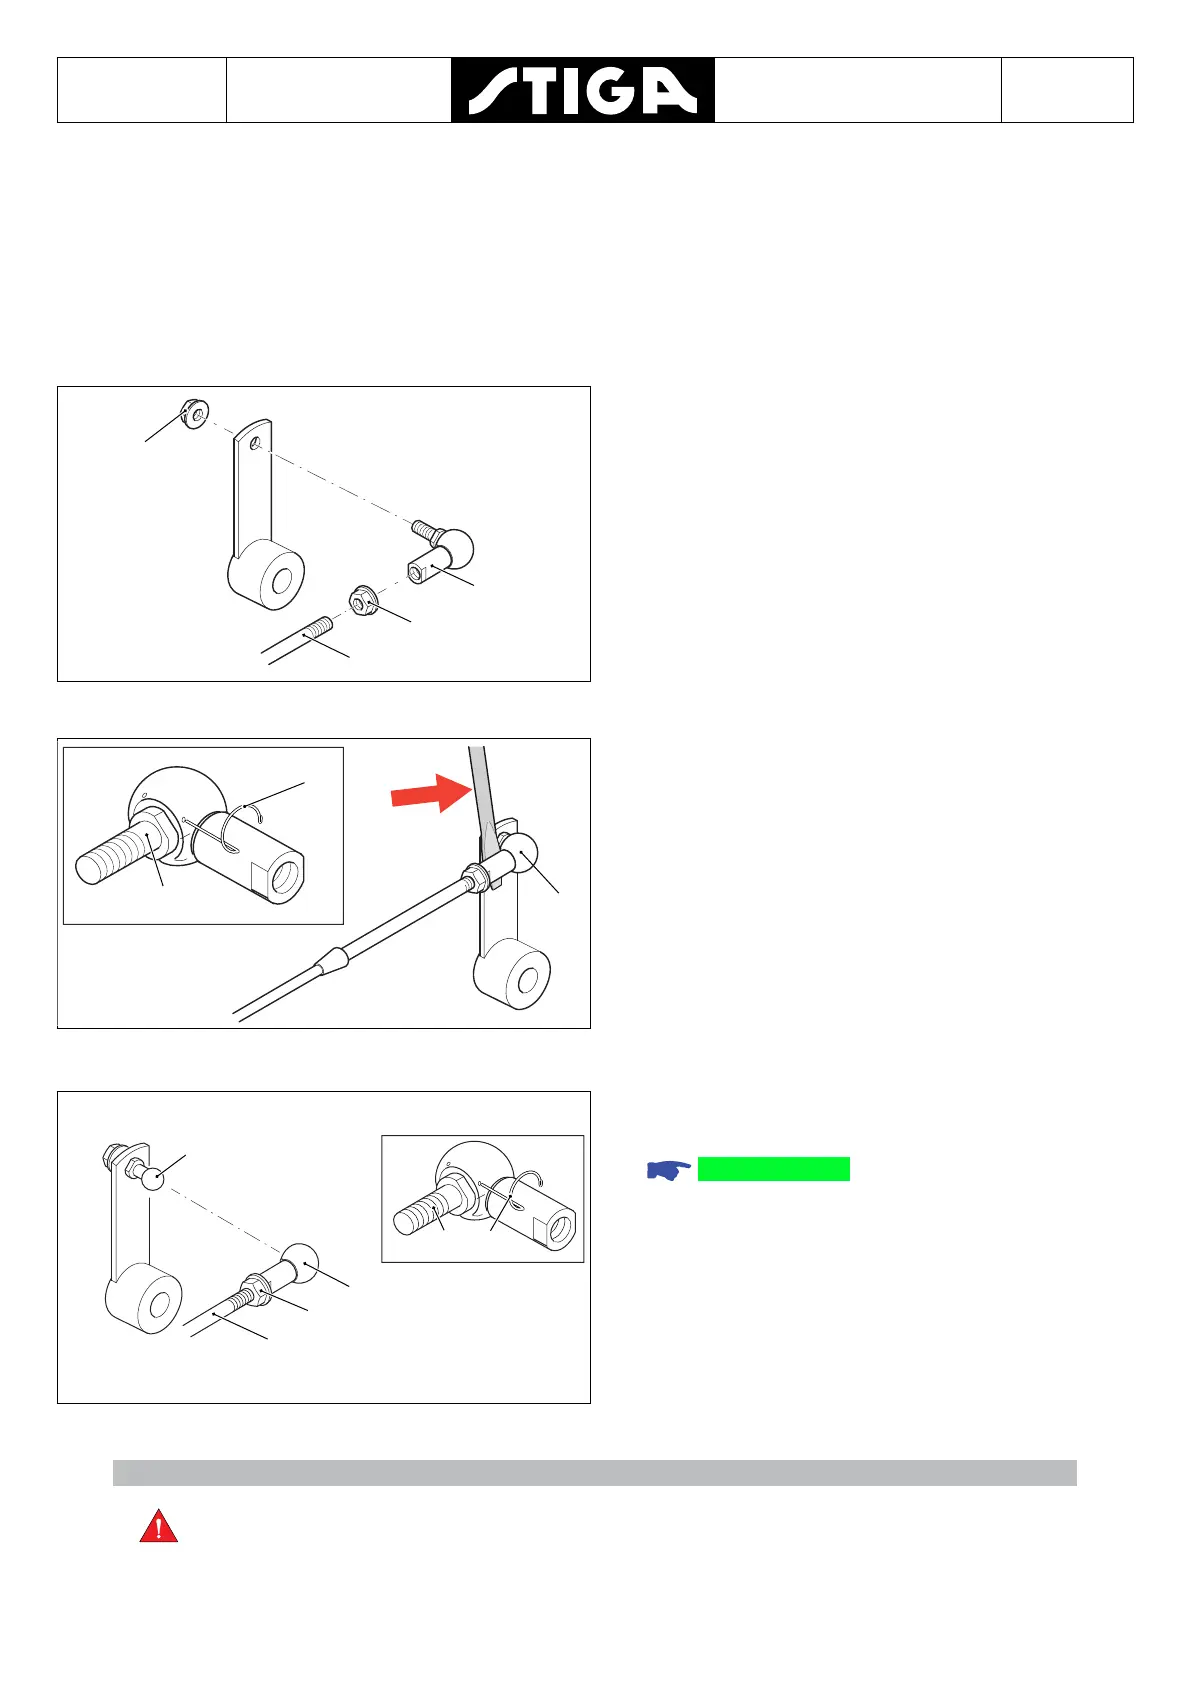
Adjustment
C
A
D
B
B E
1. Tighten nut (A).
2. Separare the ball pin (B) from the ball joint (C).
“Disassembly”
3. Screw / unscrew the seat of the angle ball joint
(C) on the cable (D).
4. Check the adjustment result by installing the
ball joint (C) on the ball pin (B) without insert-
ing the circlip (E).
5. Once the adjustment is correct, insert the cir-
clip (E).
6. Tighten nut (A).
Danger!
To prevent the ball pin from falling apart during operation, it is important that circlip
(C) is inserted in both holes on the angle ball joint seat.

 Loading...