Manual Transmission/Transaxle: 5B-10
Transmission Shift Control Lever Removal and
Installation
S5JB0A5206005
Removal
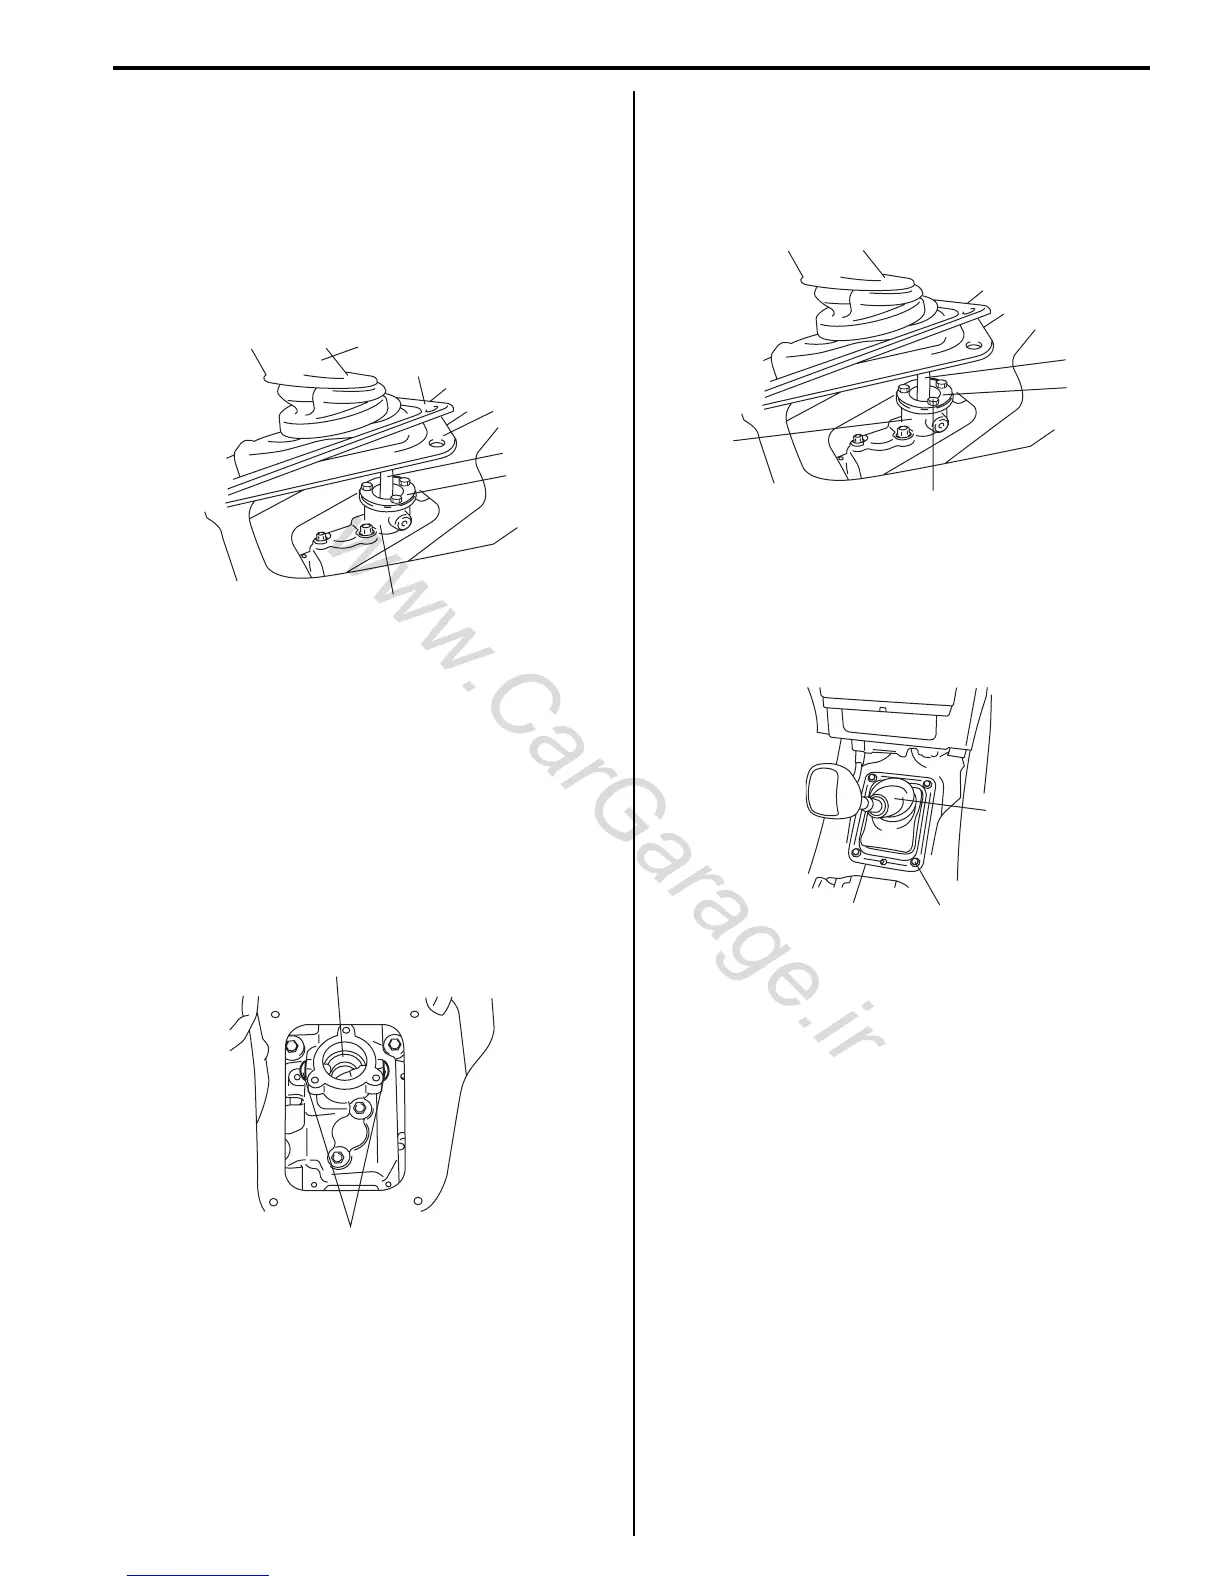
1) Remove front console box referring to “Console Box
Components: in Section 9H”.
2) Lift up boot cover (1), boot (2) and sheet (3).
3) Remove case cover (4) and take out shift control
lever (5) from gear shift lever rear case (6).
Installation
1) Tighten new control lever locating bolts (1) to
specified torque, if removed.
Tightening torque
Control lever locating bolt (a): 9 N·m (0.9 kgf-m,
6.5 lb-ft)
2) Apply grease to pivot portions and seat, then install
shift control lever.
“A”: Grease 99000–25010 (SUZUKI Super
Grease A)
3) Set shift control lever (2) to gear shift lever rear case.
4) Install case cover (1) to gear shift lever rear case (3).
Tighten case cover bolt to specified torque.
Tightening torque
Case cover bolt (a): 10 N·m (1.0 kgf-m, 7.5 lb-ft)
5) Install sheet, boot (1) with boot cover (2) to floor
panel.
Tightening torque
Control lever boot cover bolt (a): 12 N·m (1.2
kgf-m, 9.0 lb-ft)
6) Install front console box referring to “Console Box
Components: in Section 9H”.
Transmission Shift Control Lever Inspection
S5JB0A5206006
• Check transmission shift control lever lower portion
and control lever locating sheet for excessive wear.
• Check boot for damage.
Correct or replace if necessary.
6
4
5
3
1
2
I5JB0A520023-02
“A”
1, (a), “B”
I5JB0A520024-03
3
(a)
1
2
I5JB0A520025-02
2
(a)
1
I5JB0A520027-02
 Loading...