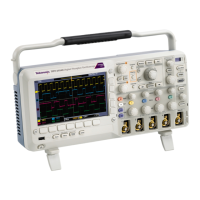
Getting Started
1. Use the optiona
l5V
DC
power adapter connected to the 5 V
DC
power input
on the Adapter.
2. Use an appropr
iate USB cable connected to a powered USB host port on your
PC and the Device port on the TEK-USB-488 Adapter.
Before sett
ing up the oscilloscope for remote communication using the electronic
(physical) GPIB interface, you should familiarize yourself with the following
GPIB requirements:
A unique device address must be assigned to each device on the bus. No two
devices can share the same device address.
No more than 15 devices can be connected to any one line.
Only one d
evice should be connected for every 6 feet (2 meters) of cable used.
No more than 65 feet (20 meters) of cable should be used to connect devices
to a bus.
At least two-thirds of the devices on the network should be powered on while
using t
he network.
Connect the device s on the network in a star or linear configuration. Do not
use lo
op or parallel configurations.
To function correctly, y our oscilloscope must have a unique device address. The
defa
ult setting for the GPIB c onfiguration is GPIB Address 1.
To change the GPIB address settings, do the following:
1. On the front panel, push Utility.
2. Push Utility Page.
3. Select I/O with the Multipurpose knob.
4. Push GPIB.
5
.
E
nter the GPIB address on the side menu, using the multipurpose knob. This
will set the GPIB address on an attached TEK-USB-488 Adapter
The oscilloscope is now set up for bidirectional communication with your PC.
Setting Up Remote Communications Software
Connect your oscilloscope directly to a computer to let the PC analyze y our data,
collect screen images, or to control the oscilloscope using a program of your own
creation. You can connect using TekVISA drivers, or connect directly from any
computer ’s web browser using Tektronix e*Scope Web-enabled tools.
MSO2000B, DPO2000B, MSO2000 and DPO2000 Series Oscilloscopes Programmer Manual 1-5
 Loading...