displays on the instrument as the
transfer occurs.
The data transfer takes a few
minutes, and is only done when
the host instrument discovers a
new probe or new probe tip. The
data transfer only occurs on
instruments that are fully
compatible with the probe.
After the data transfer is done,
the probe is ready for a functional
check and compensation. See
Functional check on page 9
Functional check.
If the probe’s status LED is red,
the power-on self-test likely
failed. See Error conditions
on page 42.
Connect accessories to the TekFlex connector
All of the P7700 TDP7700 accessories mate with the new TekFlex (zero insertion force) connector. This connector provides
an easy connection with one handed operation for attaching to the P7700 TDP7700 series accessories. The following
procedures show the steps for connecting probe tips to the TekFlex connector; the procedures for connecting to other
accessories are similar.
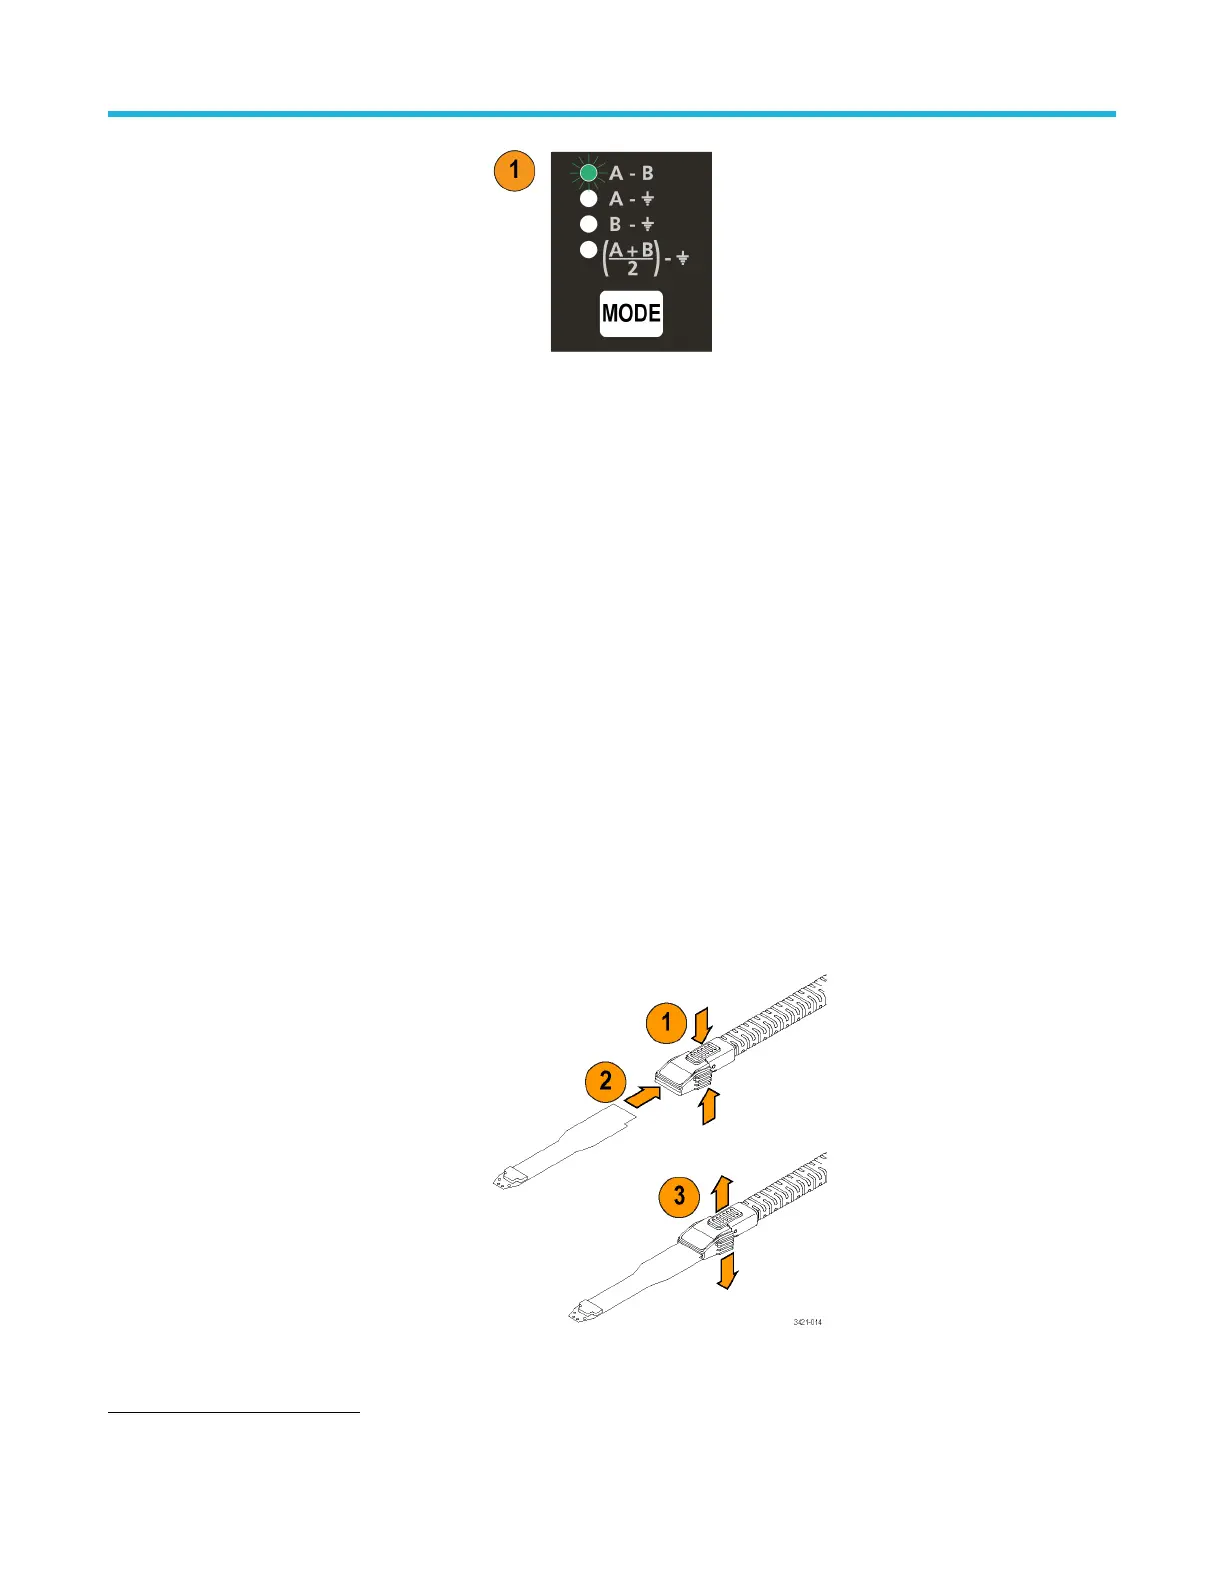
Connect the tip to the probe TekFlex connector as follows:
Pinch the TekFlex connector to
open the jaws.
Orient the tip with the probe head
(notch to the left) and slide the tip
connector into the TekFlex
connector.
A green LED will light up when
the tip is inserted
2
. The LED is
the first indication that the tip is
powered and is inserted. You also
need to confirm that the
connector pins on the TekFlex
connector fit through the
alignment holes on the tip.
Once the tip is fully inserted,
release the pinch and the TekFlex
2
The P77C292MM does not contain an LED.
Installation
P7700 Series TriMode™ Probes 6

 Loading...