connector of the probe should
first be connected to the
P77BRWSR TDP77BRWSR tip.
The P77BRWSR TDP77BRWSR
tip inputs must then be pressed
into place against the A and B
signal traces on the P77DESKEW
TEK-CDA fixture board edge,
located between the Port1 and
Port2 clamps. Either of the two
sets of A and B signal trace
connection patterns located on
the P77DESKEW TEK-CDA fixture
board edge may be used.
Test setup with the P77C292MM
adapter
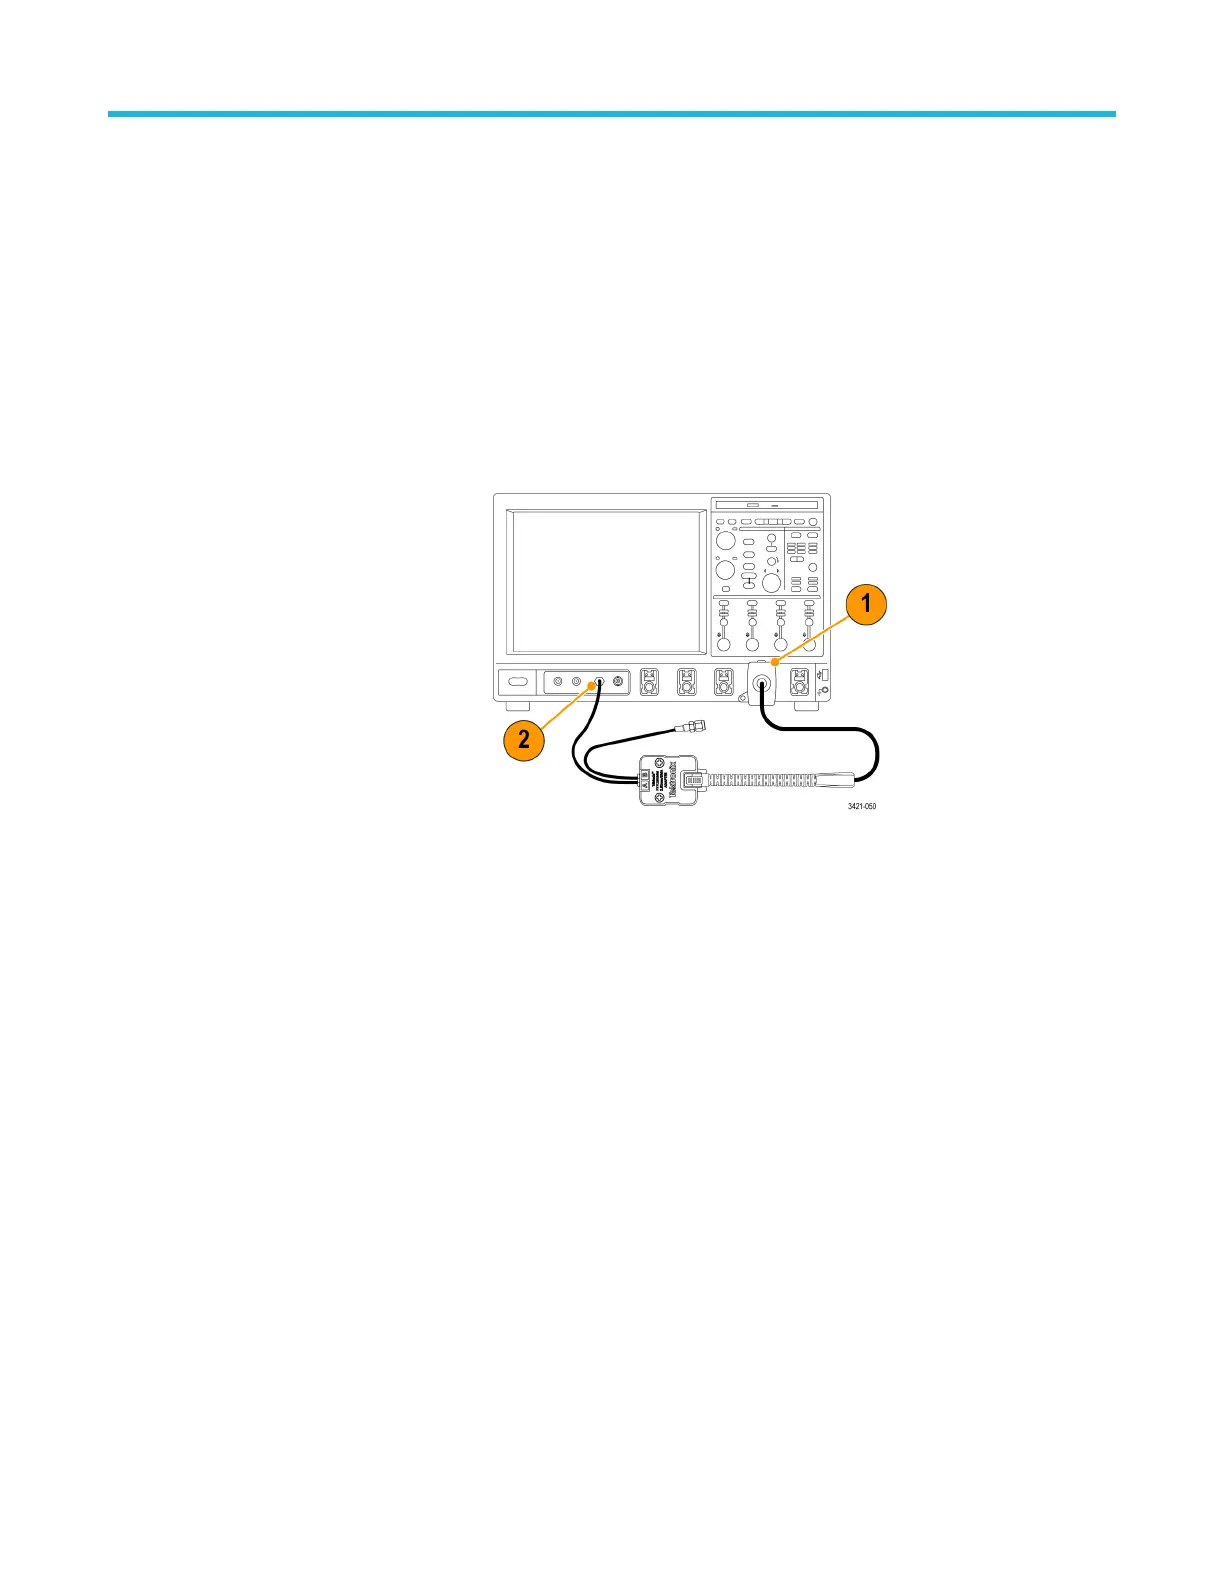
Connect the probe to any channel
(1-4) of the oscilloscope
(connection to CH4 is shown). Set
the oscilloscope to display the
connected channel. Connect the
probe to the P77C292MM adapter.
Connect the A cable from the
P77C292MM adapter to the FAST
EDGE???? output connector on
the oscilloscope. Leave the B
cable disconnected for now.
Test procedure
Set the probe Input Mode to A-B.
Adjust the oscilloscope to display
a stable waveform (or press the
Autoset button). The FAST
EDGE???? signal is a 1 kHz
square wave. The amplitude of
the FAST EDGE???? signal is
attenuated by 2X, compared to a
single path termination, due to
the power splitter built into the
P77DESKEW TEK-CDA fixture.
When you see a stable square
waveform, check the amplitude
(use the horizontal cursors). The
attenuated amplitude displayed
for a DPO70000 oscilloscope
FAST EDGE???? signal routed
through the Deskew Fixture
should be about 100 mVpp.
Functional check and calibration
P7700 Series TriMode™ Probes 11

 Loading...