BEFORE OPERATING
DANGER
Pressurized Cap Can Cause Serious Injury
If Improperly Opened.
Never open oil cap without releasing
pressure valve stem.
Keep face and upper body away from cap
while opening.
CHECK HYDRAULIC SYSTEM
1. The hydraulic system is designed to operate on
10W30 SF-CC oil. The tank contains 2 gallons of
oil. There should be 4" of oil in the tank when full.
2. Pressurize the hydraulic tank with air (20 to 40
PSI). Always maintain air pressure in the tank to
minimize slipping of the conveyor belt when using
heavy or wet sand.
3. Visually inspect the hydraulic system for leaks,
loose fasteners, missing parts, improperly routed
lines. Make all repairs before operating.
CHECK TIRE PRESSURE
1. Check tire pressure before each use. Because
the topdresser is ground driven always maintain
tire pressure at 20 PSI.
ATTACH TOPDRESSER TO TOWING
VEHICLE
1. Attach the topdresser to the towing vehicle.
Use the pin on the towing vehicle to secure.
2. Connect the long half of the wiring harness to
short half at the end of the tongue.
3. Connect the red wire to the positive terminal on
the towing vehicle battery. The white wire
connects to the negative terminal.
4. Gather and consolidate all loose wires. Tape
together with existing wires on the towing vehicle.
Make sure there are no loose or dangling wires to
interfere with the operation of the unit.
5. Pull the unit forward at a slow speed and flip the
electrical switch to the "ON" position. If brush and
conveyor belt rotate flip switch off. If they do not
rotate, check the trouble shooting page (pg. 16) for
details. After checking, turn the switch off.
CONTROLS
ELECTRIC SWITCH
The electric switch has 2 positions; ON, OFF.
When switch is on the conveyor belt and brush will
rotate. When switch is off the conveyor belt and
brush stop rotating.
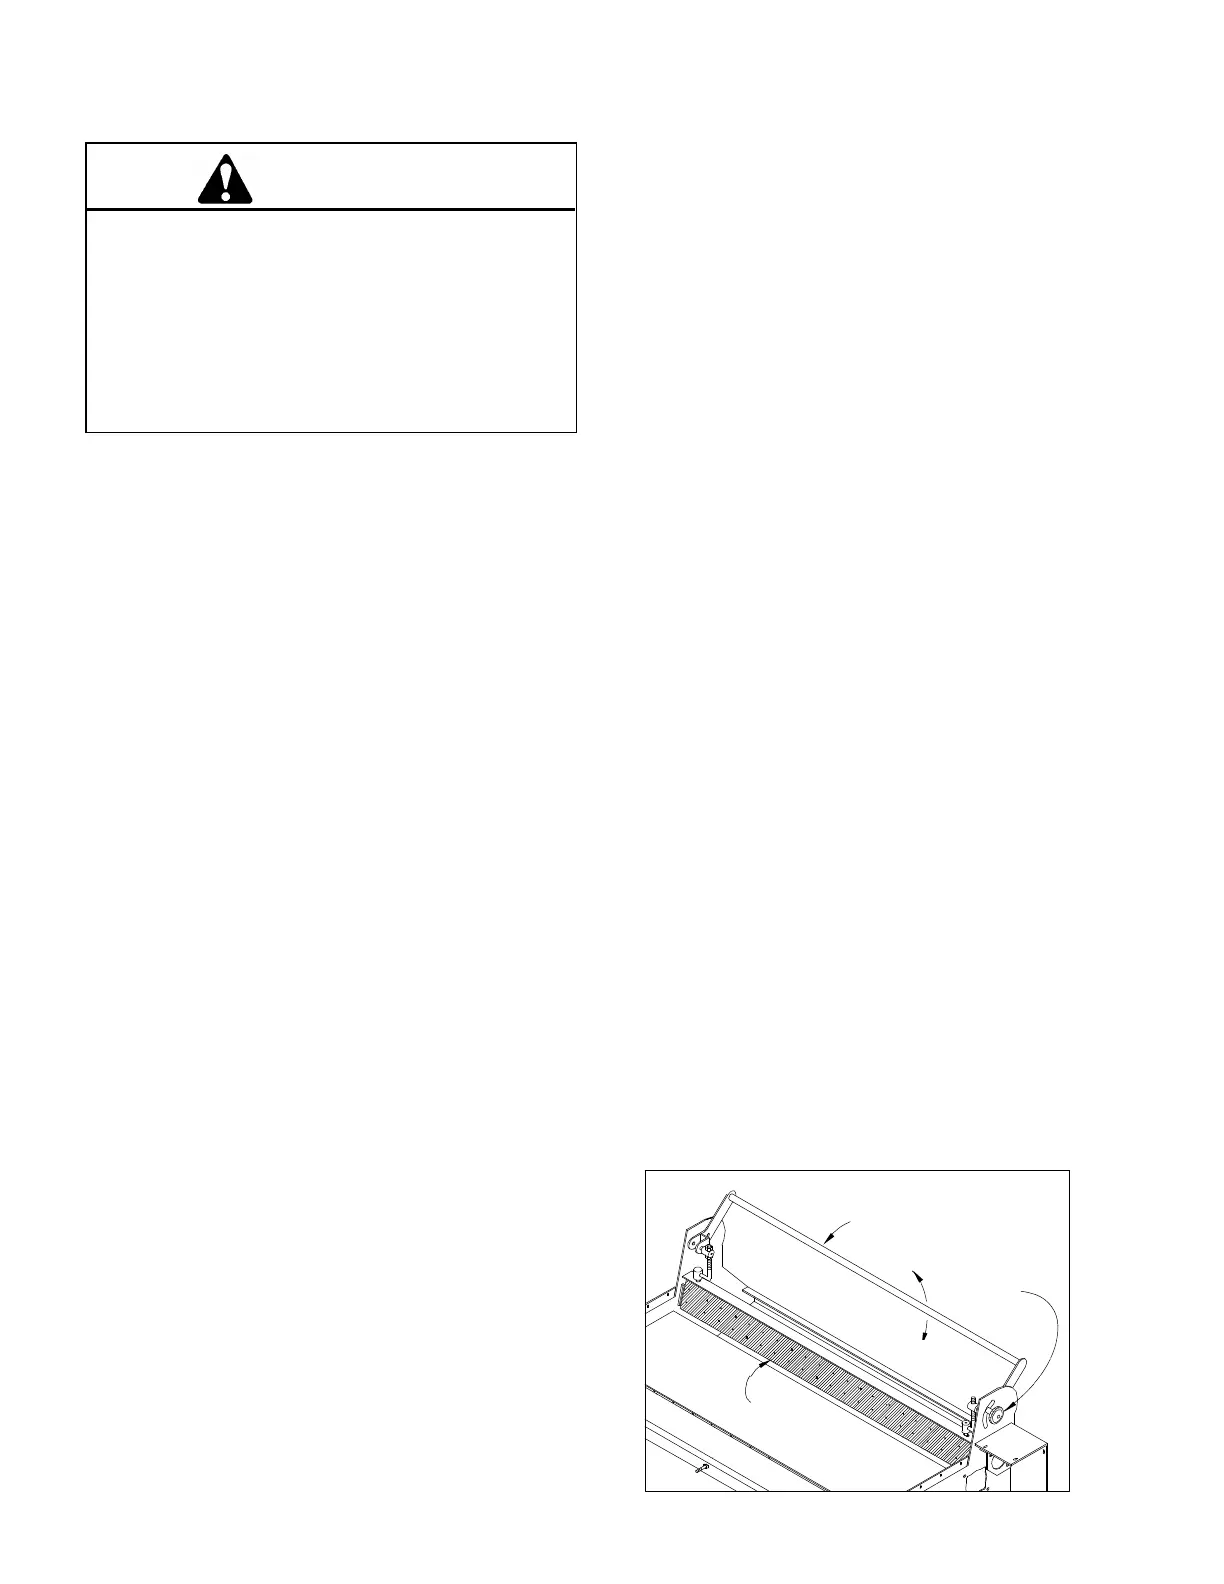
GATE CONTROL ARM (Fig. 3)
The gate control arm is used to control the amount
of sand being applied to the turf. The black knob
on the end is used to lock the setting into position.
1. Loosen the black knob enough to allow the arm
to pivot.
2. Set the gate into position. Moving the gate
control arm downward opens the gate and upward
motion closes it.
3. When desired gate setting is obtained, tighten
black knob to lock into position.
8
Open
Close
Gate Control Arm
Black
Knob
Gate
Figure 3
 Loading...