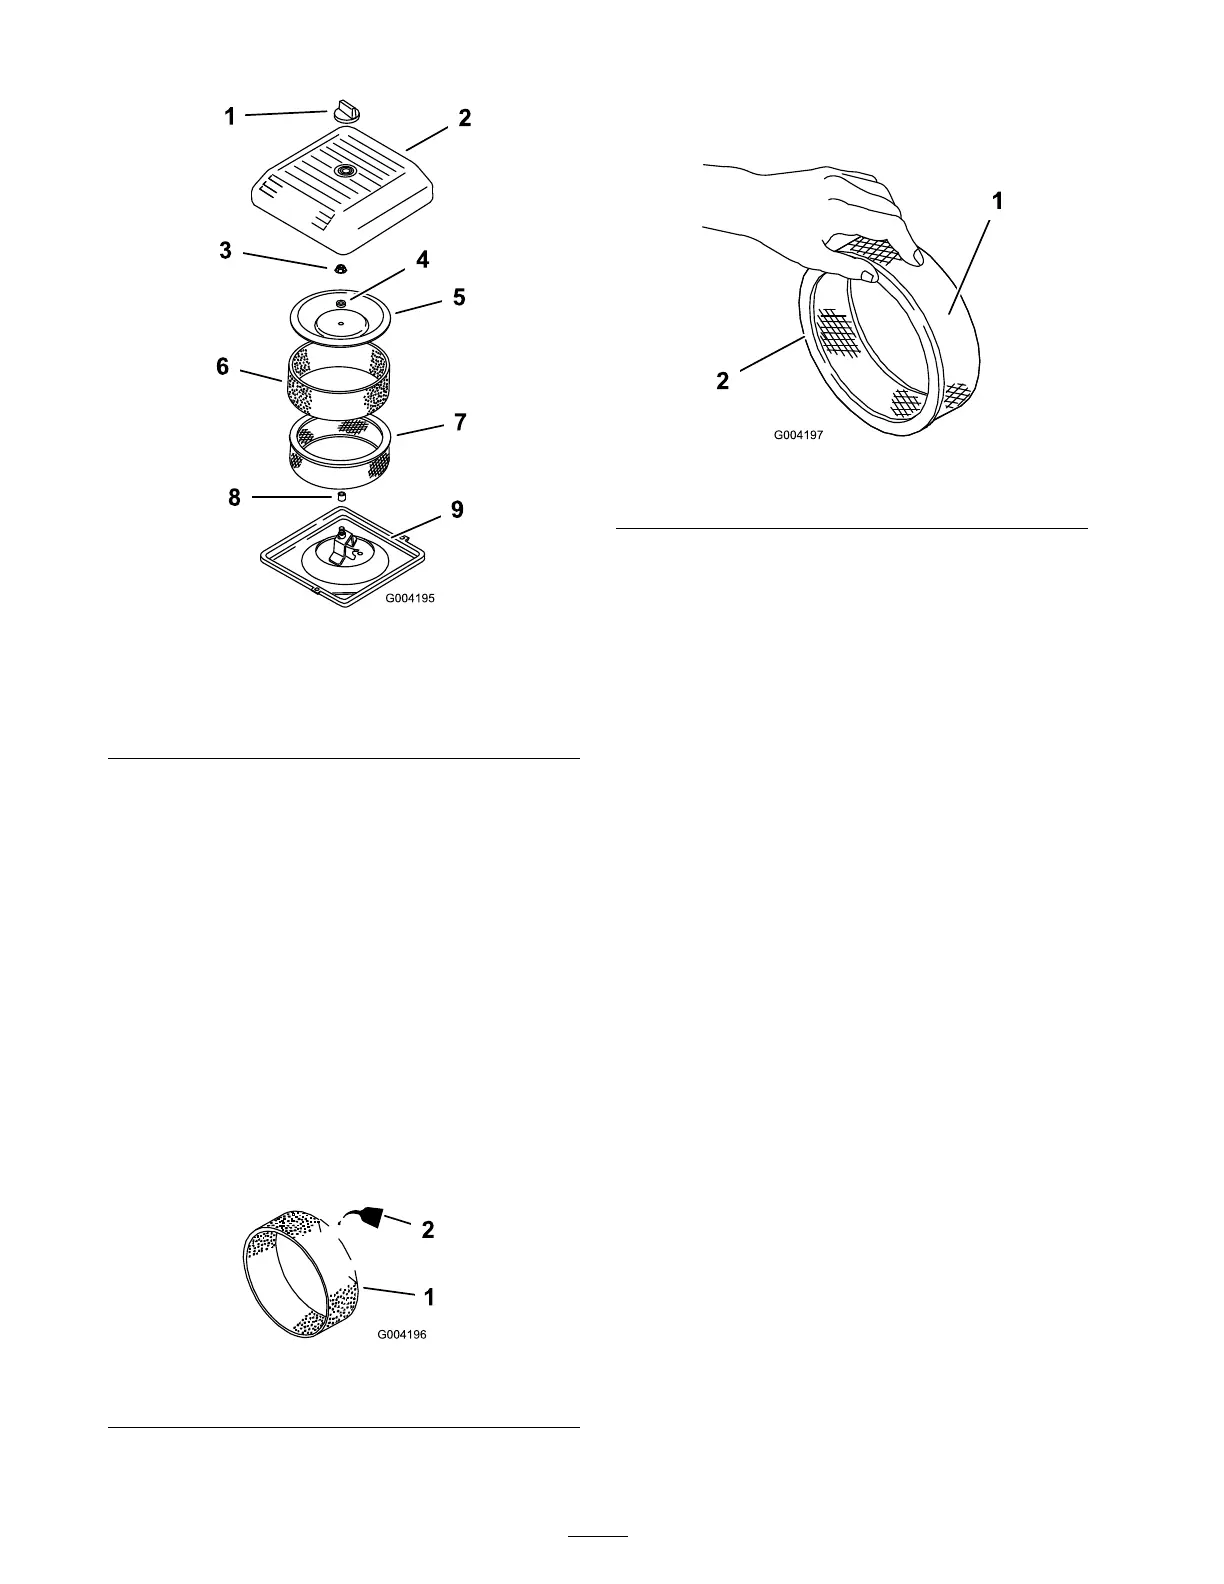
Figure 17
1. Knob 6. Foam pre-lter
2. Air cleaner cover 7. Paper lter
3. Cover nut
8. Rubber seal
4. Spacer
9. Air cleaner base
5. Cover
4. Carefully slide the foam pre-filter off of the
paper element ( Figure 17 ).
5. Unscrew the co v er n ut and remo v e the co v er ,
spacer and paper filter ( Figure 17 ).
Cleaning/Replacing the Filters
Important: R eplace the f oam element if it
is tor n or w or n.
1. W ash the foam pre-filter in liquid soap and
w ar m w ater . W hen clean, rinse it thoroughly .
2. Dr y the pre-filter b y squeezing it in a clean
cloth (do not wring).
3. Put one or tw o ounces of oil on the pre-filter
( Figure 18 ).
Figure 18
1. Foam element 2. Oil
4. Squeeze the pre-filter to distribute the oil.
5. Lightly tap the paper filter on a flat surface to
remo v e dust and dir t ( Figure 19 ).
Figure 19
1. Paper element 2. Rubber seal
6. Inspect the paper filter for dir t, tears , an oily
film, and damag e to the r ubber seal.
Important: Nev er clean the paper
element. R eplace the paper element if it
is dir ty or dama ged.
Installing the Filters
Important: T o pr ev ent engine dama ge,
al w ays operate the engine with the complete
f oam and paper air cleaner assembl y installed.
1. Carefully slide the foam pre-filter onto the
paper filter ( Figure 19 ).
2. Place the air cleaner assembly onto the air
cleaner base ( Figure 17 ).
3. Install the co v er , spacer and secure it with the
co v er n ut ( Figure 17 ). T or que the n ut to 95
inc h-lb (11 N ⋅ m).
4. Install the air cleaner co v er and secure it with
the knob ( Figure 17 ).
Servicing the Engine Oil
Chang e oil and filter after the first 50 operating
hours and then ev er y 100 operating hours
thereafter .
Note: Chang e oil more frequently when
operating conditions are extremely dusty or sandy .
Oil T ype: Deterg ent oil (API ser vice SG , SH, SJ ,
or higher)
Crankcase Capacity: w/filter , 2.1 qt. (2 l)
26
 Loading...