3. R emo v e the wing n ut and bolt securing the
batter y clamp and strip (under the clamp) and
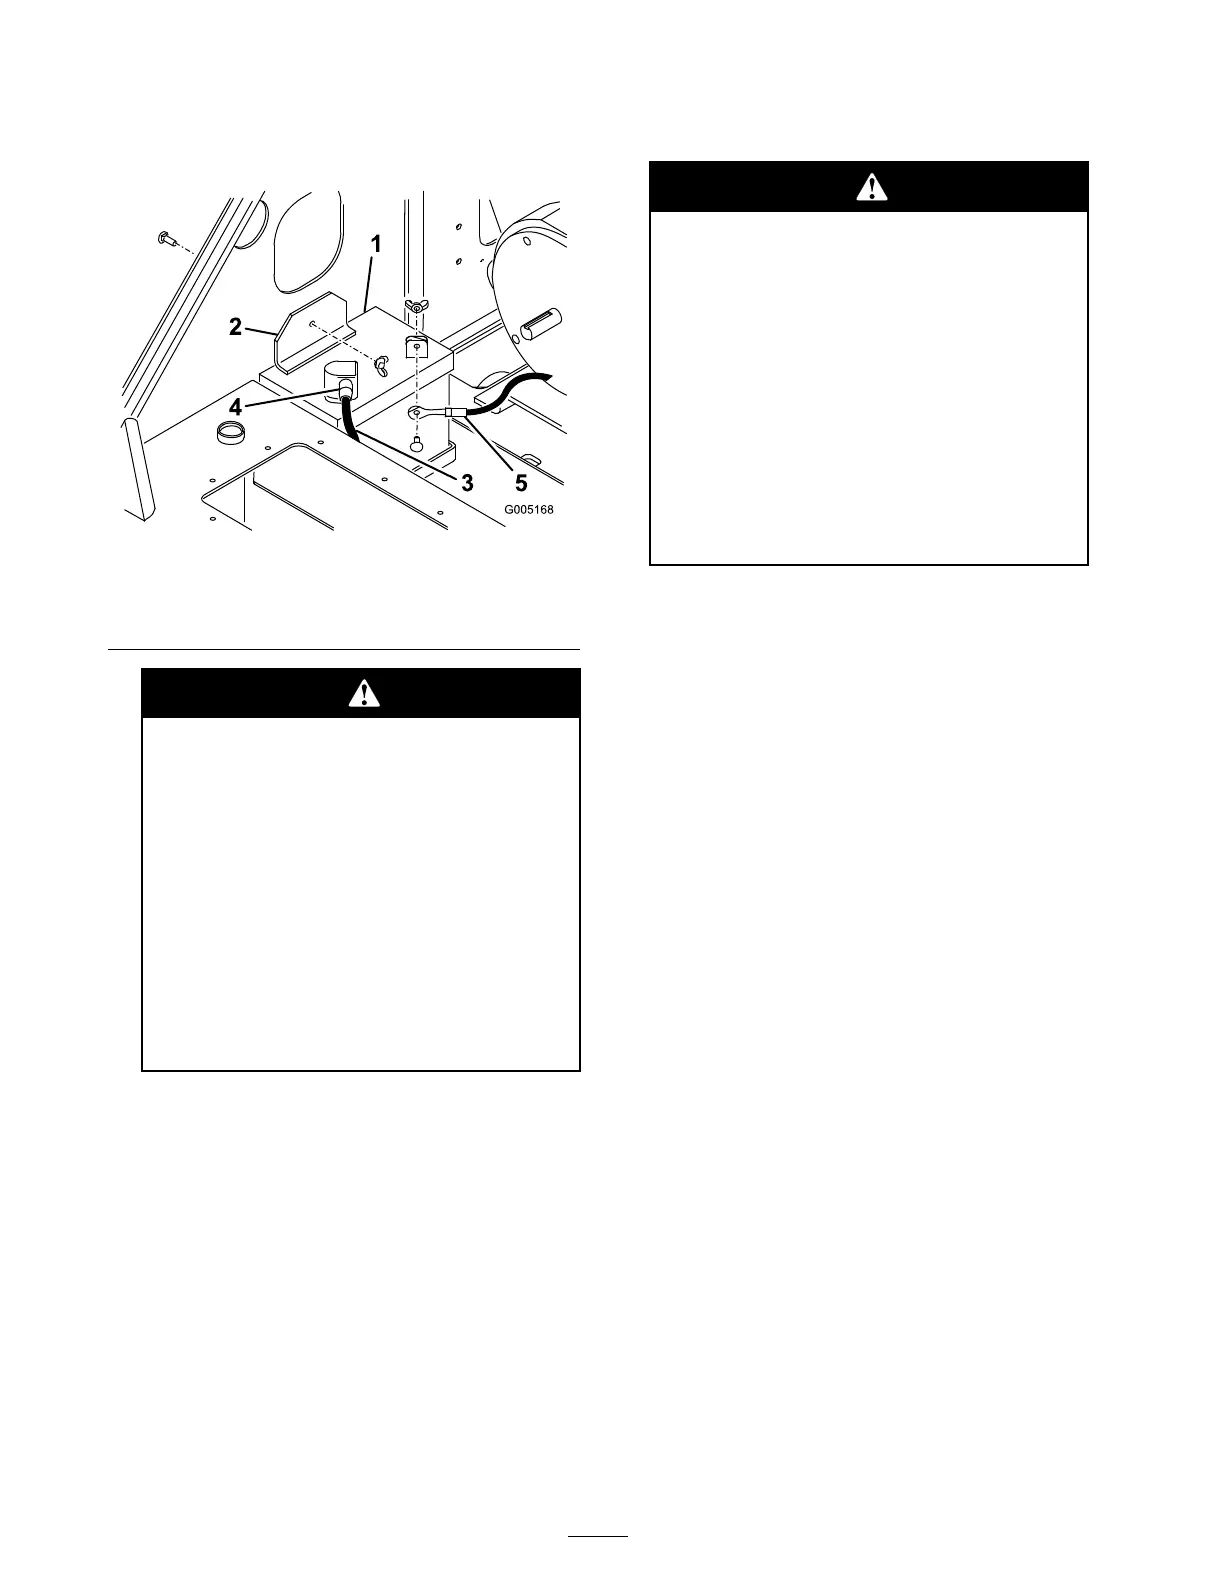
remo v e the clamp and strip ( Figure 27 ).
Figure 27
1. Battery
4. Rubber cover
2. Battery clamp 5. Negative cable
3. Positive cable
Batter y ter minals or metal tools could
shor t a gainst metal components, causing
spar ks. Spar ks can cause the batter y
gasses to explode, r esulting in per sonal
injur y .
• W hen r emo ving or installing the
batter y , do not allo w the batter y
ter minals to touch an y metal par ts of
the traction unit.
• Do not allo w metal tools to shor t
betw een the batter y ter minals and
metal par ts of the traction unit.
4. Disconnect the neg ati v e (blac k) batter y cable
from the batter y , sa ving the bolt and n ut.
5. Disconnect the positi v e (red) batter y cable
from the batter y , sa ving the bolt and n ut.
6. Gently push the h y draulic hoses aside and lift
the batter y out of the c hassis .
7. Acti v ate the new batter y as directed on the
batter y labeling .
8. Install the batter y into the c hassis ( Figure 27 ).
9. Secure the batter y in the c hassis ( Figure 27 ).
10. Using the bolt and wing n ut supplied with the
batter y , connect the positi v e (red) cable to the
positi v e (+) batter y post ( Figure 27 ). Slide the
r ubber co v er o v er the batter y post.
Incor r ect batter y ca ble r outing could
dama ge the traction unit and ca bles,
causing spar ks. Spar ks can cause the
batter y gasses to explode, r esulting in
per sonal injur y .
• Al w ays disconnect the negati v e
(black) batter y ca ble bef or e
disconnecting the positi v e (r ed)
ca ble.
• Al w ays connect the positi v e (r ed)
batter y ca ble bef or e connecting the
negati v e (black) ca ble.
11. Using the bolt and wing n ut supplied with the
batter y , connect the neg ati v e (blac k) cable to
the neg ati v e (-) batter y post ( Figure 27 ).
Note: Ensure that the batter y cables do not
contact any shar p edg es or eac h other .
Servicing the Battery
Important: T he f ollo wing pr ocedur es
appl y when ser vicing a (dr y) batter y that has
r eplaced the original batter y . T he original
(w et) batter y does not r equir e ser vice.
Chec k the electrolyte lev el in the batter y ev er y 100
hours . Alw a ys k ee p the batter y clean and fully
c harg ed. Use a paper to w el to clean the batter y
case . If the batter y ter minals are cor roded, clean
them with a solution of four par ts w ater and one
par t baking soda. Apply a light coating of g rease
to the batter y ter minals to reduce cor rosion.
V oltag e: 12 v , 450 Cold Cranking Amps
Checking the Electrolyte Level
1. Stop the engine and remo v e the k ey .
2. R emo v e the 4 bolts securing the batter y co v er
and remo v e it from o v er the batter y .
3. Look at the side of the batter y . T he electrolyte
m ust be up to the Upper line ( Figure 28 ).
Do not allo w the electrolyte to fall belo w the
Lo w er line ( Figure 28 ).
30
 Loading...