Repairs
General Safety Interlock Switch Service
The following procedures should be followed whenever
a switch requires adjustment or replacement:
1. Be sure rubber boot is reinstalled in both switch
grooves on the button end of seat switch after it is
properly adjusted.
IMPORTANT: Rubber boot on button end must be in
place to make sure all dirt, moisture and grease are
kept from the plunger sides.
2. Spread Skin-Over grease heavily over the terminal
end and inside the terminal cover of all switches before
installing the connectors and terminal cover. Be sure the
wires are fully connected.
3. Make sure terminal cover is fully installed over end of
switch.
Seat Switch Replacement and Adjustment (Fig. 15)
1. Pivot seat forward and block or tie it securely to
prevent it from falling accidentally and possibly causing
injury.
2. Remove boot from button end of seat switch and
retain for installation on replacement switch. Pull con-
nectors off switch terminals.
3. Loosen the jam nut and unscrew the switch from
mounting bracket.
4. Screw new switch through mounting bracket until
switch button is about 1/16 inch (1.6 mm) shorter than
the top of the seat return spring pin. Install the boot into
the mount grooves.
5. Carefully release the seat to its normally down posi-
tion, but do not sit or apply force on the seat. There
should be a slight gap between the switch and the seat
plate.
6. Make sure switch terminals face front of machine and
lock switch in place by tightening the jam nut to 75 in.-lb
(8.5 Nm) against the mounting bracket.
IMPORTANT: Switch threads will be damaged if the
jam nut is over-tightened.
7. Connect continuity tester of ohm meter to switch
terminals. With seat in the down position and no one on
the seat, the switch circuit should not have continuity. If
there is continuity, repeat steps 4-6. If there is no conti-
nuity, proceed to
8. Sit on the seat. The seat switch should have continu-
ity. If there is no continuity, repeat steps 4-7. If there is
continuity proceed to step 9.
9. Fill terminal end of switch and wiring harness cover
with skin-over grease and push connectors onto switch
terminals. Be sure connectors are fully connected and
slide cover over bottom of switch body.
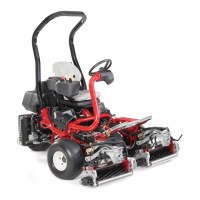
Figure 15
1. Seat switch
1
Greensmaster
®
3100 Page 5 - 13 Repairs

 Loading...