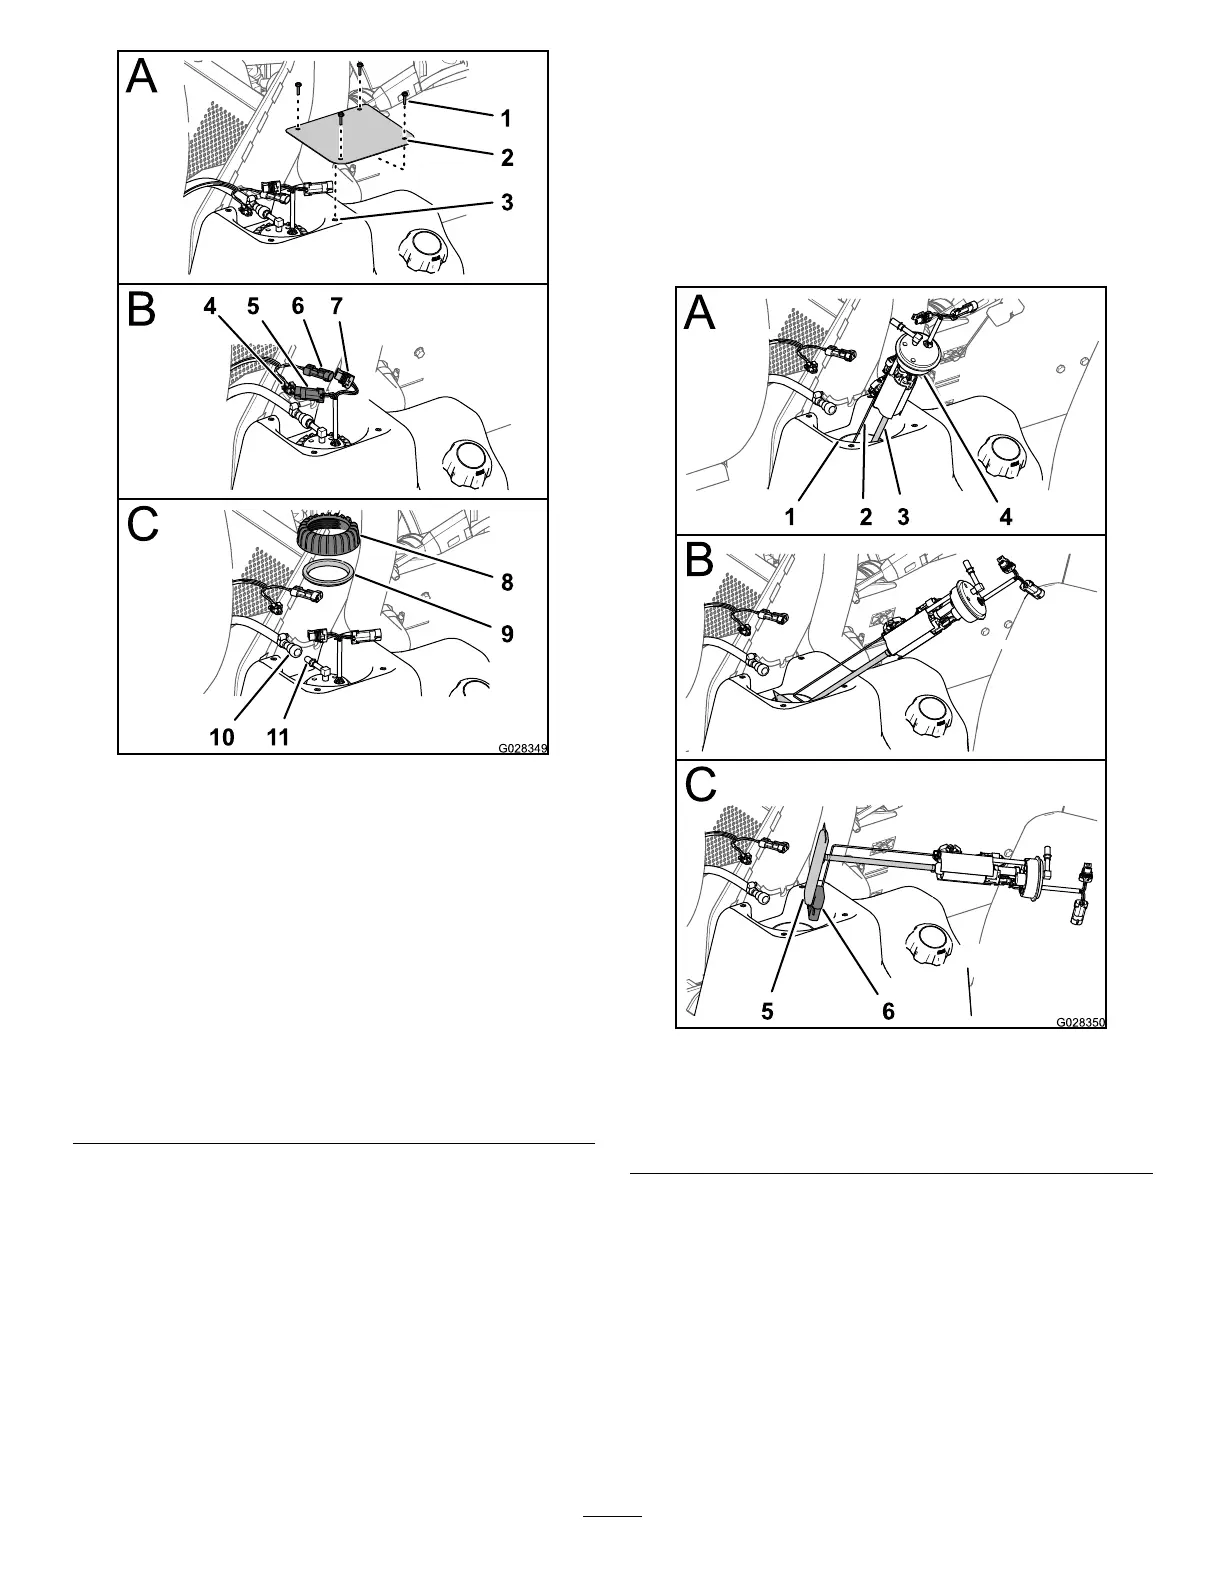
Figure61
1.Screws(#10x
3/4inch)
5.2-pin
connector(fuel
pump/sending
unit)
9.Seal
2.Cover
6.2-pinconnector
(machine-wiring
harness)
10.Fuel-hose
coupling
3.Fueltank7.2-socket
connector(fuel
pump/sending
unit)
11.Fitting(fuel
pump)
4.2-socket
connector
(machine-wiring
harness)
8.Nut(fuel
pump/sending
unit)
3.Disconnectthe2-socketconnectorofthe
machine-wiringharnessfromthe2-pinconnector
ofthefuelpump/sendingunit;disconnectthe2-pin
connectorofthemachine-wiringharnessfromthe
2-socketconnectorofthefuelpump/sendingunit
(Figure61).
4.Slidethelockingsleeveofthefuel-hosecouplingaway
fromthettingofthefuelpump/sendingunitand
removethecouplingandhosefromthetting(Figure
61).
Note:Cleanupanyfuelthatowsfromthehose
couplingorfuel-pumptting.
5.Rotatethenutforthefuelpump/sendingunit
counterclockwiseandremovethenutandseal(Figure
61)
6.Carefullyliftandrotatethefuelpump/sendingunitout
oftheneckofthefueltank(Figure62).
Important:Usecautionwhenhandlingthefuel
pump/sendingunittoavoiddamagingthearm
fortheoatofthesendingunit.
Figure62
1.Fueltankneck
4.Fuelpump/sendingunit
2.Arm(sendingunitoat)
5.Filter
3.Pickuptube(fuellter)
6.Float
47
 Loading...