3.INSTALLING PRINTER DRIVERS FOR WINDOWS
Other Installations 89
3 INSTALLING PRINTER DRIVERS FOR WINDOWS
USB printing
This section describes how to set up the printer drivers when this equipment is connected with a USB cable
on Windows Vista / Windows 7 / Windows 8 / Windows Server 2003 / Windows Server 2008 / Windows Server
2012.
The procedure to install the printer driver for USB printing differs depending on the version of Windows used.
P.89 “Windows 7 / Windows 8 / Windows Server 2012”
P.93 “Windows Vista / Windows Server 2008”
P.96 “Windows Server 2003”
Use a USB2.0 Hi-Speed certified cable: USB cable supporting the USB2.0 Hi-Speed mode (480 Mbps
of transfer speed) certified by the USB Implementers Forum.
Connect the equipment with a PC directly by the USB cable. When it is connected with a PC via a USB
hub, the equipment may not be recognized.
If a PCLX error occurs, open [Printer properties] of TOSHIBA Universal Printer2 in [Devices and
Printers] and select the [Start printing after last page is spooled] check box in the [Advanced] tab.
Windows 7 / Windows 8 / Windows Server 2012
You can install a printer driver for USB printing in Windows 7 / Windows 8 / Windows Server 2012 by using
Software Installer contained in the Install Disc.
To perform installation, you must log onto Windows with the “Administrator” account. However, even if
you have logged on with a user account other than “Administrator”, entering an administrator password
upon display of the [User Account Control] dialog box enables you to perform the installation by
temporarily changing the user account.
Even when you have logged on Windows with the “Administrator” account, the [User Account Control]
dialog box may appear. In this case, click a button for allowing the operation, such as [Continue], and
then continue.
1
Power on this equipment and your computer.
2
Connect the USB cable to this equipment and your computer.
3
Insert the Install Disc into the disc drive.
If Software Installer does not automatically start, use the Explorer to open the “e-STUDIO” folder in the
Install Disc and double-click “Setup.exe”.
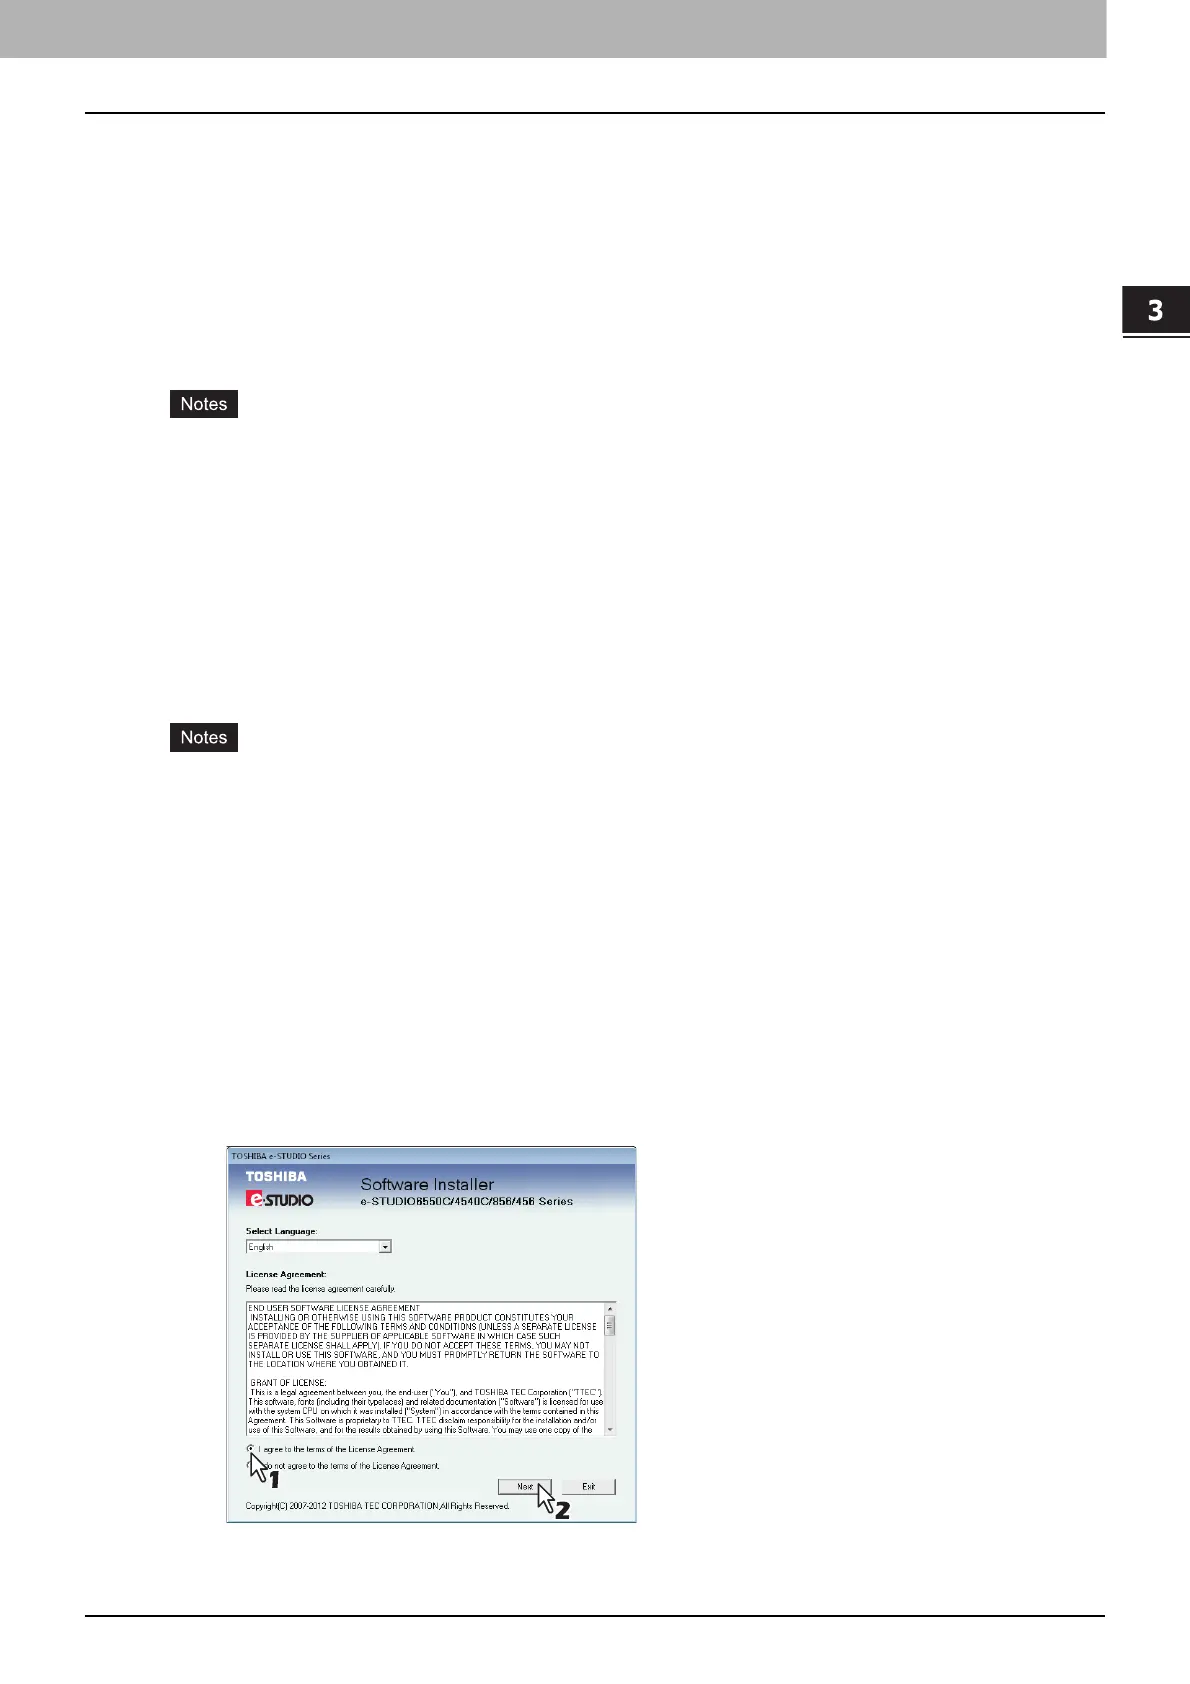
4
Select [I agree to the terms of the License Agreement.] and click [Next].
To change the display language, select a desired language from the [Select Language] box.
The main menu is displayed.
 Loading...


