5/7
(Fig.11)
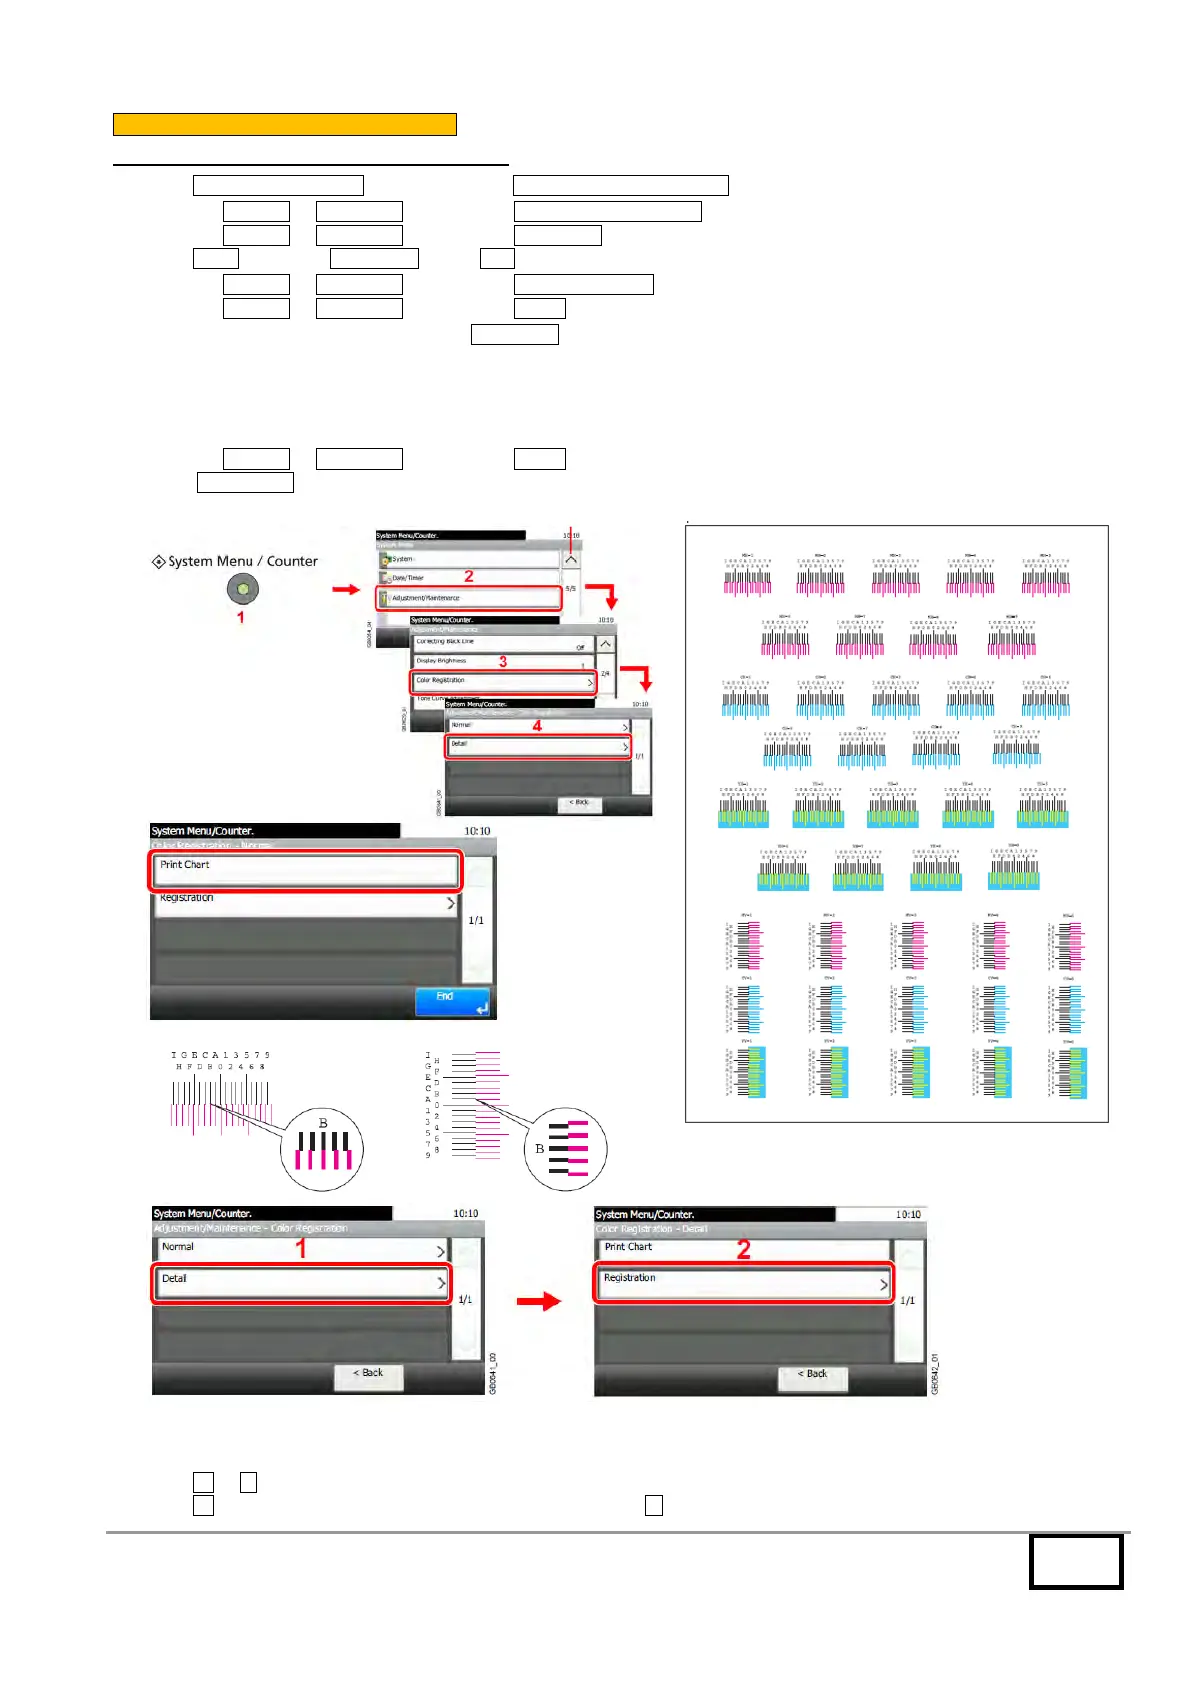
Step 3 - Color Registration Adjustment-
B) CDC 5526, CDC 5626 / DCC 6526, DCC 6626
1. Press System Menu/Counter key to display the System Menu/Counter menu . (Fig.11-1)
2. Press the Upward or Downward key to select Adjustment/Maintenance . (Fig.11-2)
3. Press the Upward or Downward key to select Calibration .
4. Press Start to perform Calibration . Press OK after completing Calibration.
5. Press the Upward or Downward key to select Color Registration . (Fig.11-3)
6. Press the Upward or Downward key to select Detail . (Fig.11-4)
7. Color Registration menu appears. Select Print Chart to print the chart.
(After printing, the Color Regist. Menu appears.)
On the chart, for each of M (magenta), C (cyan) and Y (yellow), 3 chart types are printed on one sheet: H-L (left), V
(vertical), H-R (right). (Refer to [Chart example].)
8. Find the location on each chart where 2 lines are most closely aligned as a signal straight line. If this is the 0 position,
registration adjustment for that position is not required. For the illustration, B is the appropriate value.
9. Press the
Upward or Downward key to select Detail . (Fig.14-1)
10. Select Registration . (Fig.14-2)
[Chart example]
(Fig.12)
(Fig.13)
(Fig.14)
11. Select the chart to be adjusted. (Fig.15)
12. Press + or - to enter the values read from the chart. (Fig.16)
Press + to increase the value from 0 to 9. To decrease, press - .
 Loading...