COLUMN
ATTACHMENT
ASSEMBLY
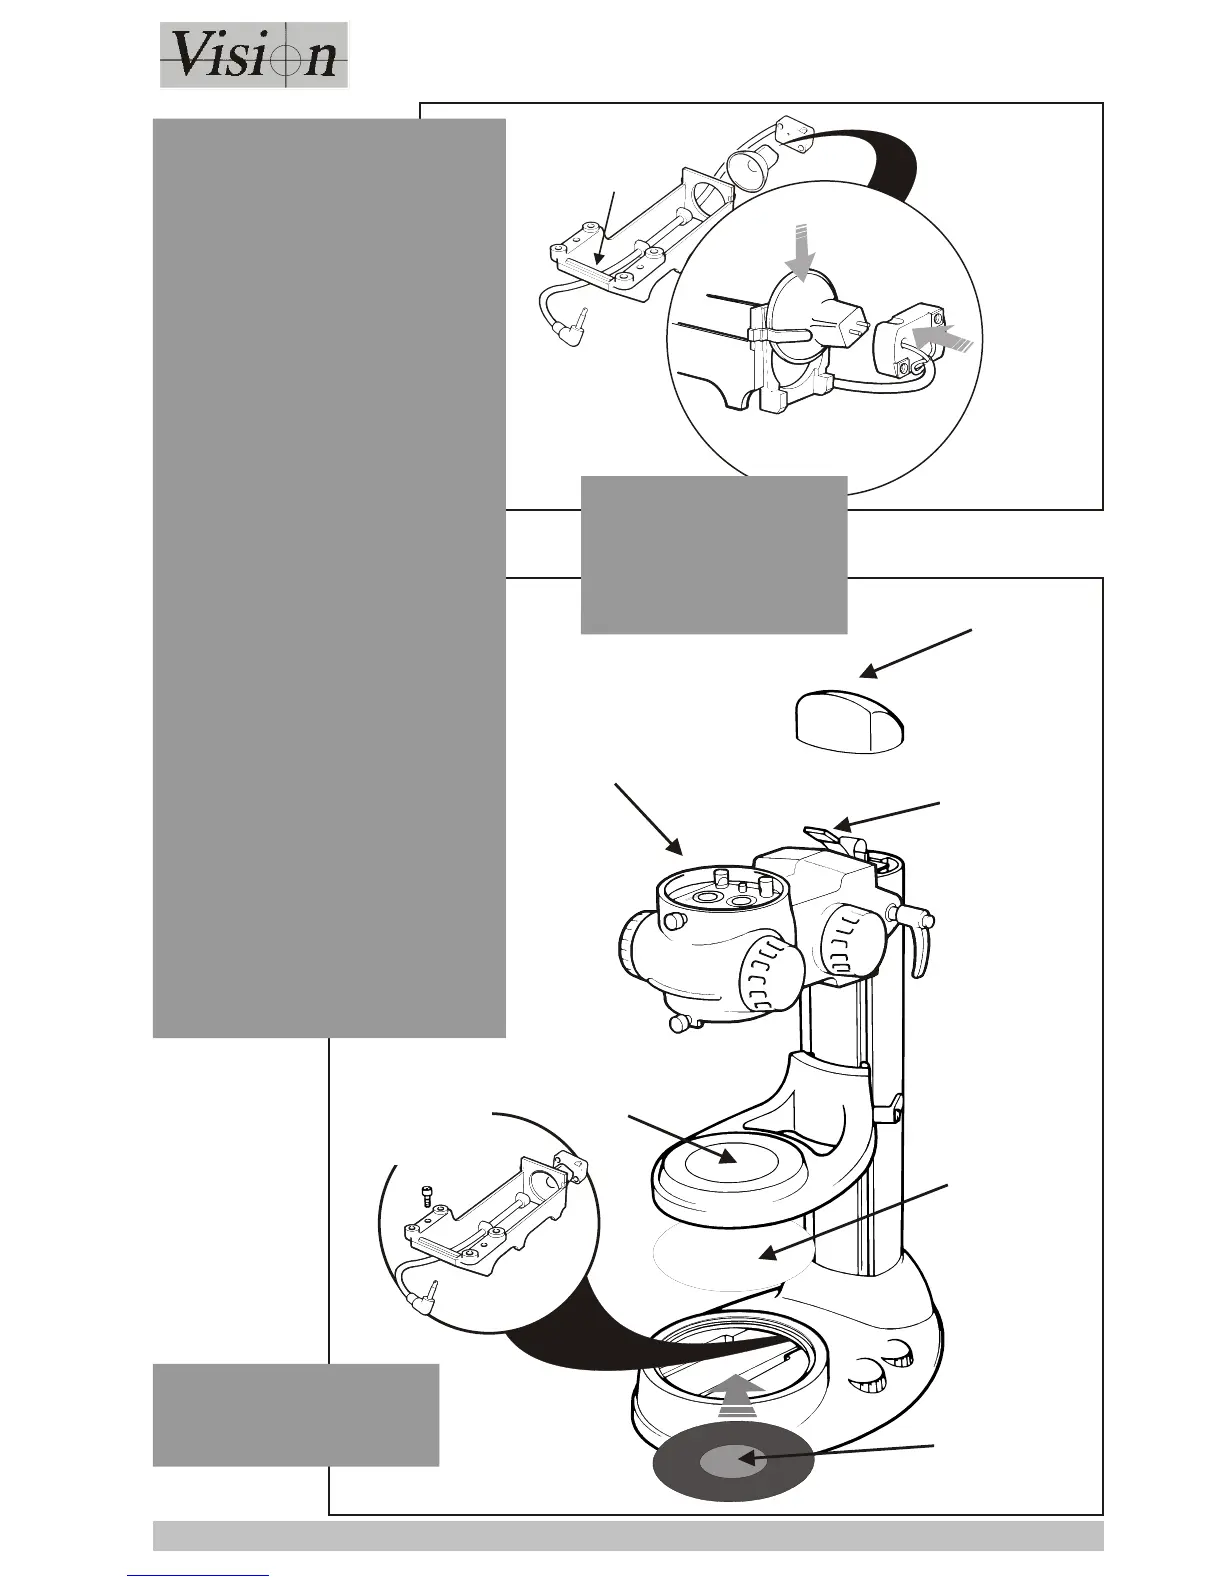
Sub-stage illuminator -
Remove the protective film from
the mirror (see right). Fit the
bulb (see 1 and 2 right).
Remove the Blanking Plate.
Slide the sub-stage illuminator
into position and secure it with
the two bolts supplied. Connect
the assembly. Put the
condenser plate into position
and fit the diffuser in either the
base or subject platform as
required.
Adjustable Subject Platform -
Slide the platform on to the
column, position it as required
and secure it in position.
OR
Slacken the securing clamp
until the platform can be
pushed on to the column.
Re-tighten the clamp with the
platform in the required
position.
Zoom/Focus Assembly -
Remove the Column Cap. Slide
the assembly on to the column
just enough to allow the column
connector to be attached to the
male connector at the rear of
the assembly. Replace the
Column Cap.
Position the Zoom/Focus
Assembly as required
and secure it.
 Loading...