17
Check for dial tone
Press . If you hear a dial tone, the
installation is successful.
If you do not hear a dial tone
• Make sure the installation
procedures are properly done.
• The handset may take a second or
two to find the telephone base and
produce a dial tone. This is normal.
Wait an extra second before dialing.
• If the previous suggestions do not
work, disconnect the telephone
line cord from your telephone and
connect the telephone line cord to
another telephone.
• If there is no dial tone on that other
telephone either, your telephone
line cord may be defective. Install a
new telephone line cord.
• If changing the telephone line
cord does not help, the wall jack
(or the wiring to this wall jack) may
be defective. Try using a different
wall jack in your home to connect
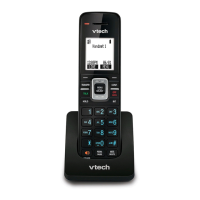
your VS112, VS112-2, VS112-3, VS112-
4, VS112-17, VS112-27, VS112-37,
VS112-47 telephone, or contact your
telephone service provider (charges
may apply).
Before use
Set up through voice guide - Date and
time (before use)
After you install your telephone or
power returns following a power outage
and battery depletion, the handset will
prompt you to set the date and time,
and to configure the Smart call blocker
and answering system through voice
guide.
NOTE
• Make sure you set the date and
time including the year correctly;
otherwise the answering system
does not announce the correct
day of the week for your recorded
messages time stamp.
1. Use the dialing keys (0-9) to enter
the month (MM), date (DD) and year
(YY). Then, press SELECT.
2. Use the dialing keys (0-9) to enter the
hour (HH) and minute (MM). Then
press p/q to choose AM or PM.
3. Press SELECT to save.
After setting the date and time, the
handset will prompt if you want to set
Smart call blocker (before use).
TIP
• To skip setting the date and time,
press on the handset.
 Loading...