Disassembly and Assembly WM 80 Repair
128 wc_tx000523gb.fm
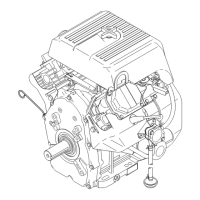
10.19 Disassembling Crankcase
See Graphic: wc_gr002911
10.19.1 Remove the clutch, starter, flywheel, cylinder, and piston. Place the nut
back on the shaft to protect shaft threads.
10.19.2 Remove eight M5 screws (a) which secure the crankcase halves
together.
10.19.3 Secure the crankcase in vice or equivalent.
Note: It is suggested that M8 cap screws (b) be screwed into clutch
end of crankcase. Then secure crankcase in vise (c) using the
capscrews.
10.19.4 Heat the area (d) of the crankcase around the bearing using a propane
torch.
10.19.5 While the crankcase is hot, tap firmly on the end of the crankshaft with
a plastic mallet to remove the crankcase from the shaft. Support the
crankcase shell/crankshaft (e) as it slides from the other half of the
crankcase shell. The bearing (f) will remain intact on the shaft.
10.19.6 Support the other half of the crankcase shell/crankshaft. Heat the area
of the crankcase around the bearing using a propane torch.
10.19.7 While the crankcase is hot, tap firmly on the end of the crankshaft with
a plastic mallet to remove the crankshaft (g) from the crankcase shell.
10.19.8 Once the crankcase shell halves have cooled, remove the crankshaft
seals (h) from each shell.
 Loading...