© 2001 Xantrex Technology Inc. 21
P/N 973-0012-01-02 Rev. A 05/01
Setting Parameters (continued)
CHARGED Indicator Setup (continued)
Trigger on Voltage and Time
When this mode is selected, the CHARGED indicator LED illuminates
when the voltage reaches the programmed level (Step A) and the amperage
remains positive for the specified time (Step B).
Step A Setting the Fully-Charged Voltage Level
1A. Press the SELECT button until the Voltage LED (
V
) is illuminated.
2A. Press the SELECT and RESET buttons simulataniously until the LED
display flashes.
3A. Press the RESET button to change the displayed voltage to the
desired fully charged voltage level.
• For a 12 VDC system, set this voltage between 14.3–14.9 volts for
lead-acid batteries.
• For a 24 VDC system, set this voltage between 28.6–29.6 volts for
lead-acid batteries.
• For a 48 VDC system, set this voltage between 57.2–59.2 volts for
lead-acid batteries.
Refer to the battery manufacturer’s recommendation for other types
of batteries.
4A. Press the SELECT button to accept the new value.
The selection range is between 10 to 64.9 VDC.
5A. Proceed to Step B.
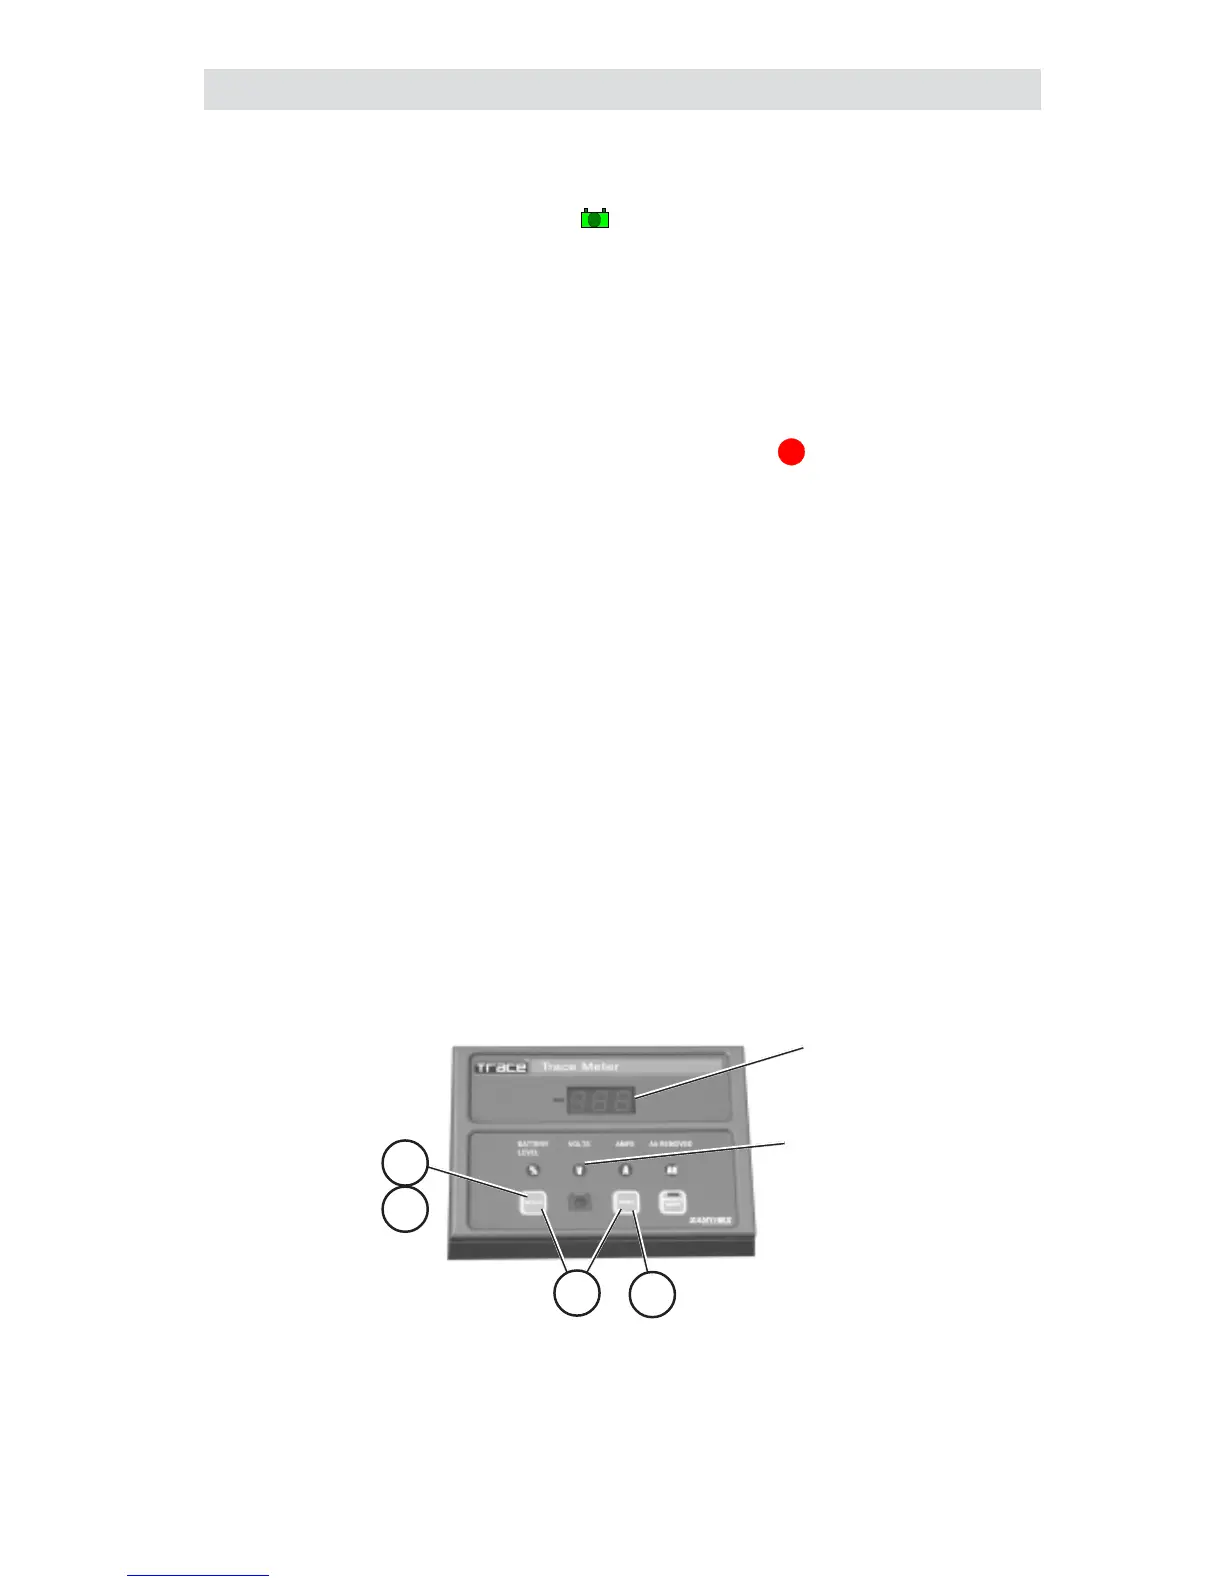
14.4
Set Voltage Level
1A
4A
2A
Voltage LED Illuminates
to Indicate the Voltage
Function is Selected
3A
Figure 3-9
Setting the CHARGED Indicator Voltage Level
3.0 CONFIGURATION
 Loading...