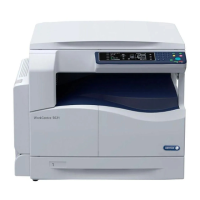
2 Product Overview
18
2 Bypass Tray Used for standard size paper and non-standard size paper. It holds
special media such as thick stock paper or other special media that
cannot be loaded in Tray 1 or Tray 2.
NOTE: For more information on the supported paper types and capacity
of the Bypass Tray, refer to
Supported Paper Sizes and Types on
page 39
.
3 Extension Flap Supports paper that is loaded in the Bypass Tray. Slide out this flap
before loading paper in the Bypass Tray.
4 Access Cover 1 Open this cover to remove paper jams in and around Tray 1 and Tray 2.
NOTE: For more information on how to clear paper jams, refer to the
Problem Solving chapter in the System Administration Guide.
5 Access Cover 2 Open this cover to remove paper jams in and around Tray 2.
NOTE: The Access Cover 2 is a part of the optional Paper Tray 2.
NOTE: For more information on how to clear paper jams, refer to the
Problem Solving chapter in the System Administration Guide.
6 Document Feeder Automatically feeds documents that are loaded to be scanned for a copy
or a scan job.
7 Control Panel Consists of the Display, the Machine Diagram (mimic), buttons and
indicators.
NOTE: For more information on the Control Panel, refer to
Control
Panel on page 22
.
8 Output Tray Copies and prints are delivered here, face down.
9 Front Cover Open this cover to replace the Drum Cartridge and to add toner.
10 Left Side Cover Latch Pull up this latch to open the Left Side Cover.
11 Tray 1 Used for standard size paper. It holds up to 250 sheets of plain paper.
NOTE: For more information on supported paper types and tray
capacity, refer to
Supported Paper Sizes and Types on page 39
.
12 Paper Tray 2 (optional) Adds an additional tray that can be used as Tray 2. Used for standard
size paper. It holds up to 500 sheets of plain paper.
NOTE: Paper Tray 2 is an optional accessory.
NOTE: For more information on supported paper types and tray
capacity, refer to
Supported Paper Sizes and Types on page 39
.
13 Stand (optional) Elevates and stabilizes the machine for optimum use. The attached
casters allow you to move the machine easily.
NOTE: The stand is an optional accessory.
14 10Base-T/100Base-TX
Connector
Connects the network cable to the machine.
15 USB Interface Connector Connects the USB cable to the machine.
NOTE: This connector is also used for upgrading software.
16 Connector This connector is to be used only by customer engineers.
17 Power Cord Connector Connects the power cord to the machine.
18 Power Switch Switches the power to the machine on and off.
No. Component Function

 Loading...


