pg | 76
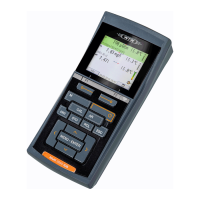
In the Calibrate menu, select BGA-PC/Chlor, then select BGA
μ
g/L. Select either a 1- or 2-point calibration.
Enter 0 for rst standard value and 10.4 for second standard value.
Click Start Calibration. Observe the readings under Current and Pending data points. While stabilizing,
click the Wipe Sensors button to activate the wiper to remove any bubbles. When data are Stable (or data
shows no signicant change for approximately 40 seconds), click Apply to accept this calibration point.
Next place the sensors in the Rhodamine WT standard. Click Proceed on the pop-up window. Observe
the readings under Current and Pending data points. While stabilizing, click the Wipe Sensors button to
activate the wiper to remove any bubbles. When data are Stable (or data shows no signicant change for
approximately 40 seconds), click Apply to accept this calibration point.
Click Complete. View the Calibration Summary screen and QC score. Click Exit to return to the sensor
calibration menu, and then the back arrows to return to main Calibrate menu.
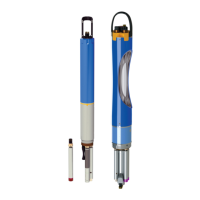
Rinse the sonde in tap or puried water and dry the sonde.
RFU – 1- or 2-point
RFU is a percent full scale output; it outputs relative uorescence from 0-100%. is calibration procedure
is recommended if you are also using grab samples to post-calibrate in vivo algae readings.
Pour the correct amount of clear deionized or distilled water into the calibration cup. Immerse the probe
end of the sonde in the water.
In the Calibrate menu, select BGA-PC/Chlor, then select BGA RFU. Select either a 1- or 2-point calibration.
Enter 0 for rst standard value and 10.4 for second standard value.
Click Start Calibration. Observe the readings under Current and Pending data points. While stabilizing,
click the Wipe Sensors button to activate the wiper to remove any bubbles. When data are Stable (or data
shows no signicant change for approximately 40 seconds), click Apply to accept this calibration point.
Next place the sensors in the Rhodamine WT standard. Click Proceed on the pop-up window. Observe
the readings under Current and Pending data points. While stabilizing, click the Wipe Sensors button to
activate the wiper to remove any bubbles. When data are Stable (or data shows no signicant change for
approximately 40 seconds), click Apply to accept this calibration point.
Click Complete. View the Calibration Summary screen and QC score. Click Exit to return to the sensor
calibration menu, and then the back arrows to return to main Calibrate menu.
Rinse the sonde in tap or puried water and dry the sonde.
 Loading...