14
P-115B/P-115WH/P-45B
P-115B/P-115WH
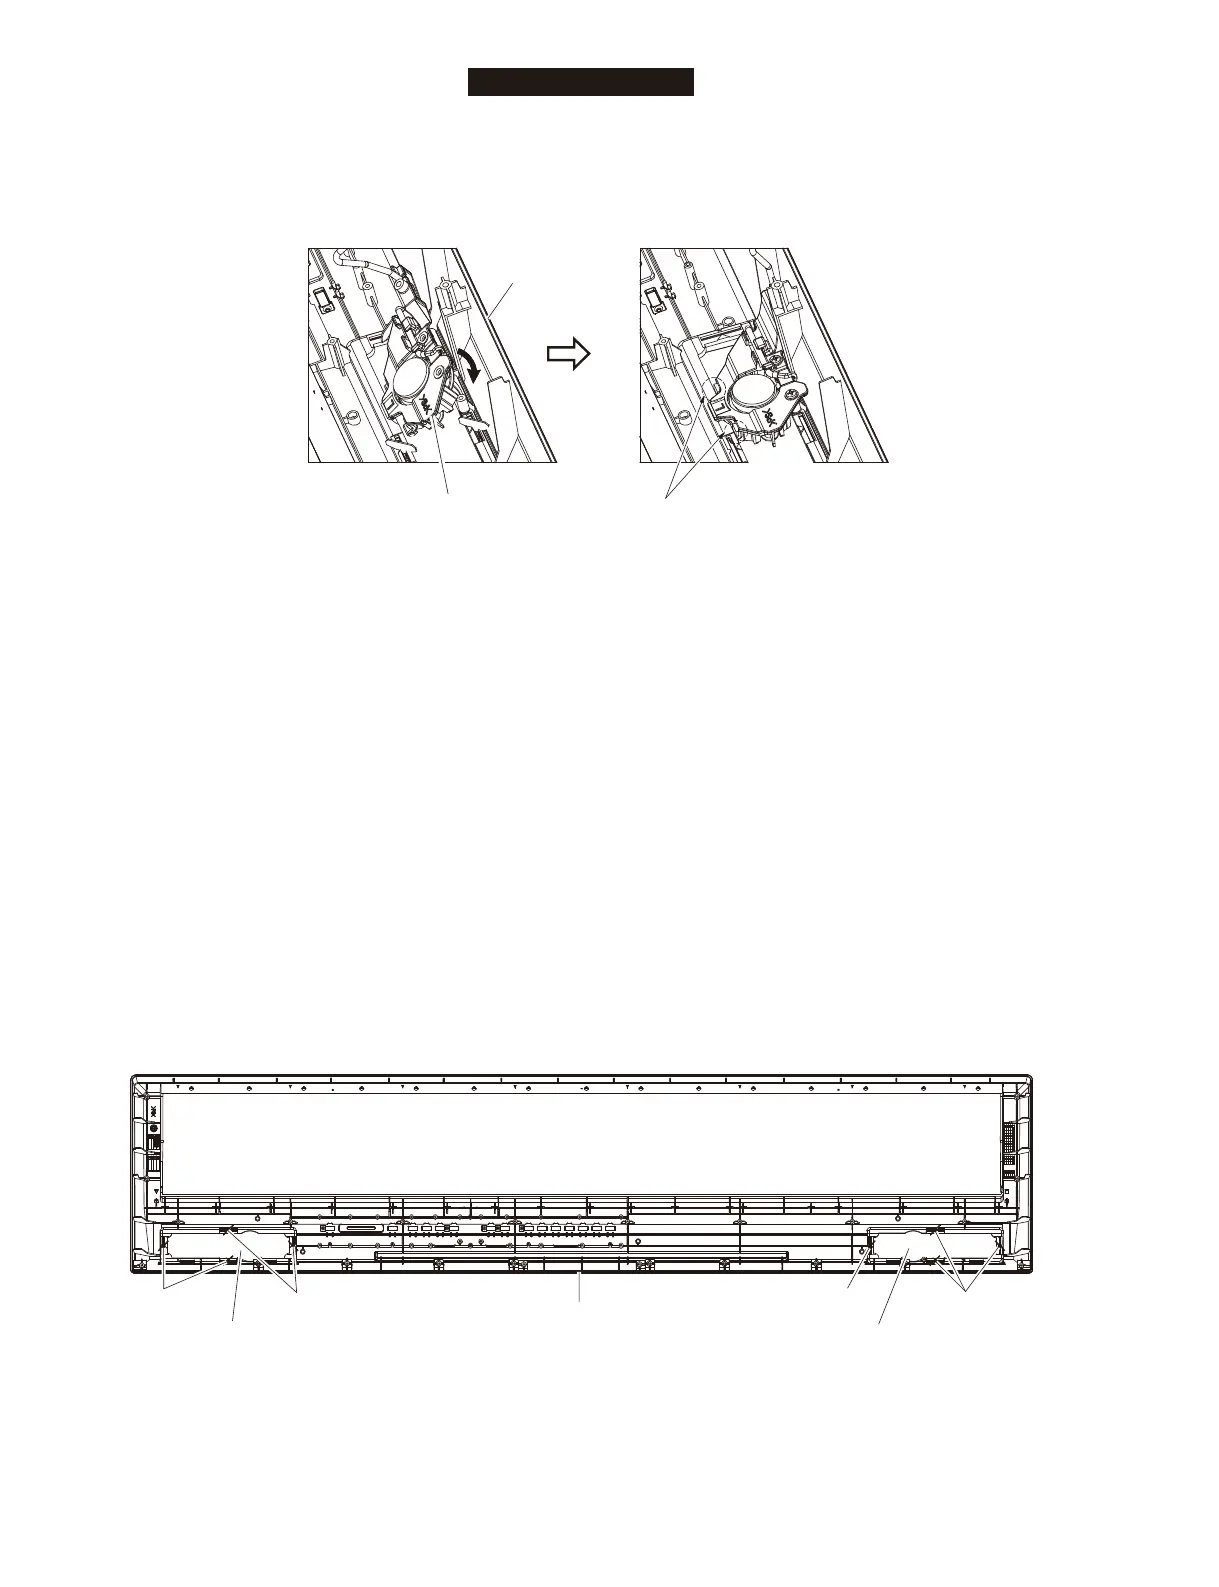
* When installing the TW assembly, make sure that the
claws of the TW bracket (at 2 locations) go under the
upper case. (Fig. A-8)
※ TWAss’y を取り付ける際、TW ブラケットの爪(2 箇所)
を上ケースの下に潜り込ませて取り付けてください。
(図 A-8)
Fig.■A-9
(図 A-9)
A-10.■Speaker■Grille■
(Time■required:■Abou t■14■minutes)
A-10-1. Remove the lower case assembly.
(See procedure A-1.)
A-10-2. Remove the keyboard assembly. (See procedure A-6.)
A-10-3. Remove the TW assembly.
(See procedure A-9.)
A-10-4. Set the four (4) hooks [A] parallel to the groove in the
upper case assembly. (Fig. A-9)
A-10-5. Remove the speaker grille.
* The right and left speaker grilles can be removed in
the same way.
A-10.SPグリル
(所要時間:約 14 分)
A-10-1.下ケース Ass’y を外します。(A-1 項参照)
A-10-2.鍵盤 Ass’y を外します。(A-6 項参照)
A-10-3.TWAss’y を外します。(A-9 項参照)
A-10-4.[A]の 4 箇所のフックを上ケース Ass’y の溝と平
行にします。(図 A-9)
A-10-5.SP グリルを外します。
※ 左右の SP グリルは、それぞれ同じ方法で外すことがで
きます。
Fig.■A-8
(図 A-8)
[A]
[A]
[A]
[A]
SPEAKER GRILLE
(SP グリル)
SPEAKER GRILLE
(SP グリル)
<Bottom view>
UPPER CASE ASSEMBLY
(上ケース Assy)
TW ASSEMBLY L
(TWAssyL)
CLAWS (TW BRACKET)
(爪(TW ブラケット))
UPPER CASE
(上ケース )
 Loading...