CAMSHAFT
5-13
EAS1SL5209
REMOVING THE CAMSHAFT
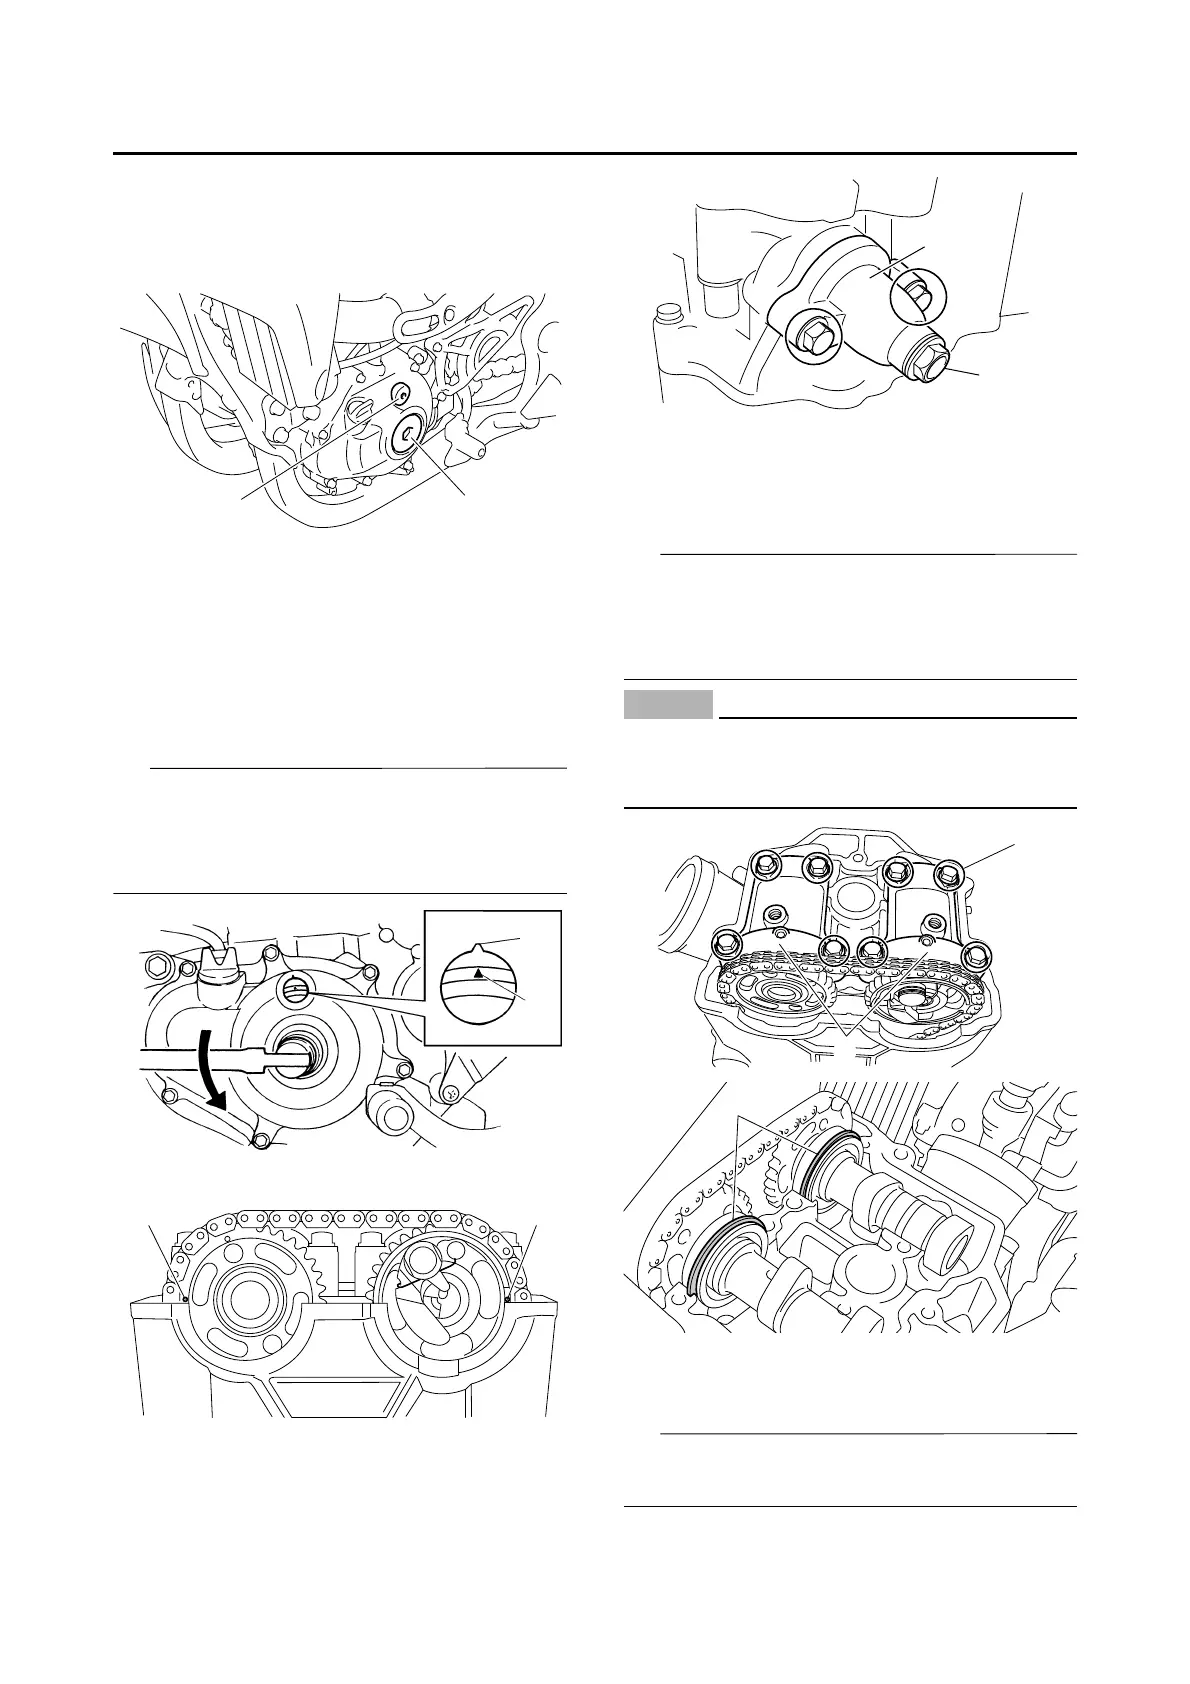
1. Remove:
• Timing mark accessing screw “1”
• Crankshaft end accessing screw “2”
2. Align:
• Alignment mark
▼▼▼▼▼▼▼▼▼▼▼▼▼▼▼▼▼▼▼▼▼▼▼▼▼▼▼▼▼▼▼▼
a. Turn the crankshaft counterclockwise with a
wrench.
b. Align the top dead center (TDC) mark “a” on
the rotor with the alignment mark “b” on the
crankcase cover.
Align the alignment mark “c” on the exhaust
camshaft sprocket and the alignment mark “d”
on the intake camshaft sprocket with the edge
of the cylinder head.
▲▲▲▲▲▲▲▲▲▲▲▲▲▲▲▲▲▲▲▲▲▲▲▲▲▲▲▲▲▲▲▲
3. Remove:
• Timing chain tensioner cap bolt “1”
• Timing chain tensioner “2”
•Gaskets
4. Remove:
• Bolt (camshaft cap) “1”
• Camshaft cap “2”
• Clip “3”
• Remove the bolts (camshaft cap) in a criss-
cross pattern, working from the outside in.
• In order to prevent the clip from falling into the
crankcase, remove the camshaft cap.
ECA33DD027
The bolts (camshaft cap) must be removed
evenly to prevent damage to the cylinder
head, camshafts or camshaft caps.
5. Remove:
• Exhaust camshaft “1”
• Intake camshaft “2”
Attach a wire “3” to the timing chain to prevent
it from falling into the crankcase.

 Loading...