CYLINDER AND PISTON
5-34
b. If out of specification, rebore or replace the
cylinder, and replace the piston and the pis-
ton rings as a set.
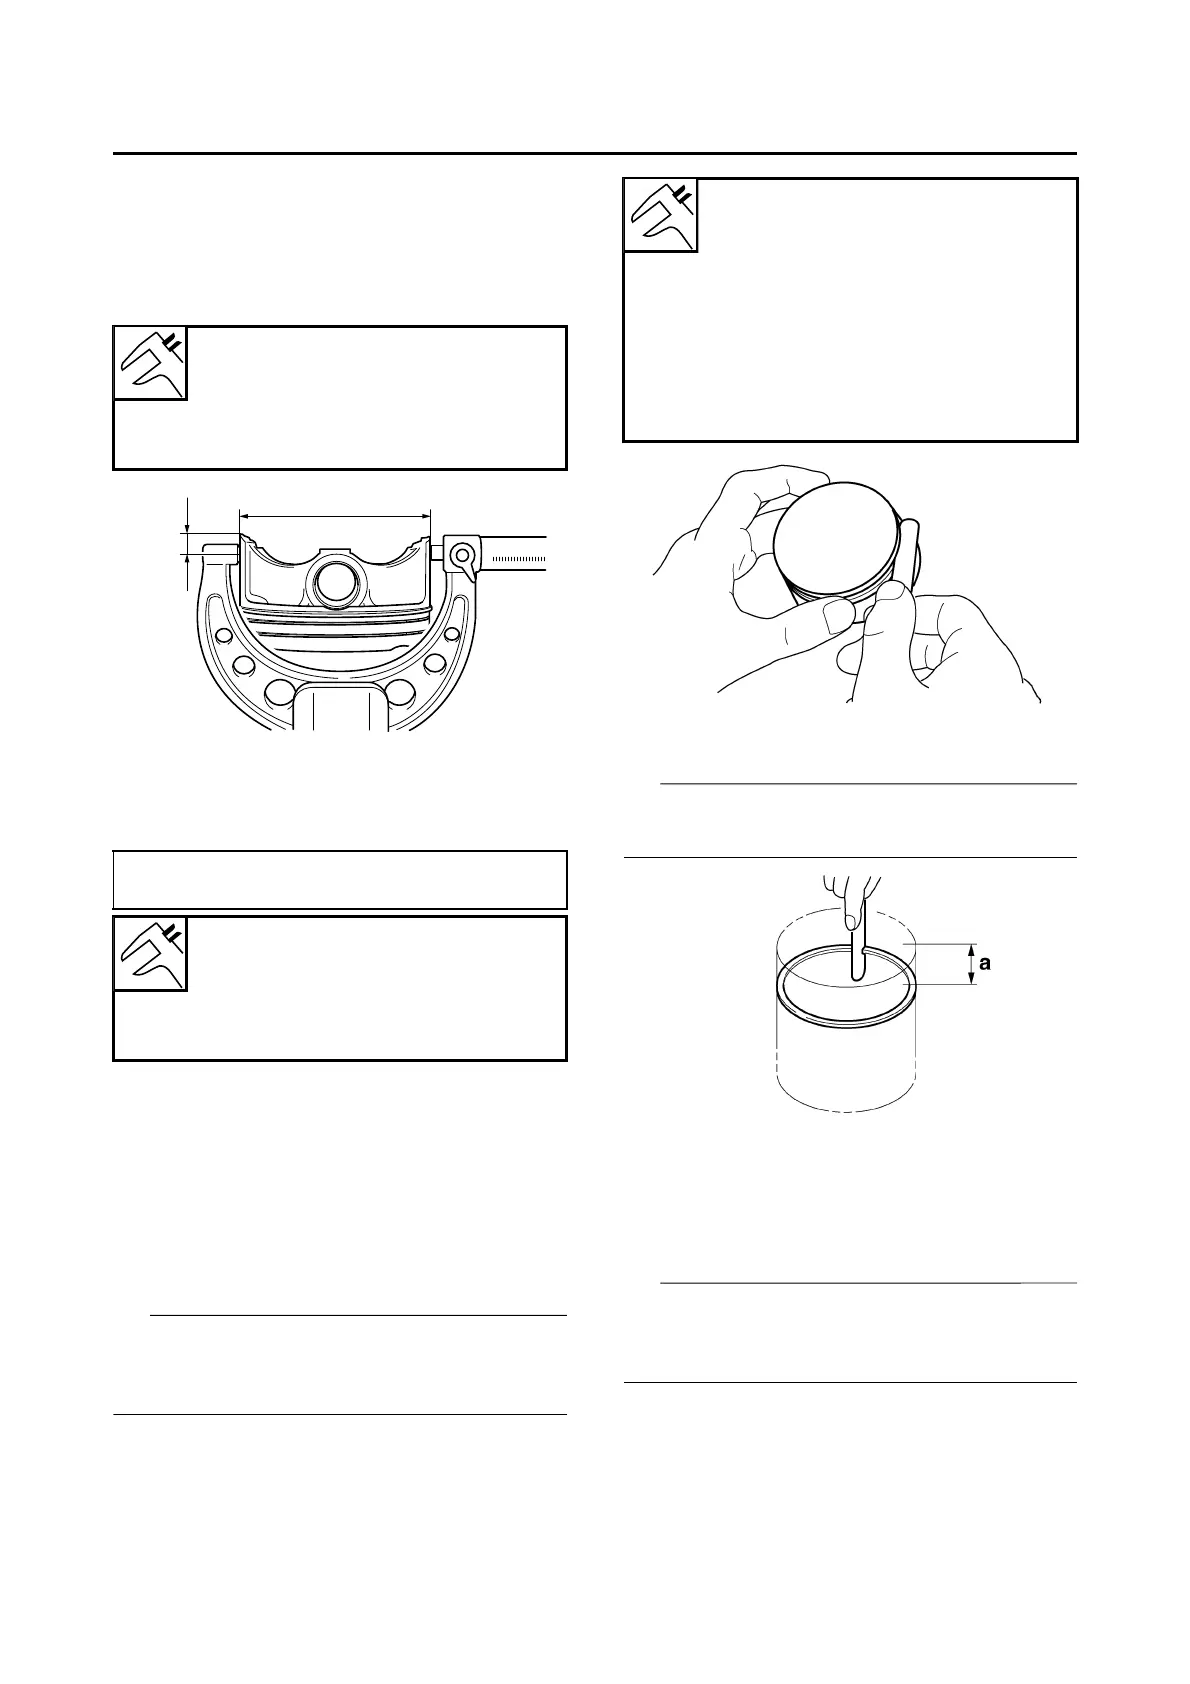
c. Measure the piston outside diameter D “a” at
the measurement position H “b” with the mi-
crometer.
d. If out of specification, replace the cylinder,
the piston, and the piston rings as a set.
e. Calculate the piston-to-cylinder clearance
with the following formula.
f. If out of specification, replace the cylinder,
the piston, and the piston rings as a set.
▲▲▲▲▲▲▲▲▲▲▲▲▲▲▲▲▲▲▲▲▲▲▲▲▲▲▲▲▲▲▲▲
EAS1SL5230
CHECKING THE PISTON RINGS
1. Measure:
• Piston ring side clearance
Out of specification Replace the piston
and piston rings as a set.
Before measuring the piston ring side clear-
ance, eliminate any carbon deposits from the
piston ring grooves and piston rings.
2. Install:
• Piston rings
Level the piston ring into the cylinder with the
piston.
3. Measure:
• Piston ring end gap
Out of specification Replace the piston
ring.
The oil ring expander’s end gap cannot be
measured. If the oil ring rail’s gap is excessive,
replace all three oil rings.
Diameter D
96.955–96.970 mm (3.8171–
3.8177 in)
Measurement position H
9.0 mm (0.35 in)
Piston-to-cylinder clearance =
Cylinder bore - Piston diameter
Piston-to-cylinder clearance
0.030–0.055 mm (0.0012–0.0022
in)
Limit
0.15 mm (0.006 in)
Ring side clearance
0.015–0.065 mm (0.0006–0.0026
in)
Limit
0.120 mm (0.0047 in)
2nd ring
0.020–0.060 mm (0.0008–0.0024
in)
Limit
0.120 mm (0.0047 in)
a. 10 mm (0.39 in)
 Loading...