Getting Started
Compensating Probes
1-7
Compensating Probes
Perform this adjustment to match your probe to the input channel. This should
be done whenever you attach a probe for the first time to any input channel.
Low Frequency Compensation
1 Set the Probe menu attenuation to 10X. Press the appropriate channel
button on the front panel (
1 or 2), then select the Probe menu item until
10X appears.
2 Attach the probe tip to the probe compensation connector and the
ground lead to the probe compensator ground connector. If you use the
probe hook-tip, ensure a proper connection by firmly inserting the tip
onto the probe.
3 Press the
Autoscale front panel button.
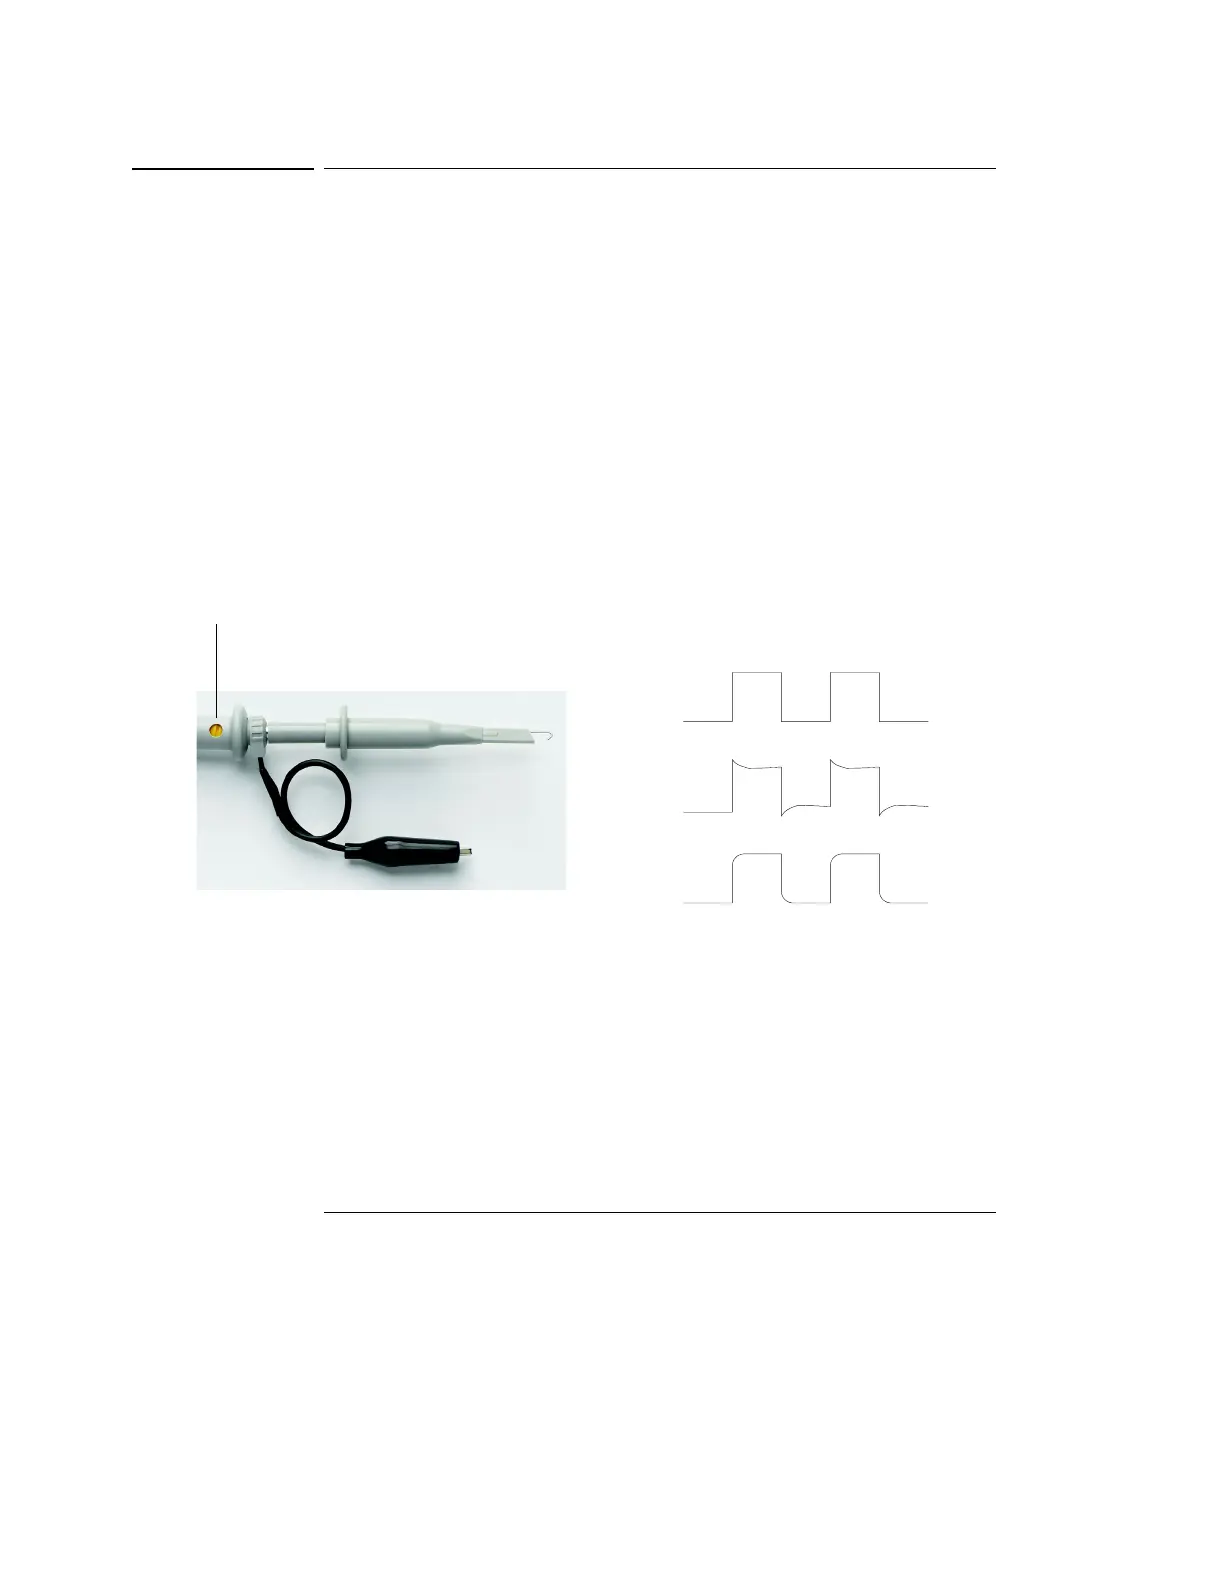
Figure 1-3
Probe Compensation
4 If the waveform does not appear like the Correctly Compensated
waveform shown in Figure 1-3, then use a nonmetallic tool to adjust the
low frequency compensation adjustment on the probe for the flattest
square wave possible.
High Frequency Compensation
1 Using the BNC adapter, connect the probe to a square wave generator.
Over Compensated
Under Compensated
orrectly
ompensated
Low frequency compensation adjustment
 Loading...