Agilent InfinityLab LC Series Multicolumn Thermostats User Manual 61
3 Using the Module
Installing the capillaries
Installing the capillaries
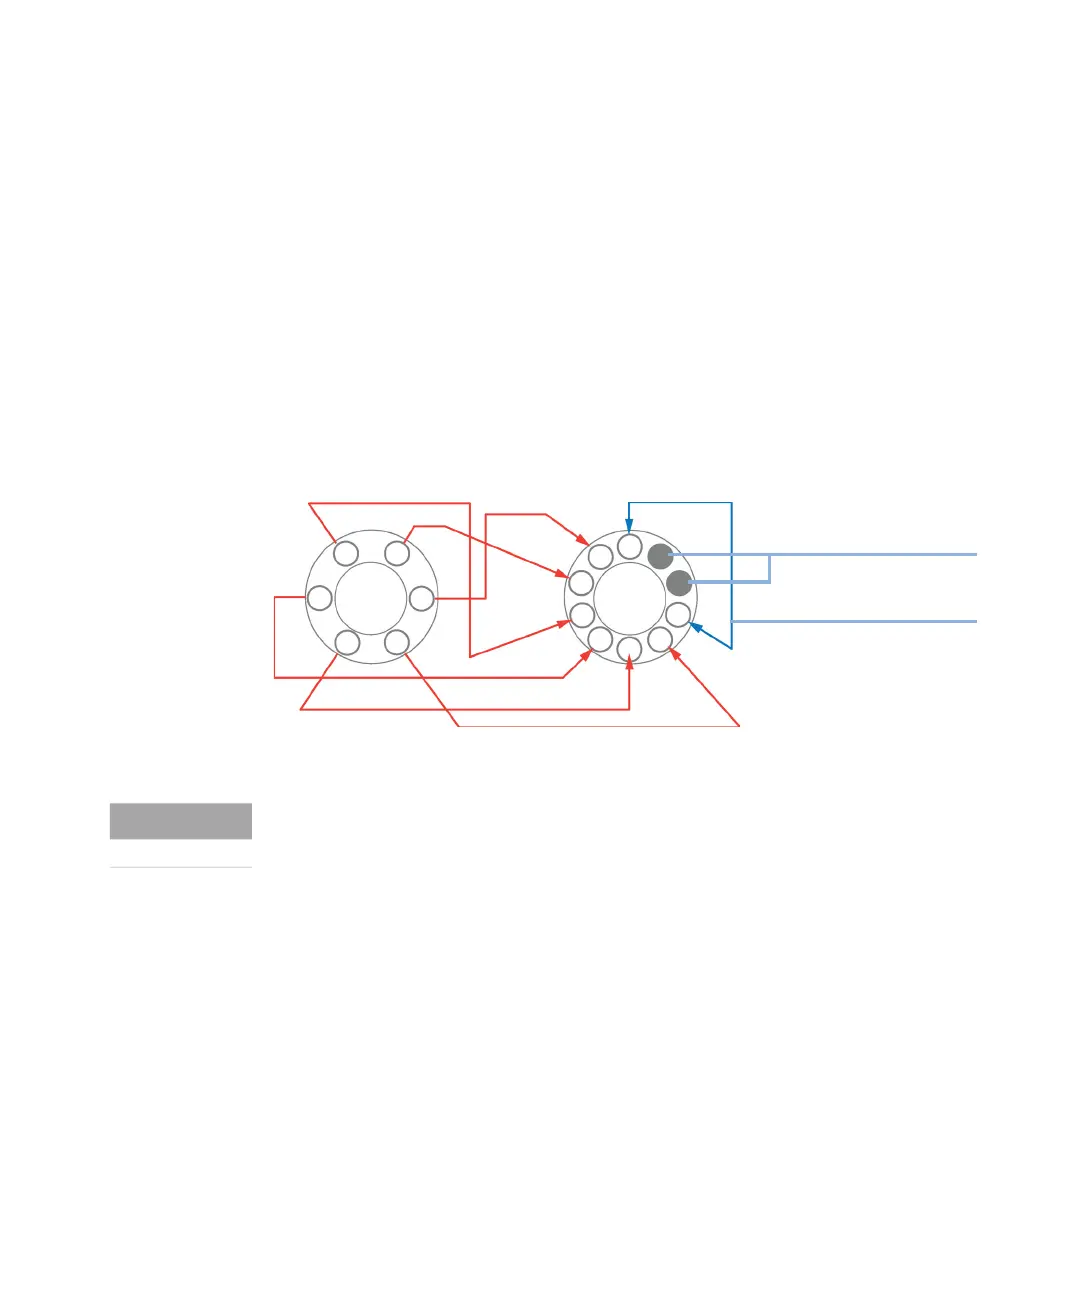
The 2-position/10-port valve can be used here in the same way as a
2-position/6-port valve, just follow the rerouting diagram below.
Map the ports from the 2-position/6-port valve to the corresponding ports of the
2-position/10-port valve according to the red arrows. For example, mount the
capillary connected to port 6 (2-position/6-port) at port 2 instead.
Connect port 1 and port 8 with a 120 mm length capillary. Plug plastic fittings
into ports 9 and 10.
Figure 11 Rerouting of 2-position/10-port valve to match 2-position/6-port valve
1 Connect the capillaries going to a valve and fasten them immediately with a
spanner.
2 Starting from position one through six (ten, respectively), connect respective
capillaries to the heat exchangers. First, finger-tighten and then use a
spanner.
3 Finger-tighten the capillaries going from heat exchangers to columns on the
heat exchanger side, then fasten all fittings with a spanner.
4 Mount heat exchangers into the MCT.
5 Connect column inlet capillaries to the columns.
6 Connect column outlet capillaries to the columns.
1
2
3
4
5
6
8
1
2
3
4
5
6
7
9
10
Plastic fitting
120 mm length capillary
NOT E
Use utmost care to avoid any void volumes caused by poor connections.
 Loading...