224cc 4 Stroke Petrol Lawn Mower
AFTER SALES SUPPORT
e-mail: info.aldi@positecgroup.com
1300 889 028
MODEL No.: SLM531 • 10/2020 • 10093
(toll free)
22
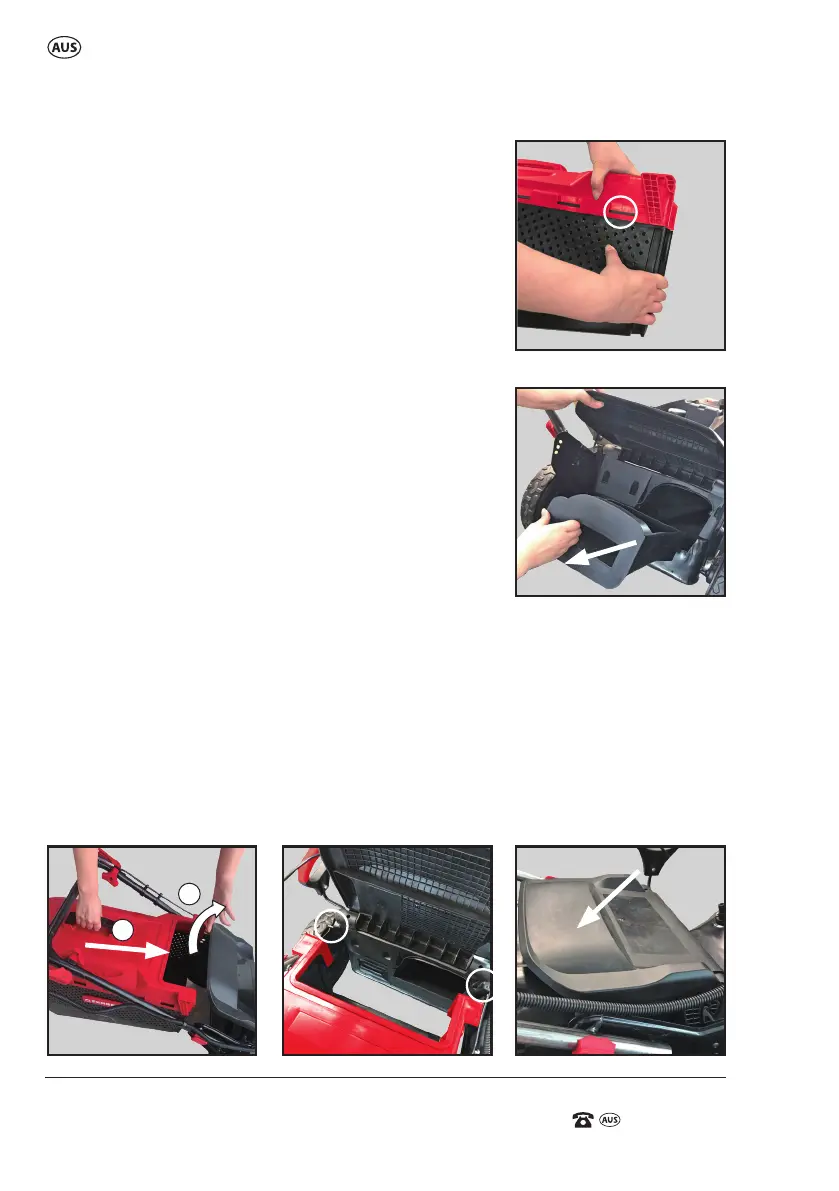
Assembly of the Hard Catcher
The hard catcher (23) is supplied in 2 sections.
Locate the top half of the catcher on top of the
bottom half and interlock them together by
aligning the clips on the top half of the catcher
into the raised ridge around the bottom half of the
catcher, then push the halves together until they
click into place. (Fig. C)
Attaching the Hard Catcher
1. Lift the rear discharge guard (22) and hold it up
in order to position the assembled hard catcher
(23).
Remove the mulching block (34) if it is in
the rear chute. (Fig. D1)
NOTE: Do NOT ever start the lawn mower if the
rear discharge guard (22) does not fully return to
the close position if the catcher (23) is not tted.
2. Pick up the hard catcher (23) by the handle,
attach the hard catcher (23) by aligning the
catcher attachment hooks (31) located on both sides of the catcher over
the catcher attachment brackets (32) so the catcher (23) is sitting evenly.
(Fig. D2 & D3)
3. Release the rear discharge guard (22) to secure the hard catcher (23) into
place. (Fig D4)
NOTE: Always empty the catcher (23) before it has reached maximum
capacity, otherwise it will decrease the performance of the lawn mower.
TIP: Do not leave grass clippings in the catcher for extended periods of time.
C
D2
Assembly
D3
D4
D1
1
2
 Loading...