Chapter
3
Publication 1203–5.1 –– July, 1997
Configuration and Interfacing
Chapter 3 provides information on how the remote I/O
communications module and a programmable controller
communicate. The following topics are covered:
• programmable controller data table use
• data transfer through the adapter
Important: Block transfer messaging is covered in a separate
publication.
!
ATTENTION: When you configure a system for the
first time, disconnect the motor from the machine or
process during the initial testing.
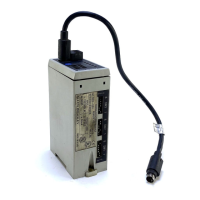
The remote I/O communications module allows a SCANport device
to look and act like a remote I/O chassis when connected to a
programmable controller. Data contained in the input/output image
table is transferred between the programmable controller by the
remote I/O scanner, the same as with any remote I/O chassis. You
control the location and amount of data transferred by setting the
rack address and starting quarter/rack size DIP switches on the
remote I/O communication module.
Figure 3.1 shows a typical example of data transfer between a
programmable controller, the remote I/O communications module,
and a 1336 PLUS drive. This same concept works for all SCANport
devices. In this example, assume that you have set the DIP switches
for rack address 2, a rack size of 1/4 (or greater if larger amounts of
data are to be transferred), and has enabled (Set) the Logic
Command/Status switch.
Data placed in the output image table area for rack address 2 is
transferred to the remote I/O communications module every rack
scan. The communications module then transfers the data to the 1336
PLUS drive as Logic Command. Logic status data is transferred
from the drive to the remote I/O communications module and then
passed to the programmable controller during a rack scan.
!
ATTENTION: The RIO to SCANport conversion is
asynchronous. Any data sent to the adapter for transfer
to the drive must be maintained until the drive has
received the data.
Chapter Objectives
Programmable Controller
Data Table Use
 Loading...

