EasyManua.ls Logo

AMX MVP-7500 User Manual

AMX MVP-7500
210 pages
To Next Page IconTo Next Page
To Previous Page IconTo Previous Page
Page #201 background image
Appendix B - Wireless Technology
191
MVP-7500/8400 Modero Viewpoint Wireless Touch Panels
11. Launch the Certificate Upload Utility and confirm the utility has detected the new USB connection
to the panel:
Click on the Local Address field's drop-down arrow.
Confirm the new USB entry shows up in the list as: 10.XX.XX.1.
How to Upload a Certificate File
1. Install the latest AMX USB LAN LINK driver onto your computer by installing the latest versions
of either TPDesign4 or NetLinx Studio2. This USB driver prepares your computer to properly
communicate with a directly connected G4 touch panel (MVP/CV7/CV10).
Refer to Step 1 from within the previous Step 1: Setup the Panel and PC for USB
Communication section on page 189.
2. Access the target panel's Protected Setup firmware page and configure the USB communication
parameters.
Refer to Step 2 from within the previous Step 2: Confirm the Installation of the USB Driver on
the PC section on page 190.
3. With the panel successfully communicating with target computer, launch the Certificate Upload
Utility.
Familiarize yourself with the User Interface options (Certificate Utility User Interface).
4. Locate your certificate file by using the Browse button and navigating to the desired file type.
5. Use the drop-down arrow in the Local Address field to select communication through either the
computer's Ethernet port (Internet communication) or via the USB port (direct connection). If using
an Ethernet connection skip to step 8.
6. For a USB connection, select the 10.XX.XX.1 IP Address which corresponds to the virtual IP
Address assigned to the USB connection port on the computer.
7. For a USB connection, navigate to the Add IP Address field (bottom-right of the interface) and
enter a value of 1 greater than the virtual USB IP Address.
For example: If the virtual USB IP Address is 10.0.0.1 then you would add an address for the
directly connected panel of 10.0.0.2 (this is one greater than the USB address value detected
by the utility).
You can send a certificate to ONLY ONE directly connected panel (via USB). If using the
Ethernet port's IP Address, you can send a server certificate to multiple target panels.
8. For an Ethernet IP Address connection, select the IP Address which corresponds to the local
computer's Ethernet address.
9. Navigate to the Add IP Address field (bottom-right of the interface) and enter the IP Addresses of
the various target touch panels.
10. Click the Add button to complete the entry and add the new IP Address to the listing of available
device IP Addresses. Repeat this process for all subsequent device IP Addresses.
11. Once your list is complete, click on the File drop-down menu and select the Save option to launch a
Save dialog where you can assign a name to the current list of addresses and then save the
information (as a TXT (text) file) to a known location.
This application must be run from a local machine and should not be used from a
remote network location.

Table of Contents

Other manuals for AMX MVP-7500

Question and Answer IconNeed help?

Do you have a question about the AMX MVP-7500 and is the answer not in the manual?

AMX MVP-7500 Specifications

General IconGeneral
BrandAMX
ModelMVP-7500
CategoryTouch Panel
LanguageEnglish

Summary

AMX Limited Warranty and Disclaimer

FCC Information

MVP Modero Viewpoint Wireless Touch Panels

Overview of MVP Panels

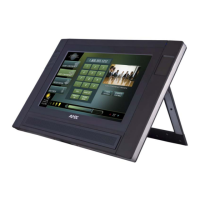
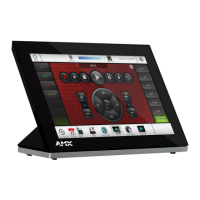
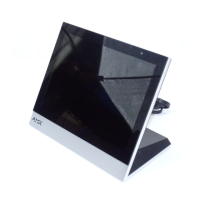
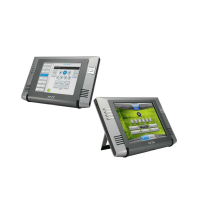
Introduces the MVP-7500 and MVP-8400 Modero Viewpoint Wireless Touch Panels.

MVP Panel Specifications

Details the models, dimensions, power, and battery duration of the MVP panels.

MVP-BP Power Pack

MVP-BP Power Pack Overview

Describes the MVP-BP Power Pack as a rechargeable Lithium-Ion battery.

Installing MVP-BP Batteries

Step-by-step guide for inserting MVP-BP batteries into the panel.

NXA-CFSP Compact Flash

NXA-CFSP Compact Flash Overview

Details the 64 MB Compact Flash card shipped with MVP panels.

Installing the NXA-CFSP Compact Flash Card

Instructions for accessing internal components and installing the Compact Flash card.

Wireless Interface Cards

802.11b Wireless Interface Card

Details the 2.4 GHz Direct Sequence Spread Spectrum 802.11b wireless PC card.

NXA-WC80211GCF 802.11g Wireless Interface Card

Describes the 2.4 GHz Wi-Fi LAN CF Card for 802.11g upgrades.

Installing the 802.11g Card and Antenna

Step-by-step guide for upgrading to the 802.11g Wi-Fi card and antenna.

Configuring Communications

Modero Setup and System Settings

Accesses on-board Setup pages for panel information and configuration changes.

Configuring Wireless Network Access

Guides through configuring wireless communication parameters for network access.

Choose Master Connection Mode

Establishes the connection type (USB or Ethernet) between the panel and the master.

Upgrading MVP Firmware

Upgrading Modero Firmware via USB

Step-by-step instructions for updating panel firmware using a USB connection.

Upgrading Docking Station Firmware via USB

Procedure for updating firmware of accessory docking stations through a target panel.

Setup Pages

Setup Page Navigation Buttons

Describes the navigation buttons available on the Setup pages.

Custom Logo Configuration

Explains how to customize the boot splash screen with a JPEG image.

Protected Setup Pages

Provides secured access to advanced panel configuration, including communication and security.

Security Settings Configuration

Details security profiles (Standard, Secure, DoD) and their features for panel security.

System Settings Page

Sets the NetLinx Master communication settings for the panel.

Wireless Settings Page

Configures communication settings for the wireless CF card and reads panel device number.

G4 Web Control Settings

Enables/disables G4 Web Control functionality for remote PC interaction.

Connection Utility Page

Allows use of the panel as a site survey tool to check wireless network coverage.

Other Settings

Cache Settings and Setup

Configures memory allocation for image caching to decrease load times.

Password Setup Page

Assigns passwords for accessing Protected Setup and releasing panels from docking stations.

SIP Settings Page (MVP-8400)

Establishes network settings for using the panel as an IP phone.

Information

Project Information Page

Displays project properties of the TPDesign4 file loaded on the panel.

Panel Information Page

Provides detailed information about the panel's hardware and firmware.

Time & Date Setup

Time & Date Setup Page

Allows setting and adjusting time and date information on the NetLinx Master.

Audio Settings

Audio Volume Control

Adjusts master and digital audio volume levels, and panel sound settings.

Custom Sound Configuration

Allows adding custom button hit and miss sounds using WAV files.

Battery Settings and Batteries

Battery Settings Page

Sets power warning preferences and monitors battery status.

Batteries Page Status

Displays combined and individual battery charge status and docking station information.

EAP Security and Server Certificates Overview

Programming

Button Assignments

Defines button channel range, variable text range, states, levels, and address ports.

Page Commands

Commands for managing popup pages, their display, and effects in NetLinx Programming Language.

Appendix A: Text Formatting

Text Formatting Codes for Bargraphs/Joysticks

Codes to dynamically provide bargraph text about status and level.

Text Area Input Masking

Limits allowed/correct characters in text areas for data entry and validation.

Appendix B: Wireless Technology

Overview of Wireless Technology

Explains WLAN standards (802.11b/g/a) and their characteristics.

EAP Authentication Methods

Details EAP methods (TLS, TTLS, PEAP, LEAP, FAST) and their security characteristics.

AMX Certificate Upload Utility

Compiles and uploads certificates to target panels for WPA-PSK and EAP security.

Configuring G4 Panel for USB Communication

Guides setting up the panel and PC for USB communication and driver installation.

Appendix C: Troubleshooting

Panel Touch Response Issues

Troubleshoots unresponsive touch screens, advising removal of screen laminate.

Battery Charging Issues

Addresses issues with batteries not charging, suggesting firmware update and swap.

Panel Not Appearing in Online Tree

Troubleshooting steps for panel visibility issues in NetLinx Project Navigator.

Cannot Obtain DHCP Address

Steps to resolve issues with the panel failing to acquire a DHCP address.

WEP Security Configuration Issues

Guidance on ensuring correct default WEP key settings for panel and WAP.

NetLinx Studio Master Detection Issues

Resolves issues where NetLinx Studio detects only one of multiple connected masters.

Cannot Connect to NetLinx Master

Troubleshooting steps for connectivity failures with a NetLinx Master controller.

Only One Modero Panel Visible

Addresses issues where only one panel is shown when multiple are connected.

Strange Panel Behavior After Download

Troubleshooting steps for panels exhibiting issues after file or firmware downloads.

Related product manuals