80
use and maintenance RSV mille ! - RSV mille R !
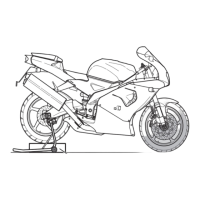
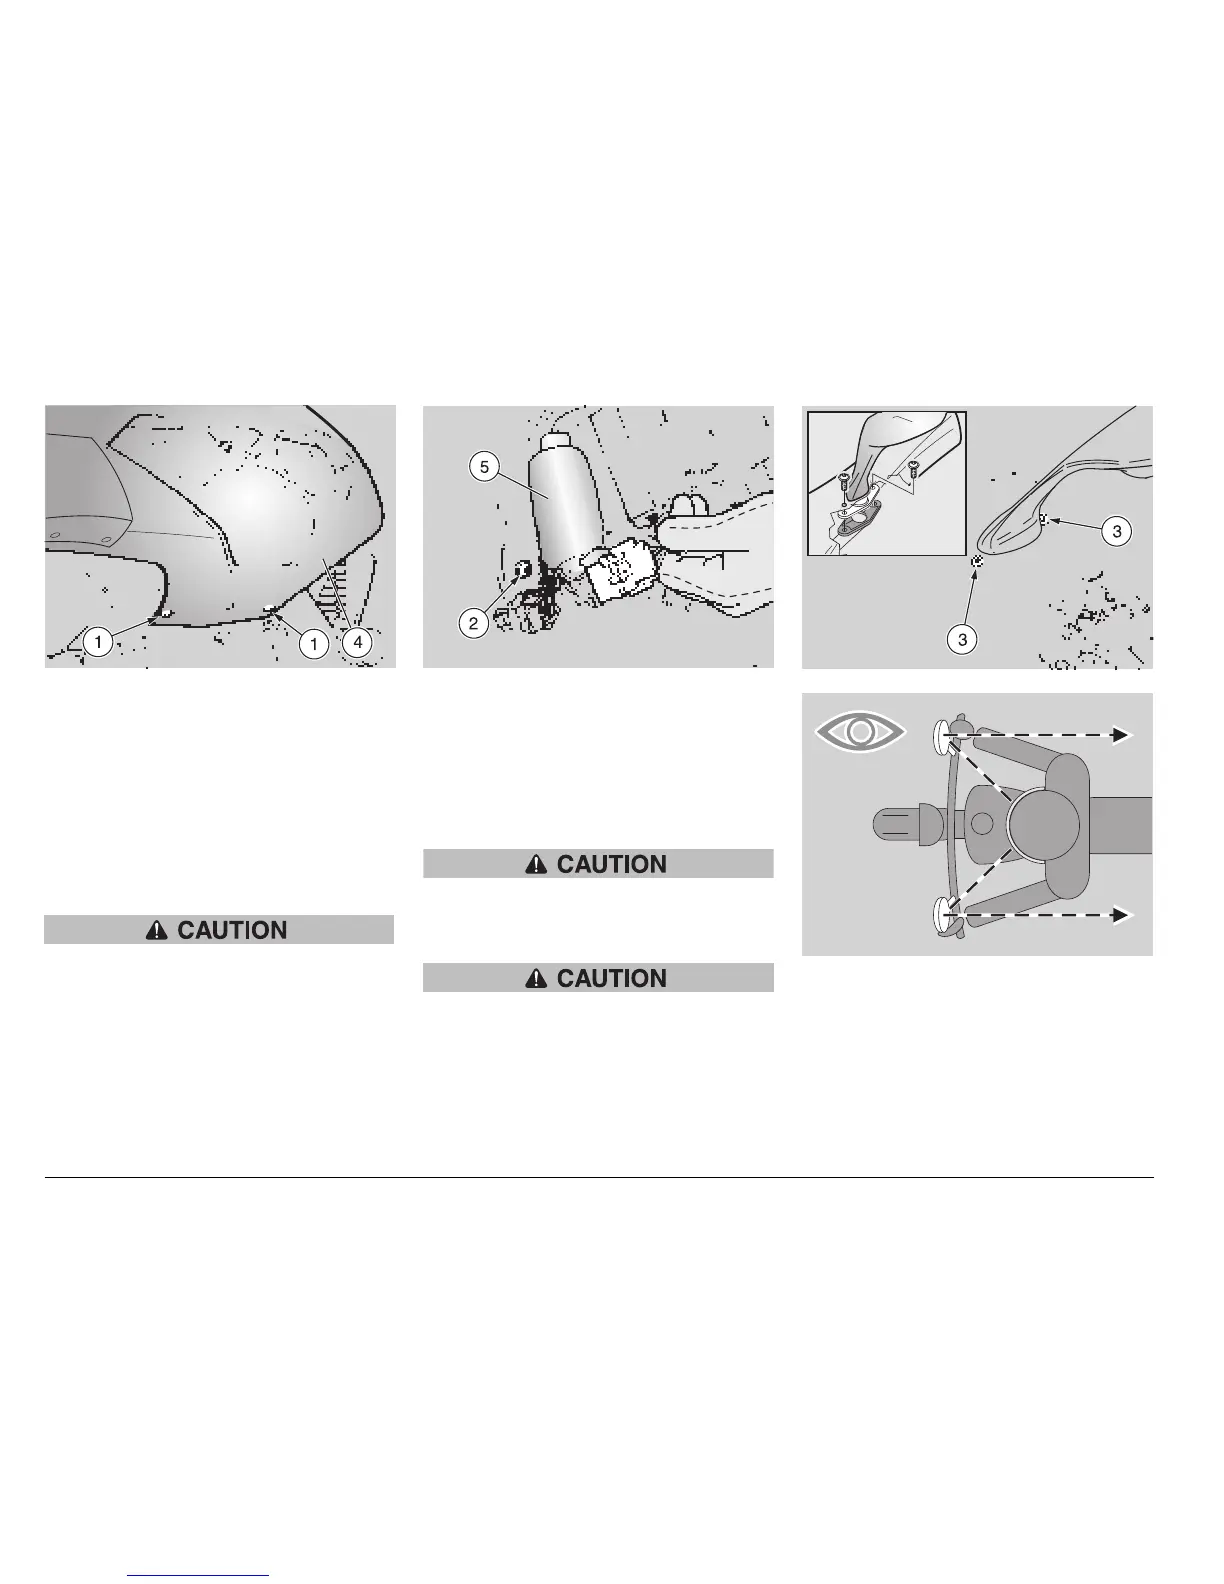
REMOVING THE FRONT PART OF
THE FAIRING
◆ Position the vehicle on the stand, see p.
58 (POSITIONING THE VEHICLE ON
THE STAND).
◆ Turn the ignition switch to position “C”.
◆ Unscrew and remove the two lower
screws (1).
[Unscrew and remove the side screw
(2).
Upon reassembly, tighten the screw (2)
moderately, since it is fixed on plastic.
[Unscrew and remove the two upper
screws (3).
NOTE Upon reassembly, rotate the
rear-view mirror support so that the faste-
ning holes coincide with those provided on
the front part of the fairing.
The whole unit must be correctly positio-
ned on the support.
◆ Move the front part of the fairing (4) sli-
ghtly forward.
◆ Raise the protection element (5).
◆ Disconnect the electric connector (6) of
the headlight.
Upon reassembly, make sure that the
electric connector (6) is correctly cou-
pled.
Handle the plastic and painted compo-
nents with care to avoid scraping or da-
maging them.
◆ Remove the front part of the fairing (4)
completely, together with the headlight
and the rear-view mirrors.
After reassembly:
◆ Adjust the inclination of the rear-view
mirrors correctly.
 Loading...