19
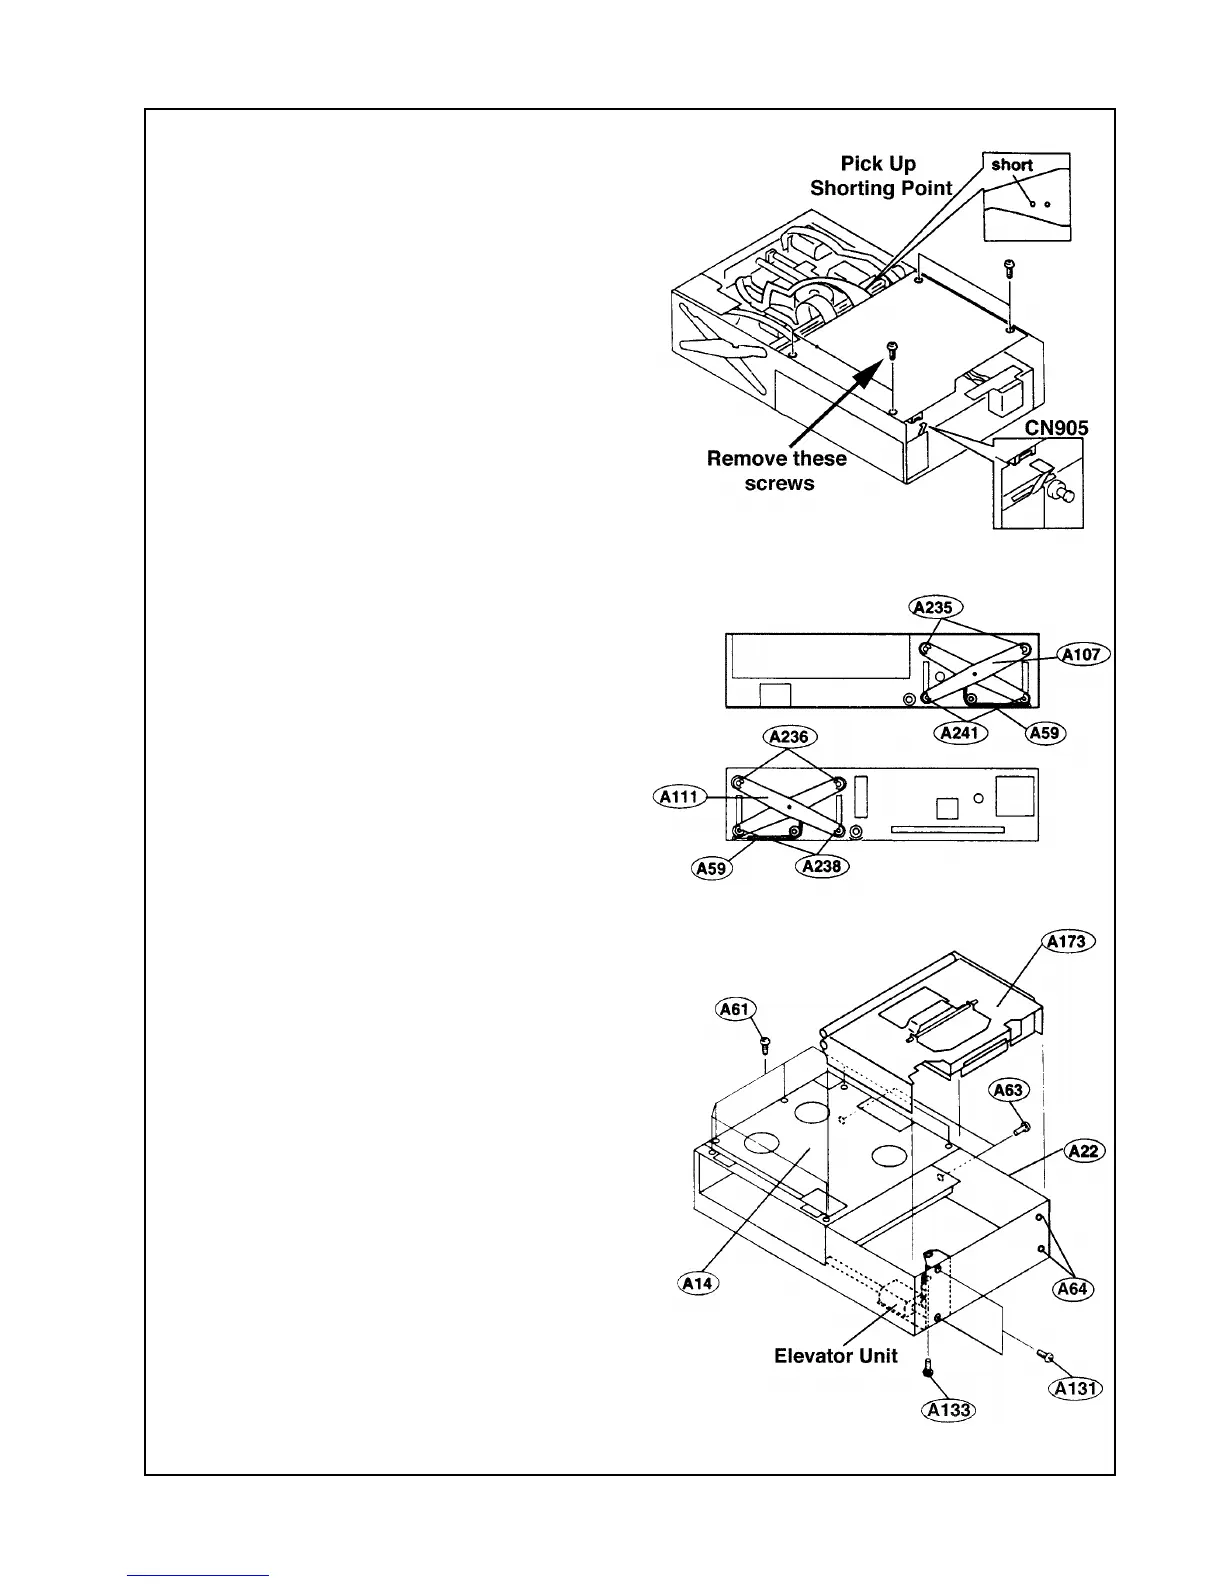
1. Main PCB Disassembly
1.1 Short the two pads on the ribbon cable
coming from the pick up.
1.2 Unplug CN905.
1.3 Remove the four screws that secure the
PCB to the chassis.
1.4 Lift the PCB up and remove the remain-
ing connectors.
2. Base Chassis Disassembly
2.1 Remove all the FPCs that connect the
mount chassis (A173) to the main PCB.
2.2 Remove the front and rear elevator
tension spring (A59).
2.3 Remove the two E-rings located in the
rear (A238) and the two located in the front
(A241). Remove the two E-rings located in
the front (A235) and the two located in the
rear (A236). Remove the link cross bars
(A107) and (A111).
2.4 Remove the screw (A133) and the two
screws (A131) that mount the elevator unit
and remove the elevator unit.
Note: A133 is the screw that secures the
plastic piece.
2.5 Remove the six screws (A61) that
secure the top base chassis (A14).
2.6 Remove the two screws (A63) and the
two screws (A64) that secures the rear
base chassis (A22). Remove the spring
that connects from the mount chassis to the
base chassis.
Note: Use caution when removing the
mount chassis so that the washers, rollers,
etc. that are mounted on the lift pin of the
mount chassis are not lost.
(Continued on the next page)
CD MECHANISM DISASSEMBLY PROCEDURES
 Loading...