2
CONTENTS
SAFETY INFORMATION ...........................................................................................................................4
ELECTROSTATIC DISCHARGE SENSITIVE (ESDS) DEVICE HANDLING ............................................5
WARRANTY................................................................................................................................................5
PART LIST NOTES ....................................................................................................................................5
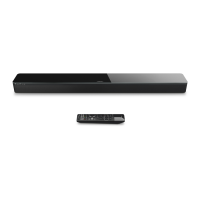
PRODUCT DESCRIPTION......................................................................................................................6-7
PACKAGING PART LIST ...........................................................................................................................8
Figure 1. Packaging Exploded View ........................................................................................................8
MAIN ASSEMBLY LIST...............................................................................................................................9
Figure 2-4. Main Assembly Exploded View .......................................................................................10-12
Figure 5-6 IO Panel Assembly Exploded View...................................................................................13-14
MAIN-I/O PCB PART LIST...................................................................................................................15-22
POWER PCB PART LIST....................................................................................................................23-28
DISPLAY PCB PART LIST........................................................................................................................29
POLE SWITCH PCB PART LIST...............................................................................................................30
DISASSEMBLY PROCEDURE............................................................................................................31-38
Figure 7.
1 Nut & Washer and 3 Volume Knobs Location
.........................................................................31
Figure 8.
The Inlay Removal
....................................................................................................................31
Figure 9.
The Adhesive Remains on the I/O Panel
...................................................................................31
Figure 10.
10 screws Location
..................................................................................................................31
Figure 11.
Detach the AC cables
..............................................................................................................32
Figure 12.
FFC Cables Direction
..............................................................................................................32
Figure 13. Rubber
Feet and Bottom Inlays Location
.................................................................................32
Figure 14.
12 screws Location
.................................................................................................................33
Figure 15.
4 Cables Direction
...................................................................................................................33
Figure 16.
Grille Removal
.......................................................................................................................33
Figure 17.
4 screws Location
...................................................................................................................34
Figure 18.
The Location for RTV and Foam
.............................................................................................34
Figure 19.
6 screws Location
...................................................................................................................34
Figure 20.
2 Cable Harnesses Removal
..................................................................................................34
Figure 21.
7 Screws & 1 FFC Cable Location
..........................................................................................35
Figure 22.
6 Screws Location
...................................................................................................................35
Figure 23.
4 Screws & 1 FFC Cable Location
...........................................................................................35
Figure 24.
OLED Removal
.......................................................................................................................35
Figure 25.
OLED Gasket Removal & Clean
.............................................................................................36
Figure 26.
Shield Cover Removal
............................................................................................................36
Figure 27.
1 screw Location
.....................................................................................................................36
Figure 28.
1 screw Removal
....................................................................................................................36
Figure 29.
11 screw Location
...................................................................................................................37
Figure 30.
Bluetooth Antenna Removal
...................................................................................................37
Figure 31. The Location for
2 Transmitter Antenna
.................................................................................37
REPLACE THE SYSTEM BATTERY...........................................................................................................38
TEST PROCEDURE...............................................................................................................................39-43
SYSTEM BATTERY CHARGING AND TEST
.............................................................................................44
Title Page
 Loading...