4. ASSEMBLY
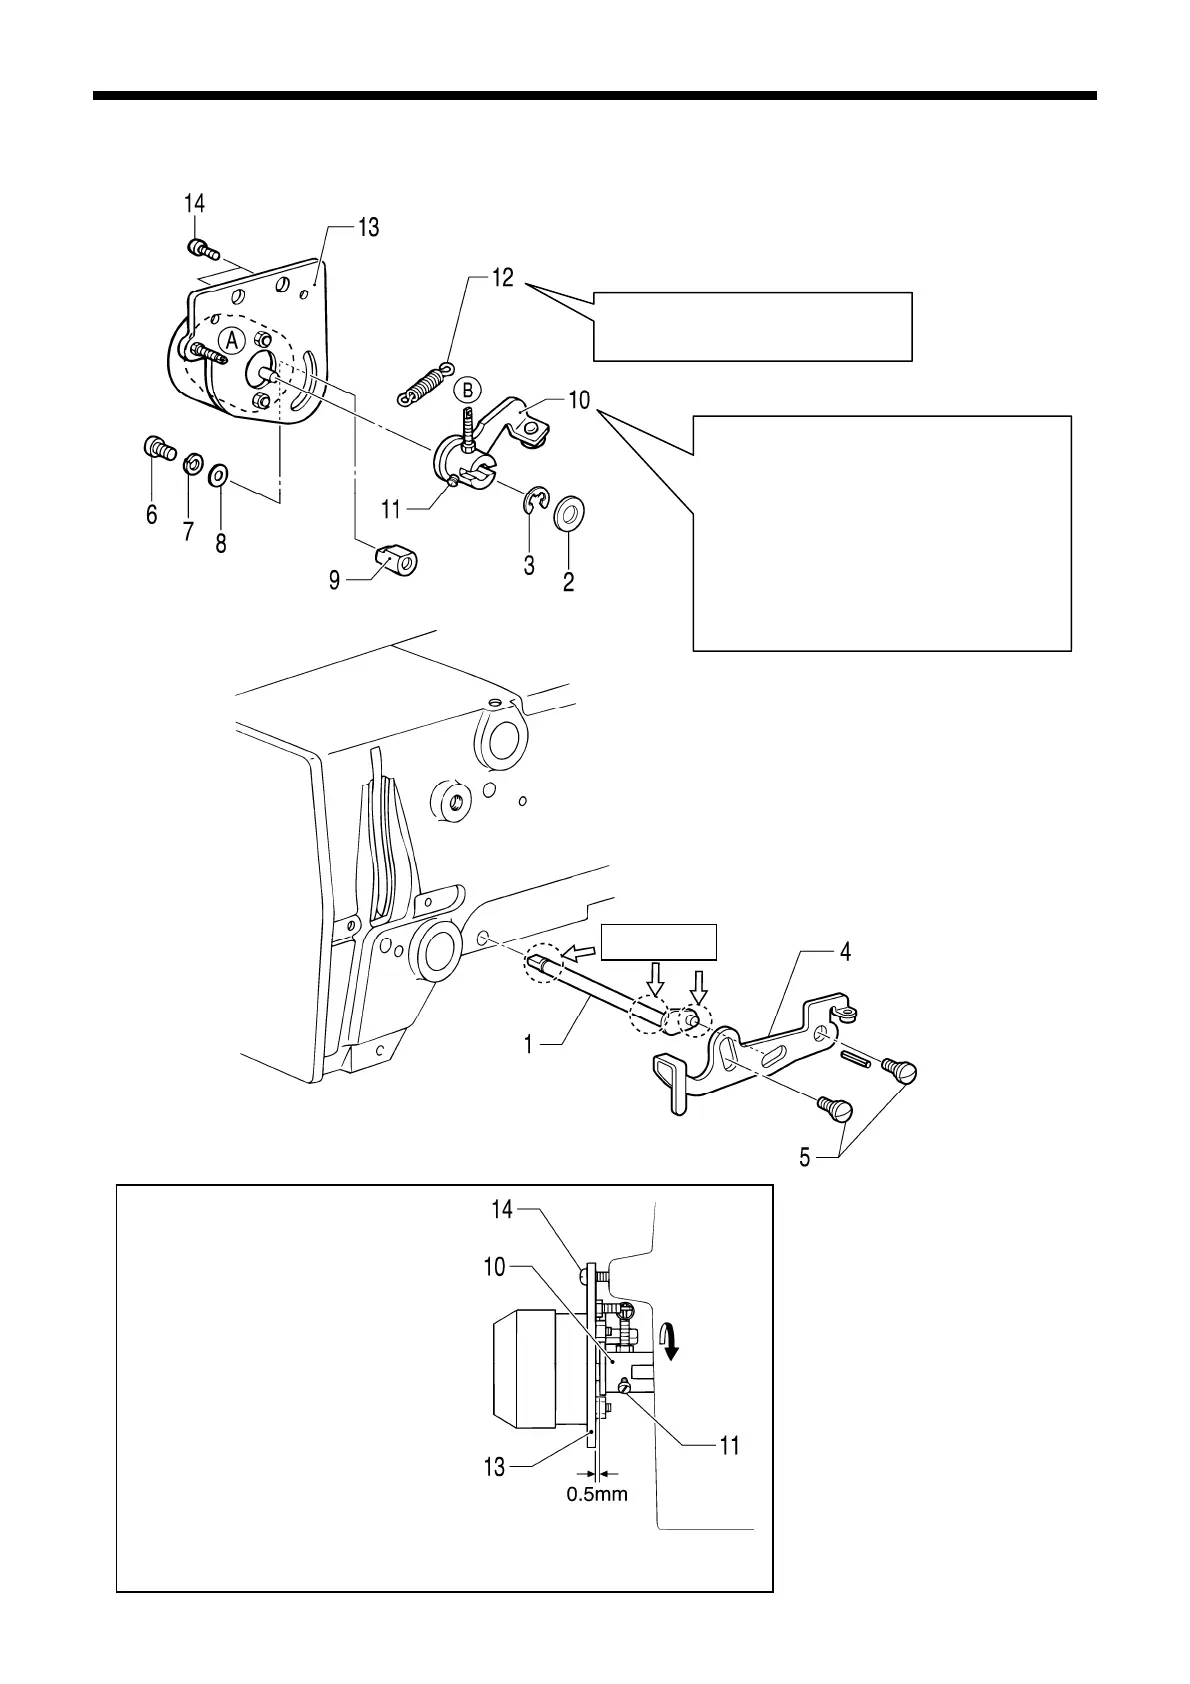
4-4. Thread take-up mechanism
3345Q
Attach the spring to spring
ho
oks (A) and (B).
KE-430B, 430C series
62
3346Q
1) Provisionally install the solenoid
joint to the thread take-up solenoid
with the set screws.
2) Place the solenoid joint onto the
thread take-up lever crank so that
the flat surface is against the flat
part of the thread take-up crank,
and then install the solenoid setting
plate to the machine head.
Apply grease.
While pushing the solenoid joint
in the direction of the arrow, set
the solenoid setting plate and the
solenoid joint so that the gap
between them is 0.5 mm, and
then tighten the set screws.
* Move the solenoid joint and
check that the thread take-up
lever operates smoothly. If it
does not move smoothly, it
may damage the solenoid. If
the movement is not smooth,
make fine adjustments to the
position of the solenoid setting
plate until the thread take-up
lever operates smoothly.
3347Q
1.
Thread take-up lever crank
2. Plain washer
3. Retaining ring
4. Thread take-up lever
5. Shoulder screws [2 pcs]
6. Set screw [Temporarily tighten]
7. Spring washer
8. Plain washer
9. Nut
10. Solenoid joint
11. Set screws [2 pcs]
12. Spring
13. Solenoid setting plate
14. Screws [2 pcs]
Seen from the front
 Loading...