4. ASSEMBLY
Wh
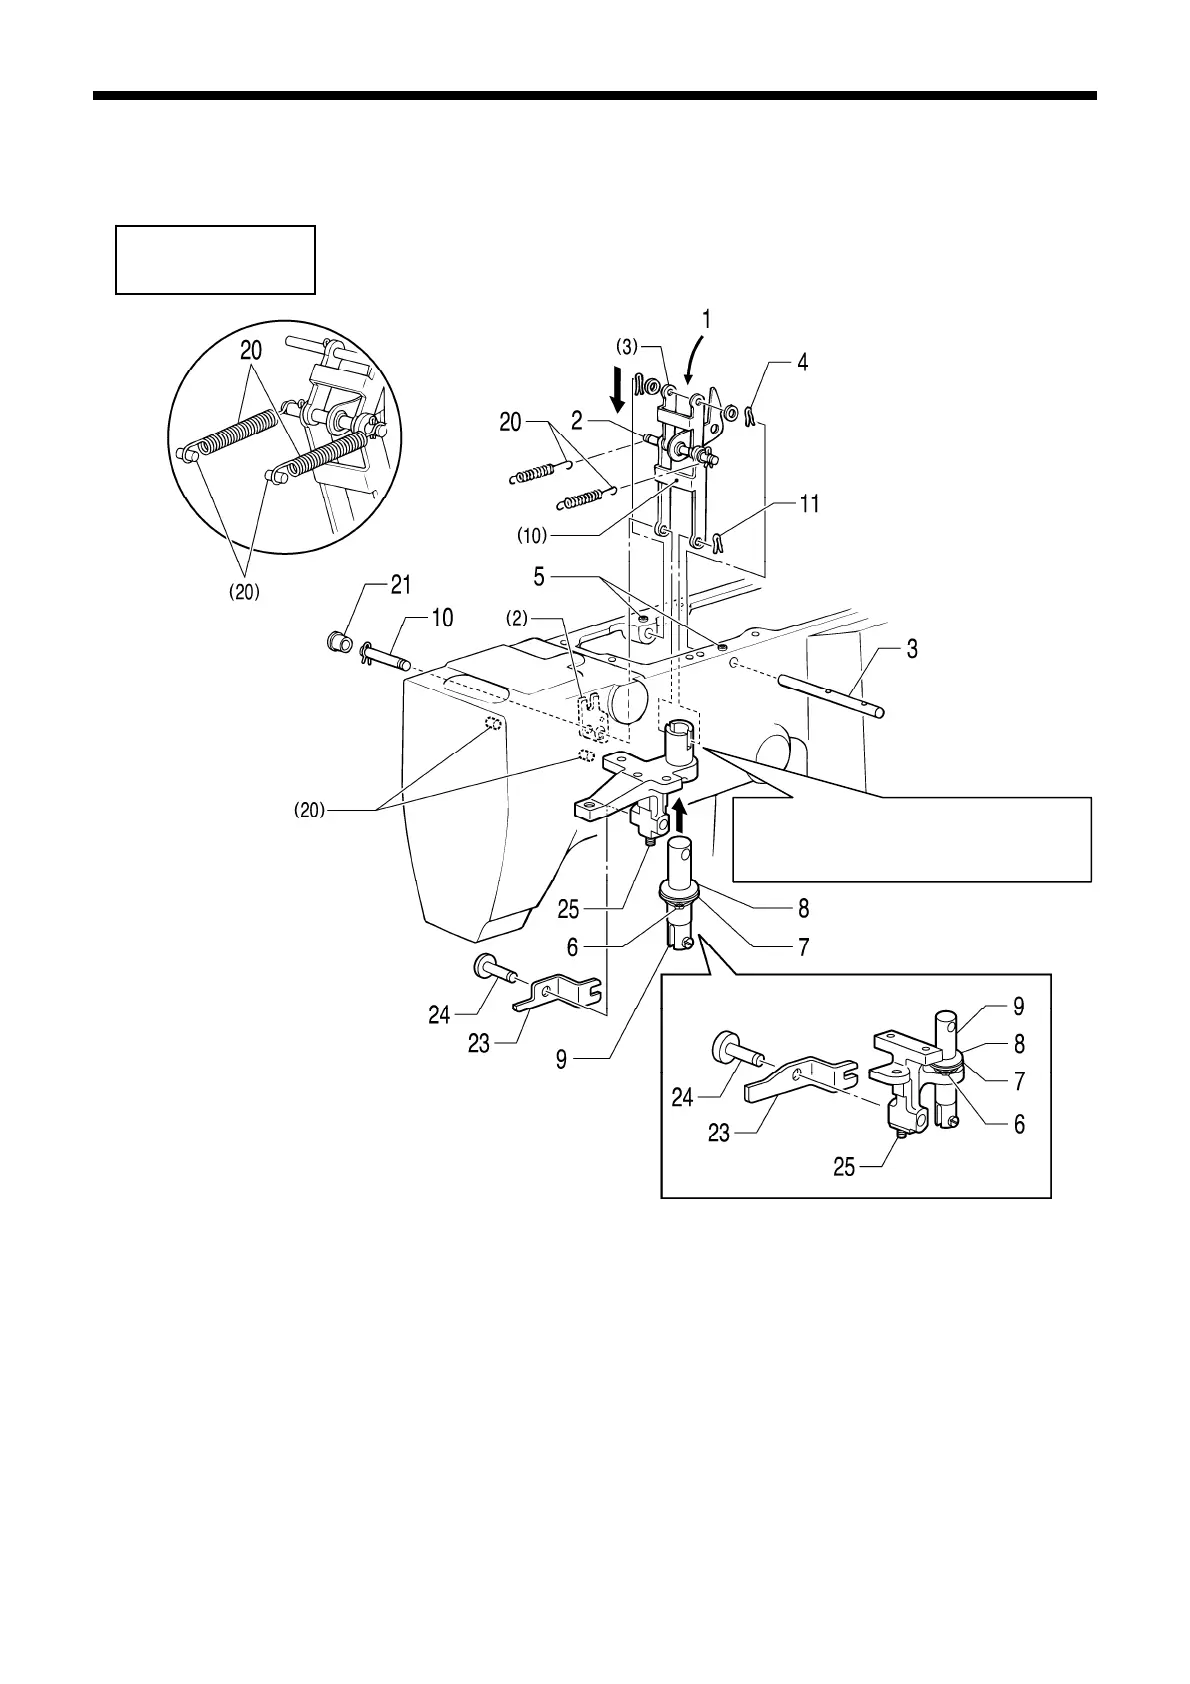
en assembling, apply grease to the required places while referring to “4-5-1. Applying grease”.
KE-432B, 432C
BE-438B, 4
38C
Secure link shaft A using the set
scre
w so that link B (10) is centered
in the bush.
<BE-438B, 438C>
1. Work clamp lifter link-related parts
[Insert from above the arm]
2. Link shaft, B
[Place into the forked section of the thread wiper driving lever (2)]
3354Q
3.
Link shaft, A [Pass through the washer and link A (3)]
4. Snap pins [2 pcs: Attach to both ends of link shaft A]
5. Set screws [2 pcs]
6. Retaining ring
7. Plain washer
8. Rubber band
9. Work clamp lifting rod
10. Link shaft, C [Pass through link B (10) and the work clamp plate]
11. Snap pins [2 pcs: Attach to both ends of link shaft C]
12. Presser solenoid assy [Insert from above the arm]
13. Screws [2 pcs]
14. Screws [4 pcs]
15. Rubber caps [2 pcs]
KE-430B, 430C series
67
 Loading...