1
2
3
4
5
6
7
8
9
55
z LABEL PRINTING
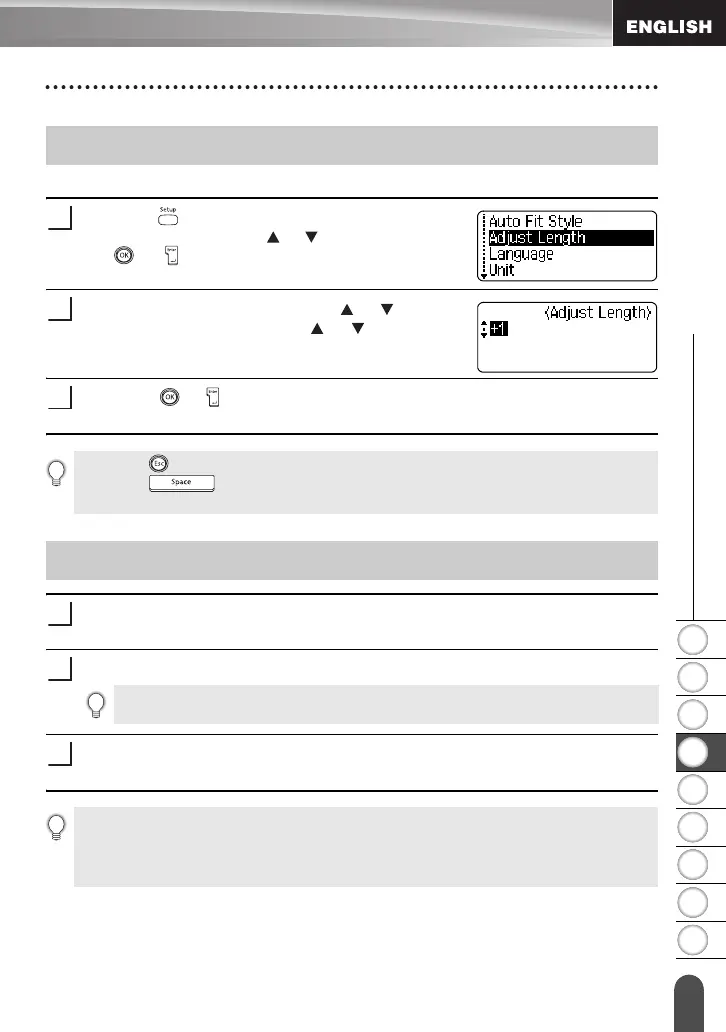
Adjusting the Label Length
You can adjust the length of the printed label in levels of -5 to +5.
Press the key to display the setup menu, select
"Adjust Length" using the or key, and then press
the or key.
Select "Adjust Length" by using the or key, and
then set the value by using the or key.
Press the or key to apply the setting.
If necessary, trim the printed label to the desired shape and length using scissors,
etc.
Peel the backing from the label.
Position the label and then press firmly from top to bottom with your finger to
attach the label.
Adjusting the Label Length
1
2
3
• Press the key to return to the previous step.
• Press the key to set the value to default setting.
• Approximately 1% of the total label length will be adjusted by 1 level.
Attaching Labels
1
2
The backing of some types of tapes may be pre-cut to make it easier to peel the backing.
3
• Labels may be difficult to attach to surfaces that are wet, dirty, or uneven. The labels may peel
off easily from these surfaces.
• Be sure to read the instructions provided with Fabric Iron-On Tapes, Extra Strength Adhesive
Tapes or other special tapes and observe all precautions noted in the instructions.

 Loading...