8400-0181-OM Rev C 185 and 185B Installation & Technical
30
SECURITY SEAL INSTALLATION
If your metrology laws require the use of physical sealing, a lead and wire security seal can be
installed on the Model 185 and 185B Weight Indicators to prevent access to the calibration
jumper (located on the main printed circuit board) from being removed and re-installed to enter
setup and calibration thereby preventing unauthorized access to the calibration adjustments.
NOTE: In order to install the lead and wire security seal, two enclosure screws must be
replaced with two locking screws. They are available from the Cardinal/Detecto Parts
Department. The part numbers are:
8400-0179-08, 185 LOCKING SCREW, (2) REQUIRED
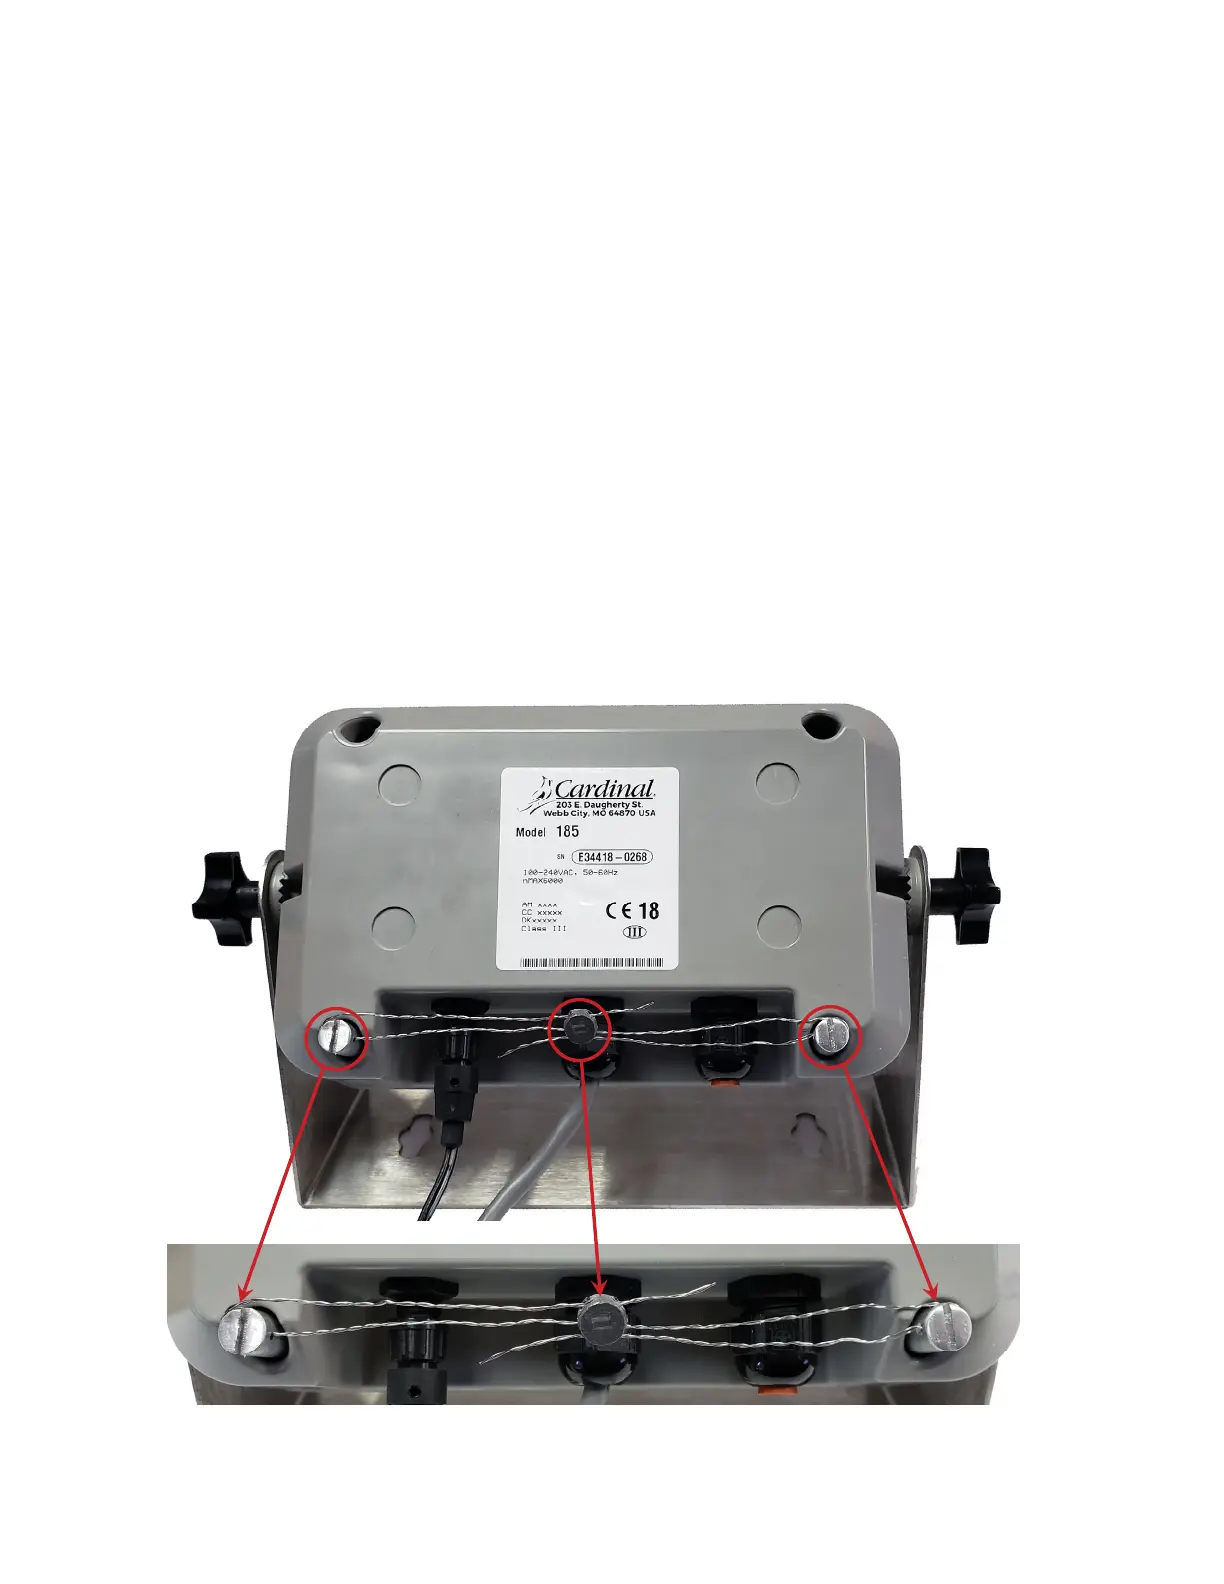
To install a lead and wire security seal, follow the steps provided and refer to Figures No. 12,
and 13 below for details on the installation of the seal.
1. Remove two of the round-head machine screws securing the back enclosure to the front
enclosure.
2. Replace the two screws removed with the 185 Locking Screws.
3. Make certain the 185 Locking Screws are securely tightened before proceeding.
4. Thread the sealing wire through the hole in the 185 Locking Screws.
5. Pull the wire tight and install the lead seal.
6. The 185 Locking Screws cannot be removed without damaging the lead wire seal.
Figure No. 12
Figure No. 13

 Loading...