— 43 —
OPERATION CHECK
Preparation
1 : A-20 5 : AC-adapter
2 : Alkaline batteries 6 : Charger
3 : Jigs of RS-JIG-232C and RS-JIG-3PIN 7 : Rechargeable battery pack
4 : RAM Card XC-110 8 : Diagnostic program (Diag 340.EXE)
Notes: •Be sure to keep separate back-up copies of all important data in A-20, because the
DISGNOSTICS make data corrupt.
• Diag 340 EXE. (Program is included in CD-ROM(Service Information Disc) with Service Manual
A-20)
• When using alkaline batteries use new ones.
• After all inspections are done perform Full Reset.
(After performing Full Reset make sure Diag 340. EXE is not in the computer.)
Notes: • If the diagnostic program is not stored in the RAM, you need to load the program otherwise
the tests 11, 12 cannot be done.
• Take CF card out after turning the power off.
• When new Diag program comes out, the Rev. value will vary.
• To make the task bar disappear, touch the task bar with the stylus or press control + ESC.
Touch Screen Calibration
Connect A-20 and a PC
Done
Next
Next
Turn power on. Operate
full Reset (refer to P12).
Enter
Touch five crosses as
they appear.
Enter
Next
Next
Next
Enter
Windows CE Menu Display
Copy Diag 340EXE to A-20 from
CD.
Synchronizing with your Desk-
top Computer
Step Operation Display Note
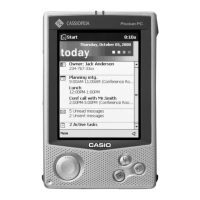
1 Picture of sky with sun and
clouds. Wait for about 10 sec-
onds.
HP/C Setup Wizard Introduction
Make sure that the diag-
nostic program starts.
Make sure the diagnostic
program is copied.
Before turning the power
on be sure to insert the CF
card.
Next
Touch five crosses as they ap-
pear
World Clock (World Map)
World Clock (Calender, Clock)
Owner Properties
Differences from Microsoft Win-
dows
Finished!
Disconnect A-20 and the
PC
Double click Diag icon
2
3
4
5
6
7
8
9
10
11
12
13
** Main Menu **
0 AUTO MODE
1 DISPLAY
2 TOUCH PANEL
3 MEMORY
4 SERIAL
5 POWER CONTROL
6 AUDIO
7 OTHERS
8 AUTO MENU1
9 AUTO MENU2
– AUTO MENU3
CPROG Rev, 0.83 for ZX-
34x(APO OFF)
 Loading...