43
Replace the CompactFlash Disk
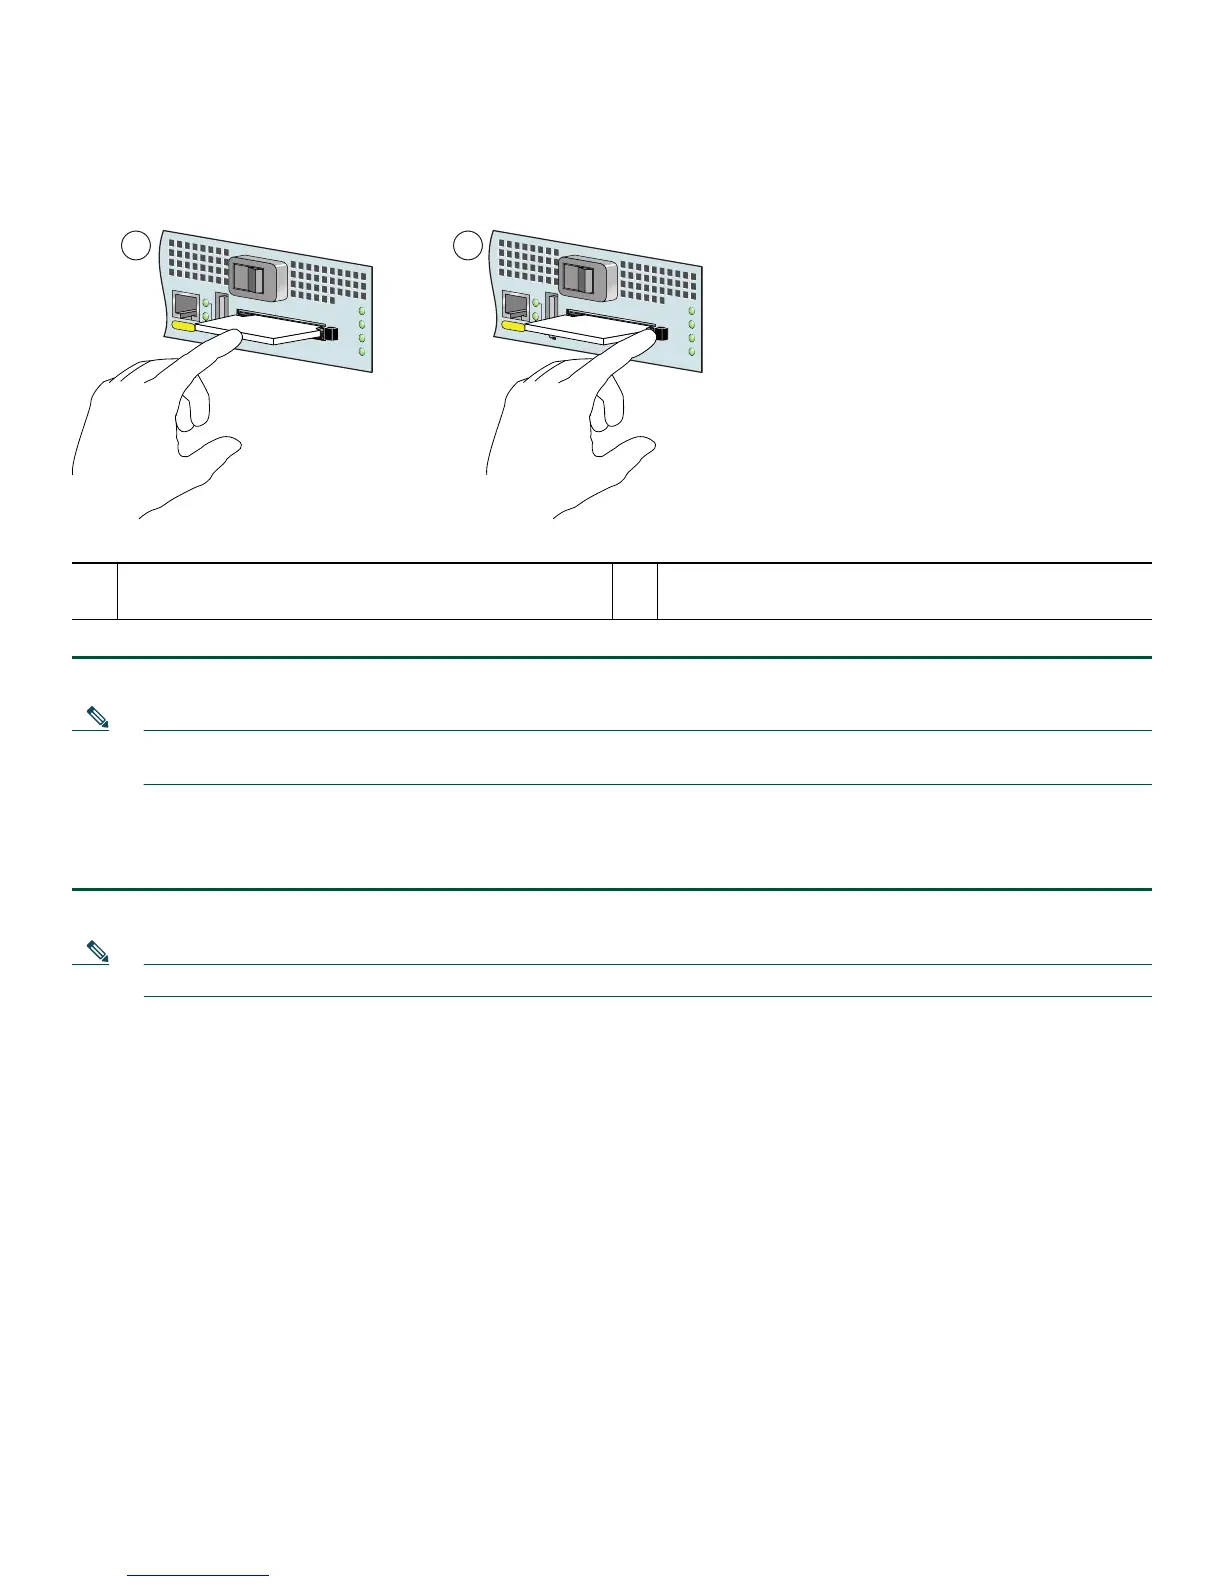
Figure 31 Installing and Removing a CompactFlash Disk
Step 1 To remove the CompactFlash Disk, press the ejector button, grasp the CompactFlash Disk and pull it from the slot.
Note The CompactFlash Disk is keyed and cannot be seated the wrong way. The ejector button does not pop out if the
CompactFlash Disk is not completely inserted.
Step 2 Insert the CompactFlash Disk into the CompactFlash Disk slot with the label with the vendor name and memory size
facing up, until it completely seats in the connector, and the ejector button for the slot pops out toward you.The
CompactFlash Disk protrudes when completely inserted.
Note Only the CompactFlash Disk is supported in a Cisco 7201 router. Other types of Flash Disks are not supported.
• The larger the CompactFlash Disk size, the longer the system boot time.
• The CompactFlash Disk supports online insertion and removal (OIR).
• Use the CompactFlash Disk to store your configuration files and Cisco IOS software image.
For more information on the CompactFlash Disk, see Appendix B, “Using the CompactFlash Disk,” in the Cisco 7201
Installation and Configuration Guide at
http://www.cisco.com/en/US/docs/routers/7200/install_and_upgrade/7201_install_config/7201_icg.html.
1 Inserting the CompactFlash Disk 2 Pressing the ejector button to release the CompactFlash
Disk
MNGMNT USE ONLY
FE
LINK
0
FE 0/0
ALARM
PWR OK
STATUS
CF
ACTV
COMPACT FLASH
170871
21
MNGMNT USE ONLY
FE
LINK
0
FE 0/0
ALARM
PWR OK
STATUS
CF
ACTV
COMPACT FLASH
 Loading...