Safety
Guard Function and Features
The guard is a very important safety feature,
designed to reduce the risk of injury associ-
ated with blade contact. Install the guard
correctly. Follow the specific instructions
in the ripping and crosscutting sections to
set and use the guard correctly for each
type of cuL
Guard Features Include:
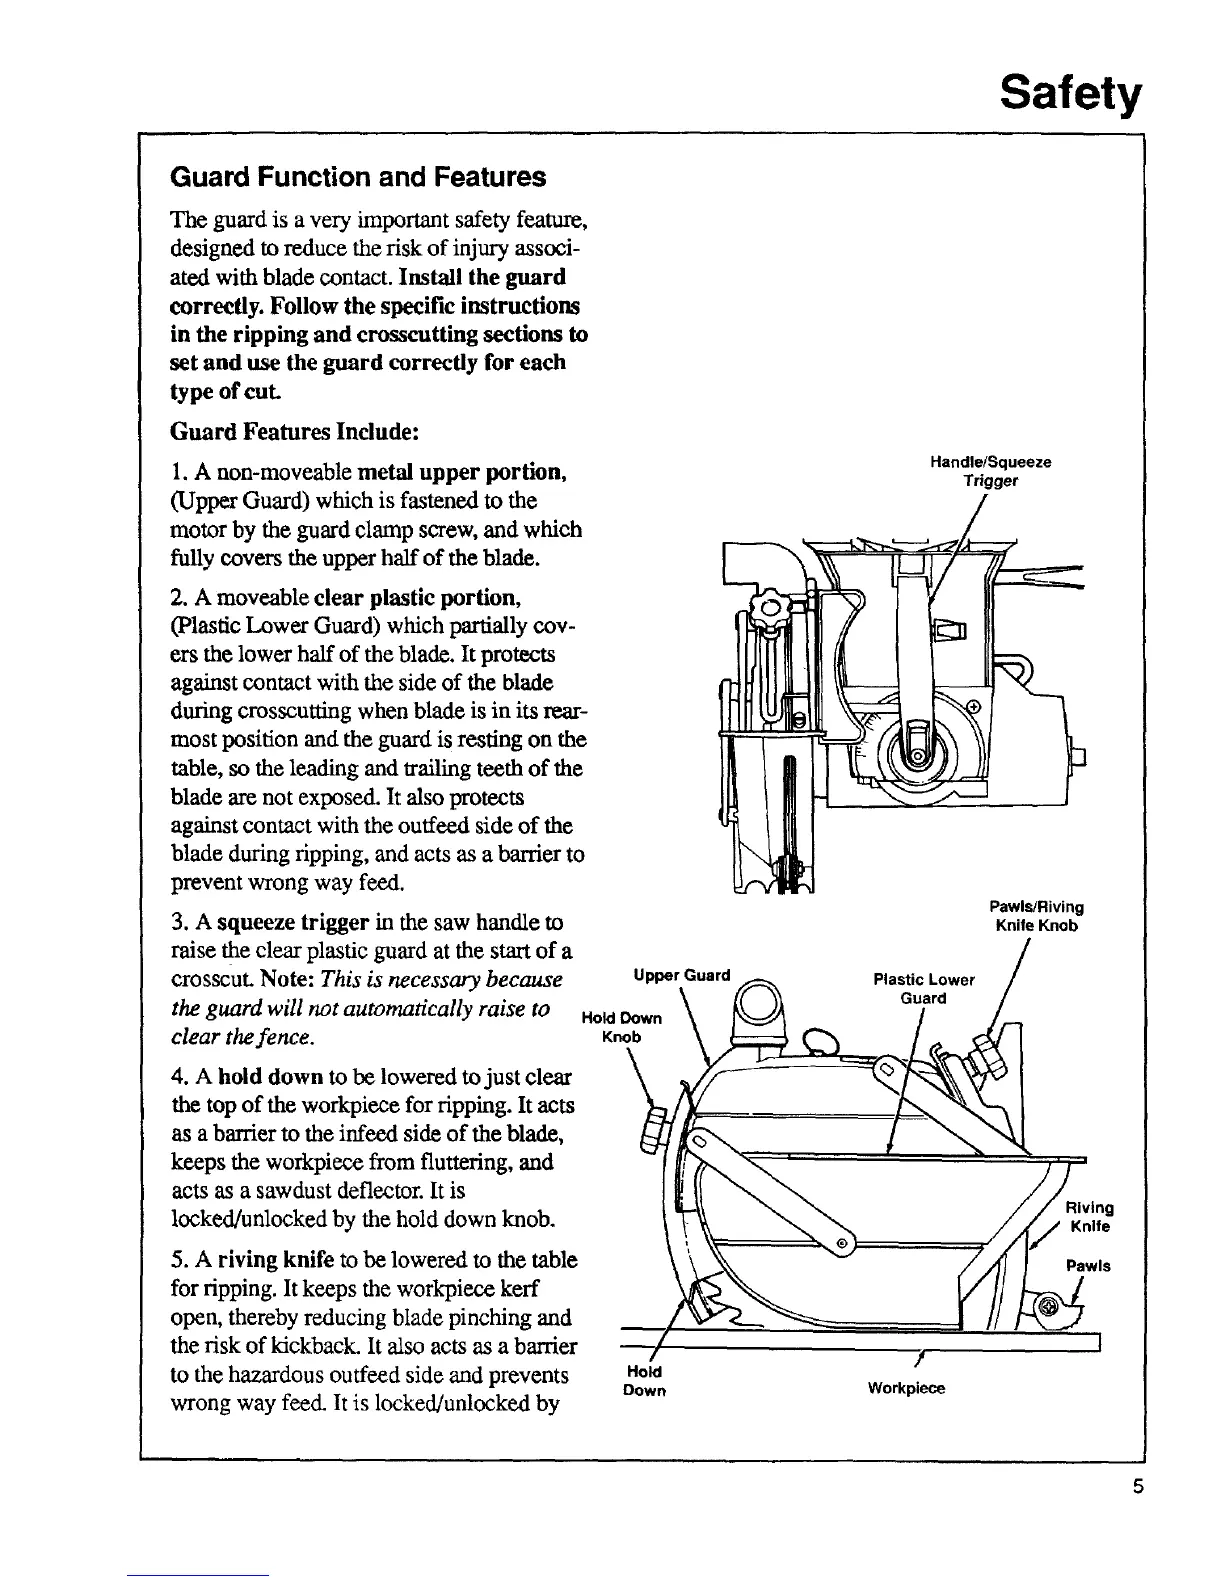
1. A non-moveable metal upper portion,
(Upper Guard) which is fastened to the
motor by the guard clamp screw, and which
fully covers the upper half of the blade.
2. A moveable clear plastic portion,
(Plastic Lower Guard) which partially cov-
ers the lower half of the blade. It protects
against contact with the side of the blade
during crosscutting when blade is in its rear-
most position and the guard is resting on the
table, so the leading and trailing teeth of the
blade are not exposed. It also protects
against contact with the ouffeed side of the
blade during ripping, and acts as a barrier to
prevem wrong way feed.
3. A squeeze trigger in the saw handle to
raise the clear plastic guard at the start of a
crosscut. Note: This is necessary because
the guard will not automatically raise to
clear the fence.
4. A hold down to be lowered to just clear
the top of the workpiece for ripping. It acts
as a barrier to the infeed side of the blade,
keeps the workpiece from fluttering, and
acts as a sawdust deflector. It is
locked/unlocked by the hold down knob.
5. A riving knife to be lowered to the table
for ripping. It keeps the workpiece kerf
open, thereby reducing blade pinching and
the risk of kickback. It also acts as a barrier
to the hazardous outfeed side and prevents
wrong way feed. It is locked/unlocked by
Upper Guard
Hold Down
Knob
Hold
Down
Handle/Squeeze
Trigger
Pawls/Riving
Knife Knob
Plastic Lower
Guard
Riving
Knife
Pawls
!
Workpiece
 Loading...