(b) If column moves front to rear within the
column support, tighten the four (4) bolts,
with a 9/16 socket and extension, located
through holes in rear column support cover
until movement disappears. Elevation should
be smooth and firm. Recheck adjustments,
repeat steps (a) and (b) if necessary.
2. Locate the four (4) plastic hole caps in loose
parts bag #661. After all adjustments are made to
the column support insert the plastic caps in all
four holes in rear column support cover.
STEP TWO
NOTE: The following adjustment, performed proper-
ly, will result in the work table being parallel to the
arm. This helps insure the blade will cut the same
depth along the entire crosscut travel.
ATTACHING AND LEVELING TABLE MOUNTING
SUPPORT CHANNELS
1. From the loose parts bag #499, locate the follow-
ing hardware:
4 - Hex Head Bolts 5/16-18 x 3/4
4 - Lockwashers 5/16
4 - Flat Washers 11/32 x 7/8 x 1/16
4 - Nuts 5/16-18
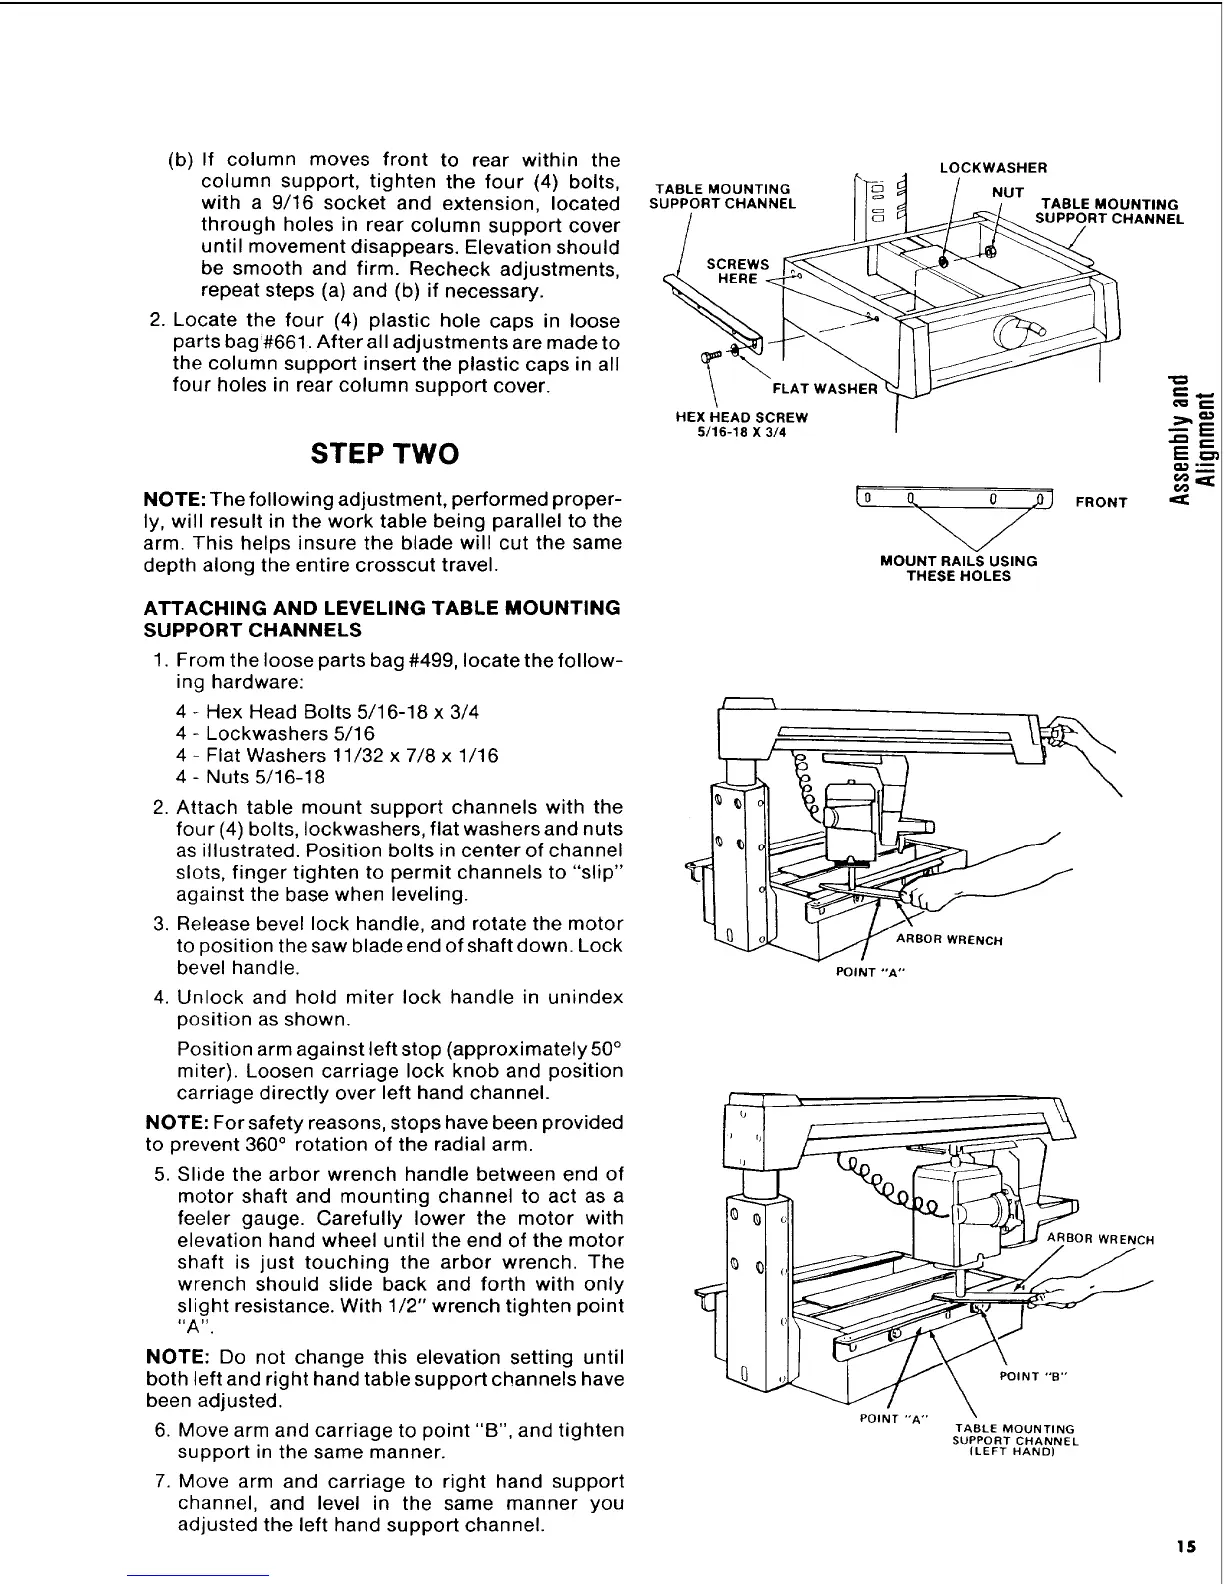
2. Attach table mount support channels with the
four (4) bolts, Iockwashers, flat washers and nuts
as illustrated. Position bolts in center of channel
slots, finger tighten to permit channels to "slip"
against the base when leveling.
3. Release bevel lock handle, and rotate the motor
to position the saw blade end of shaft down. Lock
bevel handle.
4. Unlock and hold miter lock handle in unindex
position as shown.
Position arm against left stop (approximately 50°
miter). Loosen carriage lock knob and position
carriage directly over left hand channel.
NOTE: For safety reasons, stops have been provided
to prevent 360 ° rotation of the radial arm.
5. Slide the arbor wrench handle between end of
motor shaft and mounting channel to act as a
feeler gauge. Carefully lower the motor with
elevation hand wheel until the end of the motor
shaft is just touching the arbor wrench. The
wrench should slide back and forth with only
slight resistance. With 1/2" wrench tighten point
I'Al_"
NOTE: Do not change this elevation setting until
both left and right hand table support channels have
been adjusted.
6. Move arm and carriage to point "B", and tighten
support in the same manner.
7. Move arm and carriage to right hand support
channel, and level in the same manner you
adjusted the left hand support channel.
TABLE MOUNTING
SUPPORT CHANNEL
LOCKWASHER
NUT
TABLE MOUNTING
SUPPORT CHANNEL
SCREWS
HERE
FLAT WASHER
HEX HEAD SCREW
5/16-18 X 3/4
MOUNT RAILS USING
THESE HOLES
FRONT
ARBOR WRENCH
POINT"A"
POINT "'A"
ARBOR WRENCH
POINT "B'"
TABLE MOUNTING
SUPPORT CHANNEL
ILEFT HAND)
E==
15
 Loading...