additional instructions for radial
BEFORE USING THE SAW:
saws
_.=
O'3
e--
WARNING: TO AVOID MISTAKES THAT COULD
RESULT IN SERIOUS, PERMANENT INJURY, DO
NOT CONNECT POWER CORD UNTIL THE FOL-
LOWING STEPS HAVE BEEN SATISFACTORILY
COMPLETED:
1. Assembly and alignment. (See pages 12-31)
2. Examination and operating familiarity with ON-
OFF switch, elevation hand wheel, swivel lock,
bevel lock and rip lock, guard clamp screw,
spreader and anti-kickback device and miter
lock.
3. Review and understanding of all safety instruc-
tions and operating procedures throughout the
manual.
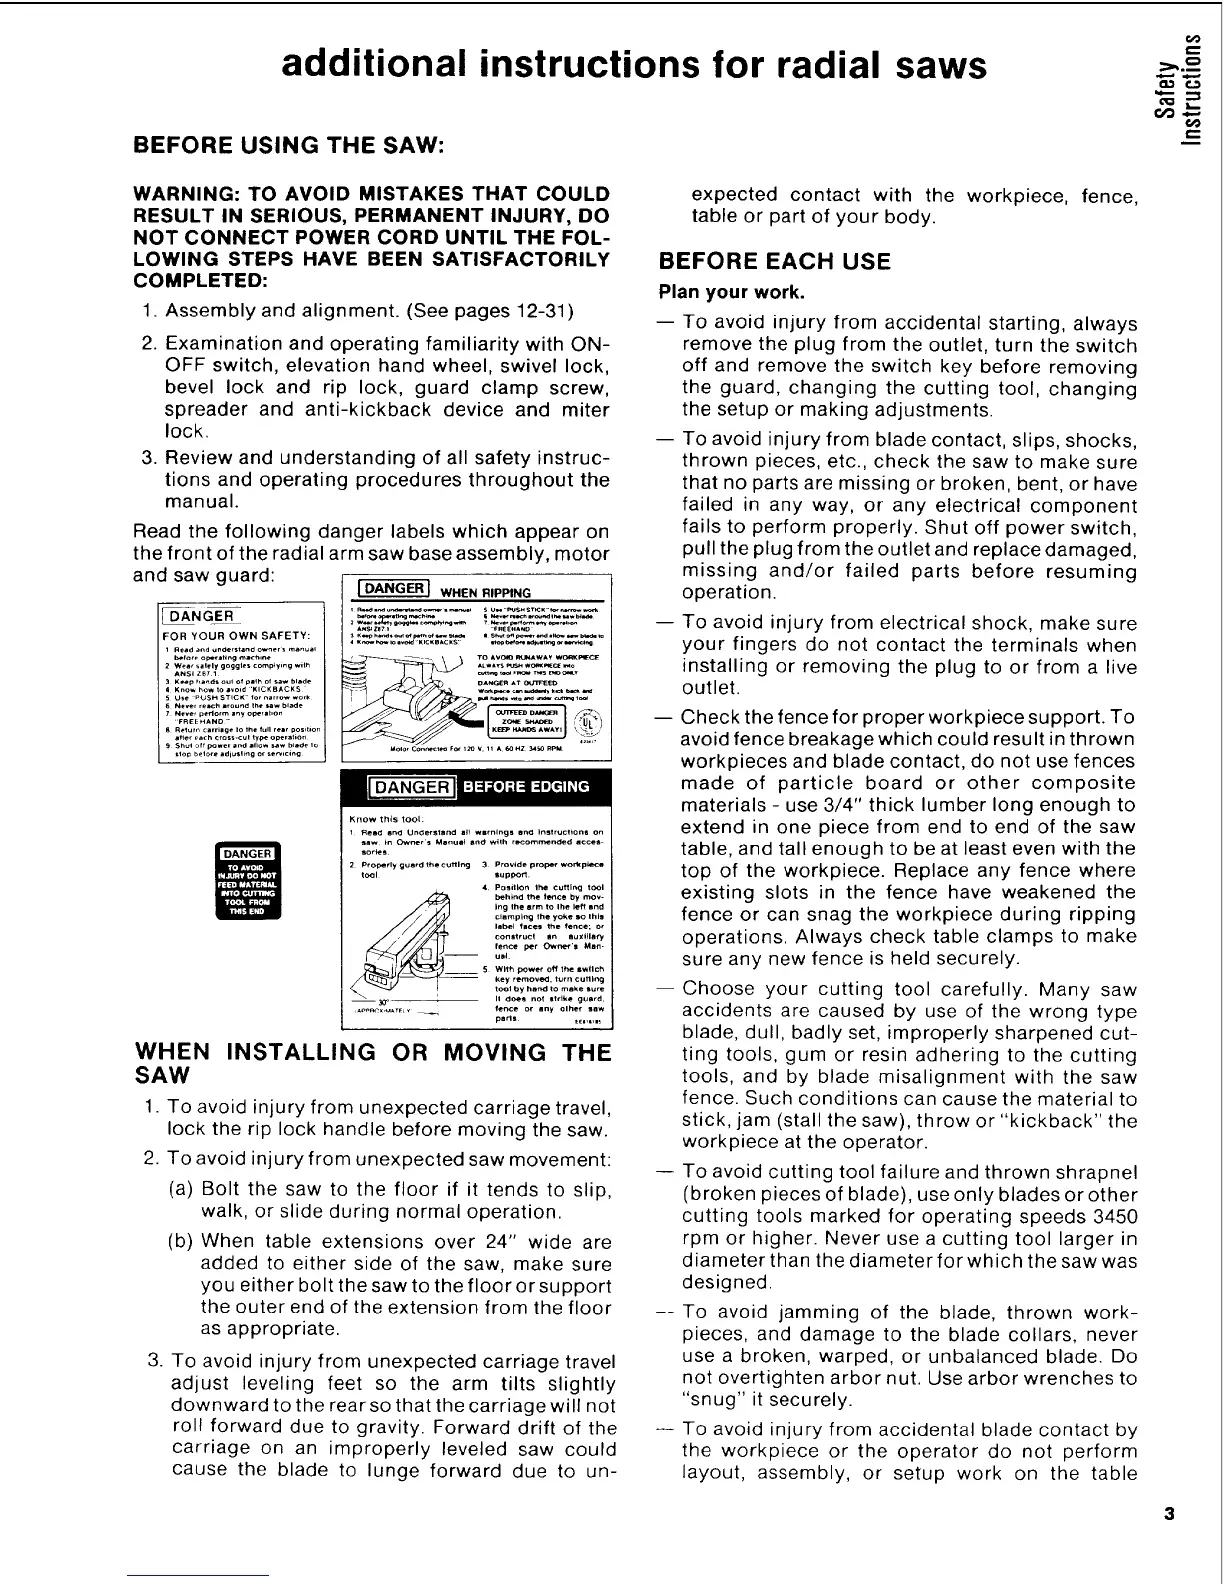
DANGER
FOR YOUR OWN SAFETY:
Read_nd unde,s,and o*o_r, manua,
before operifi ng mlchlne
Wear salely goggles c_p_ying wit_
ANS_Z67 1
3 K_p hands oul of palh of _w blade
Know he* to a_oid 'KICKBACKS
5 Use PUSH STICK for narrow work
6 Never re_h around the _w blade
7 Never peHo,m Jny o_rabon
,FREEHAND ,-
8 Return carriage ko the full teat position
a_,er _.ch crops-cuRtyp_ o_.at_on
S Shul off _wer and a(Io* saw b'ade Io
.1o_ before adlusli_g of se_lcing
Read the following danger labels which appear on
the front of the radial arm saw base assembly, motor
and saw guard: _ WHENRIPPING
•.s, z_7, _.€_Ha.D
Know this tool:
1 Read and Understand all w_rnlngs and Instructions on
saw _n Ow_rs Menue_ and with r_om_nded acces-
sories
2 Properly guard the cutting 3 Provide pro W workplace
tool tup_o_
4 Position the cuffing tool
behind the ler_ce by mov-
Ing the arm to Ihe left _nd
clamping the yoke so thi_
label faces the fence; or
conatruct an auxl_l_Pf
fence per C_ner'$ Man-
ual
__ 5 Wi_h power off the _wllch
key removed, turn culling
t_J by ha f'_l to make _ure
il dOeS nol gtrlke guard,
fete or any olher saw
paris _.,=,=,
WHEN INSTALLING OR MOVING THE
SAW
1. To avoid injury from unexpected carriage travel,
lock the rip lock handle before moving the saw.
2. To avoid injury from unexpected saw movement:
(a) Bolt the saw to the floor if it tends to slip,
walk, or slide during normal operation.
(b) When table extensions over 24" wide are
added to either side of the saw, make sure
you either bolt the saw to the floor or support
the outer end of the extension from the floor
as appropriate.
3. To avoid injury from unexpected carriage travel
adjust leveling feet so the arm tilts slightly
downward to the rear so that the carriage will not
roll forward due to gravity. Forward drift of the
carriage on an improperly leveled saw could
cause the blade to lunge forward due to un-
expected contact with the workpiece, fence,
table or part of your body.
BEFORE EACH USE
Plan your work.
-- To avoid injury from accidental starting, always
remove the plug from the outlet, turn the switch
off and remove the switch key before removing
the guard, changing the cutting tool, changing
the setup or making adjustments.
To avoid injury from blade contact, slips, shocks,
thrown pieces, etc., check the saw to make sure
that no parts are missing or broken, bent, or have
failed in any way, or any electrical component
fails to perform properly. Shut off power switch,
pull the plug from the outlet and replace damaged,
missing and/or failed parts before resuming
operation.
To avoid injury from electrical shock, make sure
your fingers do not contact the terminals when
installing or removing the plug to or from a live
outlet.
-- Check the fence for proper workpiece support. To
avoid fence breakage which could result in thrown
workpieces and blade contact, do not use fences
made of particle board or other composite
materials - use 3/4" thick lumber long enough to
extend in one piece from end to end of the saw
table, and tall enough to be at least even with the
top of the workpiece. Replace any fence where
existing slots in the fence have weakened the
fence or can snag the workpiece during ripping
operations. Always check table clamps to make
sure any new fence is held securely.
--Choose your cutting tool carefully. Many saw
accidents are caused by use of the wrong type
blade, dull, badly set, improperly sharpened cut-
ting tools, gum or resin adhering to the cutting
tools, and by blade misalignment with the saw
fence. Such conditions can cause the material to
stick, jam (stall the saw), throw or "kickback" the
workpiece at the operator.
-- To avoid cutting tool failure and thrown shrapnel
(broken pieces of blade), use only blades or other
cutting tools marked for operating speeds 3450
rpm or higher. Never use a cutting tool larger in
diameter than the diameter for which the saw was
designed.
--To avoid jamming of the blade, thrown work-
pieces, and damage to the blade collars, never
use a broken, warped, or unbalanced blade. Do
not overtighten arbor nut. Use arbor wrenches to
"snug" it securely.
-- To avoid injury from accidental blade contact by
the workpiece or the operator do not perform
layout, assembly, or setup work on the table
 Loading...