 Loading...
Do you have a question about the Dell Inspiron 13 5310 and is the answer not in the manual?
| Display Size | 13.3 inches |
|---|---|
| Graphics | Intel Iris Xe Graphics |
| Battery | 4-Cell, 54 WHr |
| Wireless | Wi-Fi 6 (802.11ax) |
| Bluetooth | Bluetooth 5.1 |
| Keyboard | Backlit Keyboard |
| Processor | 11th Gen Intel Core i5/i7 |
| RAM | 8GB/16GB LPDDR4x |
| Storage | 256GB/512GB/1TB SSD |
| Operating System | Windows 10 Home / Windows 10 Pro |
| Webcam | 720p HD |
| Audio | Stereo speakers with Waves MaxxAudio Pro |
| Ports | 2x Thunderbolt 4, 1x USB 3.2 Gen 1 Type-A, 1x HDMI 1.4, 1x headphone/microphone combo |
| Resolution | 2560 x 1600 |
| Weight | 1.25 kg |
Covers essential steps before working inside the computer, including entering Service Mode and general safety guidelines.
Details electrostatic discharge (ESD) risks and provides methods to prevent damage to components.
Lists recommended tools, screw types, and identifies major computer components for service.
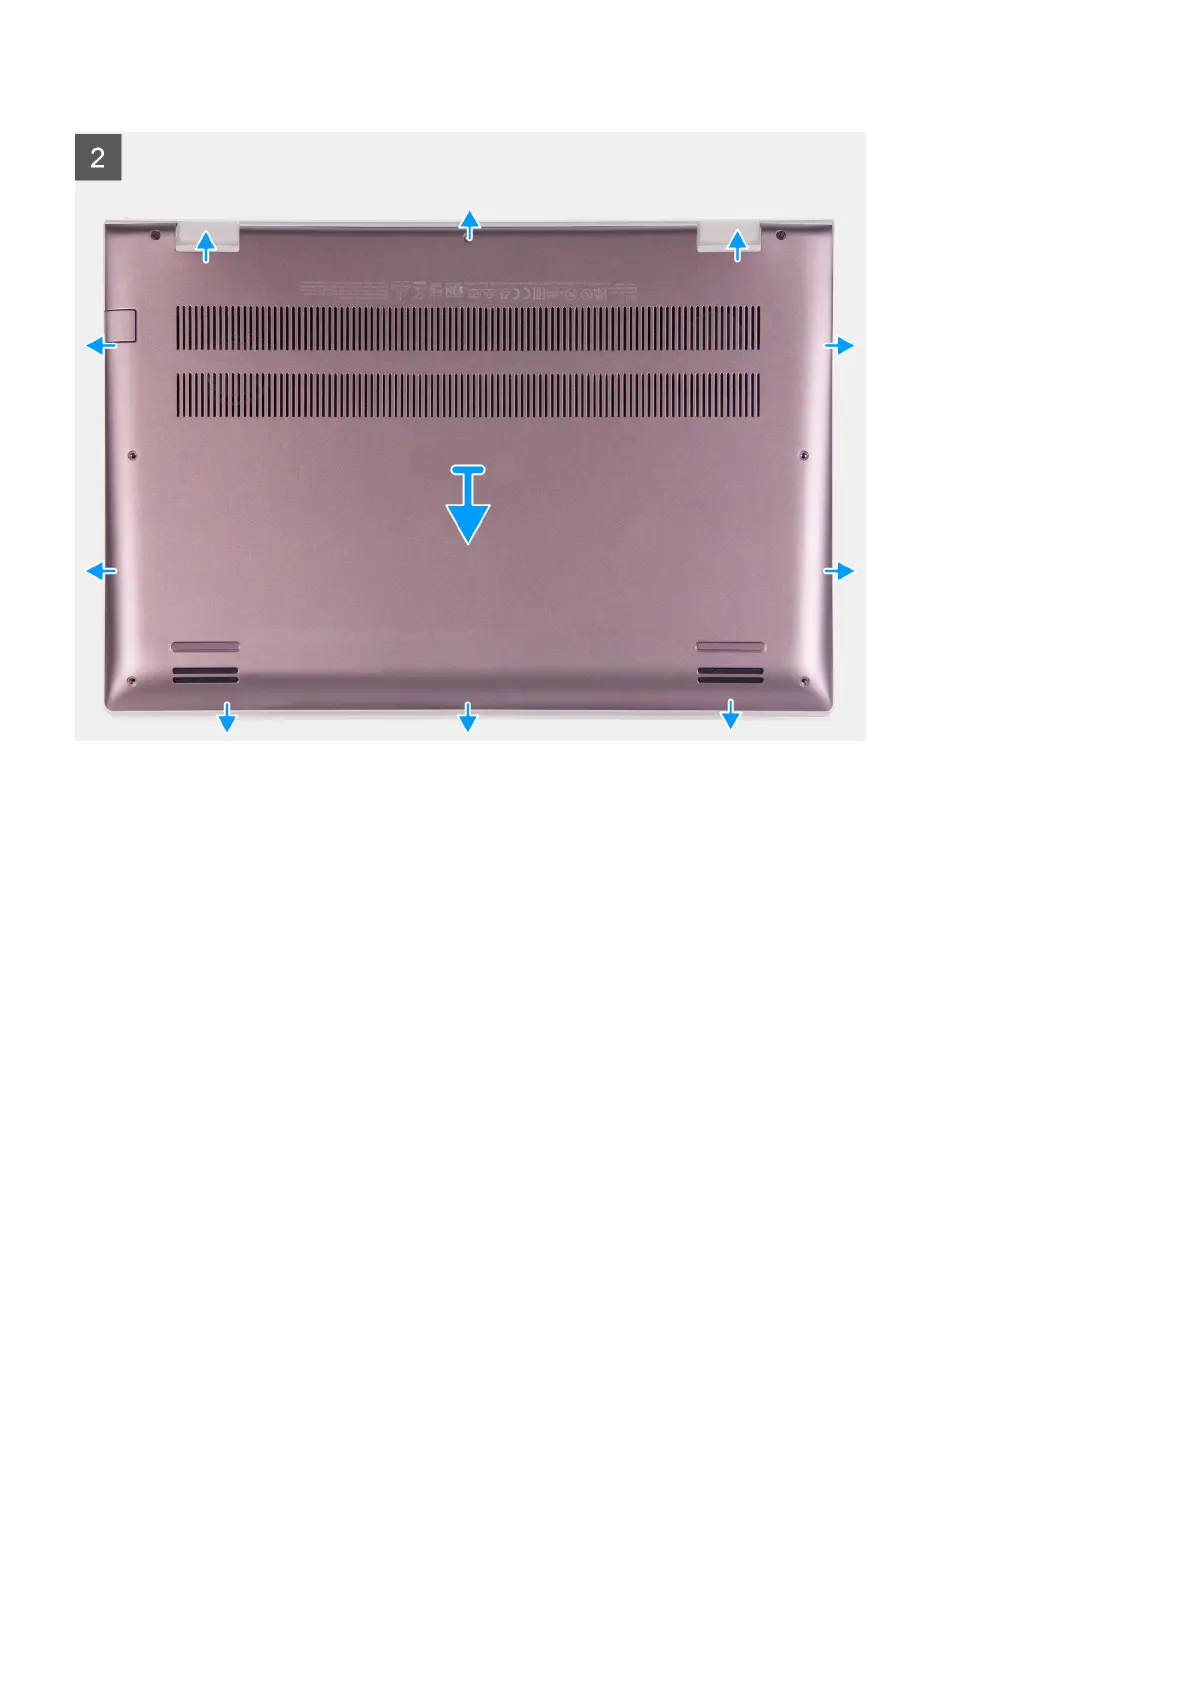
Procedure for removing and installing the computer's base cover.
Instructions for removing and installing M.2 2230 and M.2 2280 solid-state drives.
Steps for removing and installing the wireless card and its bracket.
Covers lithium-ion battery precautions and procedures for removal and installation.
Procedure for removing and installing the coin-cell battery.
Instructions for removing and installing the computer's speakers.
Details on removing and installing the left and right cooling fans.
Procedure for removing and installing the touchpad and its bracket.
Steps for removing and installing the computer's display assembly.
Instructions for removing and installing the I/O board and its cable.
Procedure for removing and installing the power button with optional fingerprint reader.
Steps for removing and installing the heat sink, including thermal grease application.
Detailed guide for removing and installing the computer's system board.
Procedure for removing and installing the palm-rest and keyboard assembly.
Guide to entering the BIOS setup program and using navigation keys for system configuration.
Details on configuring boot order, system information, and various setup options.
Instructions for updating the system BIOS from within the Windows operating system.
Procedure to update the system BIOS using a bootable USB flash drive.
Guide to updating the system BIOS using the F12 One-Time boot menu.
Covers assigning, changing, and deleting system and setup passwords for security.
Procedure for clearing the computer's CMOS settings.
Information on how to clear BIOS (System Setup) and system passwords.
Locating the Service Tag and interpreting system diagnostic light codes for troubleshooting.
Using SupportAssist for hardware diagnostics and recovering the operating system.
Procedures for flashing the BIOS via USB and performing a WiFi power cycle.
Listing of online resources, knowledge base articles, and user manuals for product support.
Information on how to contact Dell for sales, technical support, and customer service issues.