NOTE: Replace the screws in the order of the callout numbers [1, 2, 3, 4] as indicated on the heat sink.
4. Connect the battery cable to the connector on the system board.
5. Install the base cover.
6. Follow the procedure in After working inside your computer.
LED board
Removing LED board
1. Follow the procedure in Before working inside your computer.
2. Remove the base cover.
3. Disconnect the battery cable from the connector on the system board.
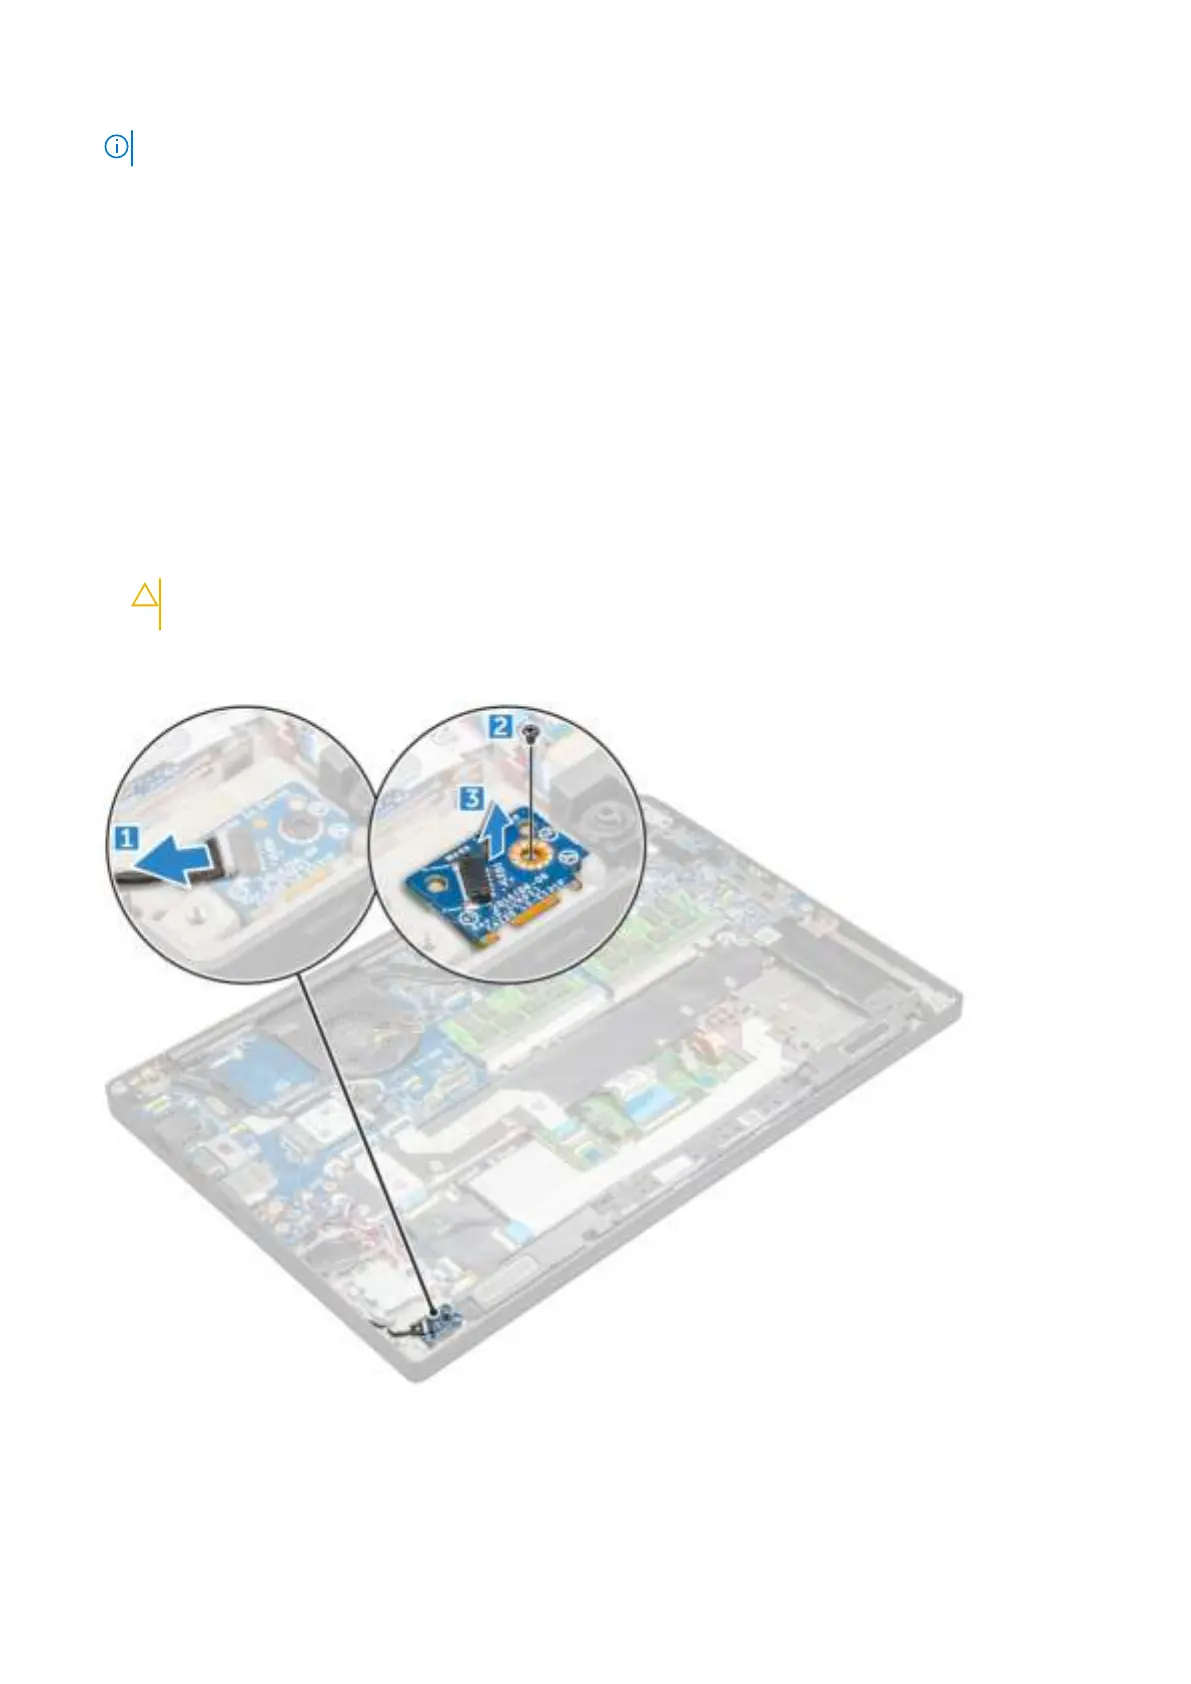
4. To remove the LED board:
a. Disconnect the LED cable from the LED board [1].
CAUTION: Avoid pulling the cable as it would result in breaking the cable connector. Instead, use a scribe
to push the edges of the cable connector to release the LED cable.
b. Remove the M2.0 x 2.5 screw that secures the LED board to the system [2].
c. Lift the LED board from the system [3].
Installing LED board
1. Insert the LED board into the slot on the computer.
Removing and installing components 25
 Loading...