Installing System Components 83
Installing the Optical Drive
1
Align the optical drive tray with its opening in the front panel. See Figure 3-19.
2
Slide in the drive tray until the tray snaps into place.
3
Connect the optical drive cable and the power cable to the back of the drive tray.
4
Close the system. See "Closing the System" on page 56.
5
Replace the bezel. See "Replacing the Front Bezel" on page 55.
6
Reconnect your system and peripherals to their electrical outlets, and turn on the system.
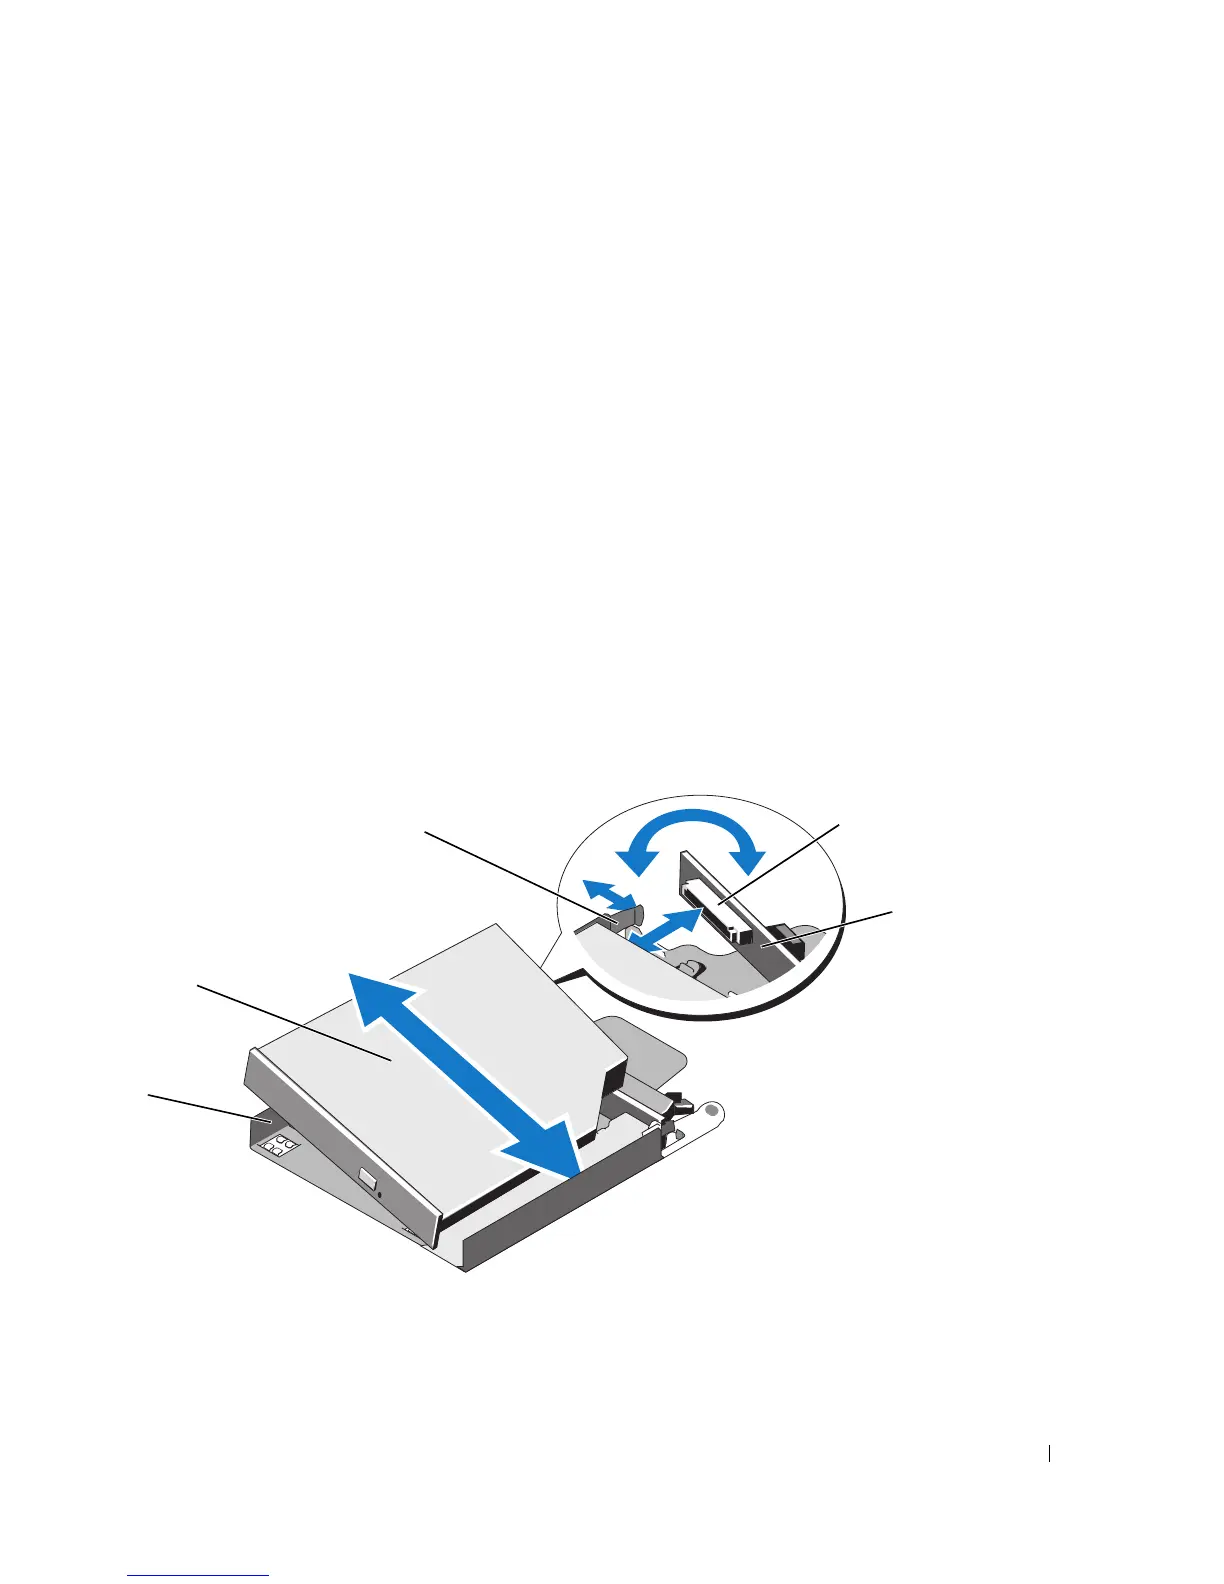
Removing the Optical Drive From the Optical Drive Tray
1
Pull outward on the interposer board release tab at the back of the drive tray to release the interposer
board connected to the optical drive. See Figure 3-20.
2
Pull the interposer board connector from the optical drive connector and rotate the interposer board
outward from the tray.
3
Pull outward again on the interposer board release tab and simultaneously pull up on the left side of
the optical drive to separate the drive from the tray. See Figure 3-20.
Figure 3-20. Removing and Installing the Optical Drive in the Optical Drive Carrier
1 optical drive carrier 2 optical drive 3 interposer-board release tab
4 optical drive connector 5 interposer board
2
3
1
4
5