Installing System Components 55
Hard Drives
The installation and removal procedures for the 3.5-inch hard drive and the
2.5-inch hard drive are similar. Following is an example showing the
replacement procedure of a 3.5-inch hard drive.
Removing a Hard-Drive Blank
CAUTION: To maintain proper system cooling, all empty hard-drive bays must
have drive blanks installed.
NOTE: This section is applicable to systems with hot-swappable hard drives only.
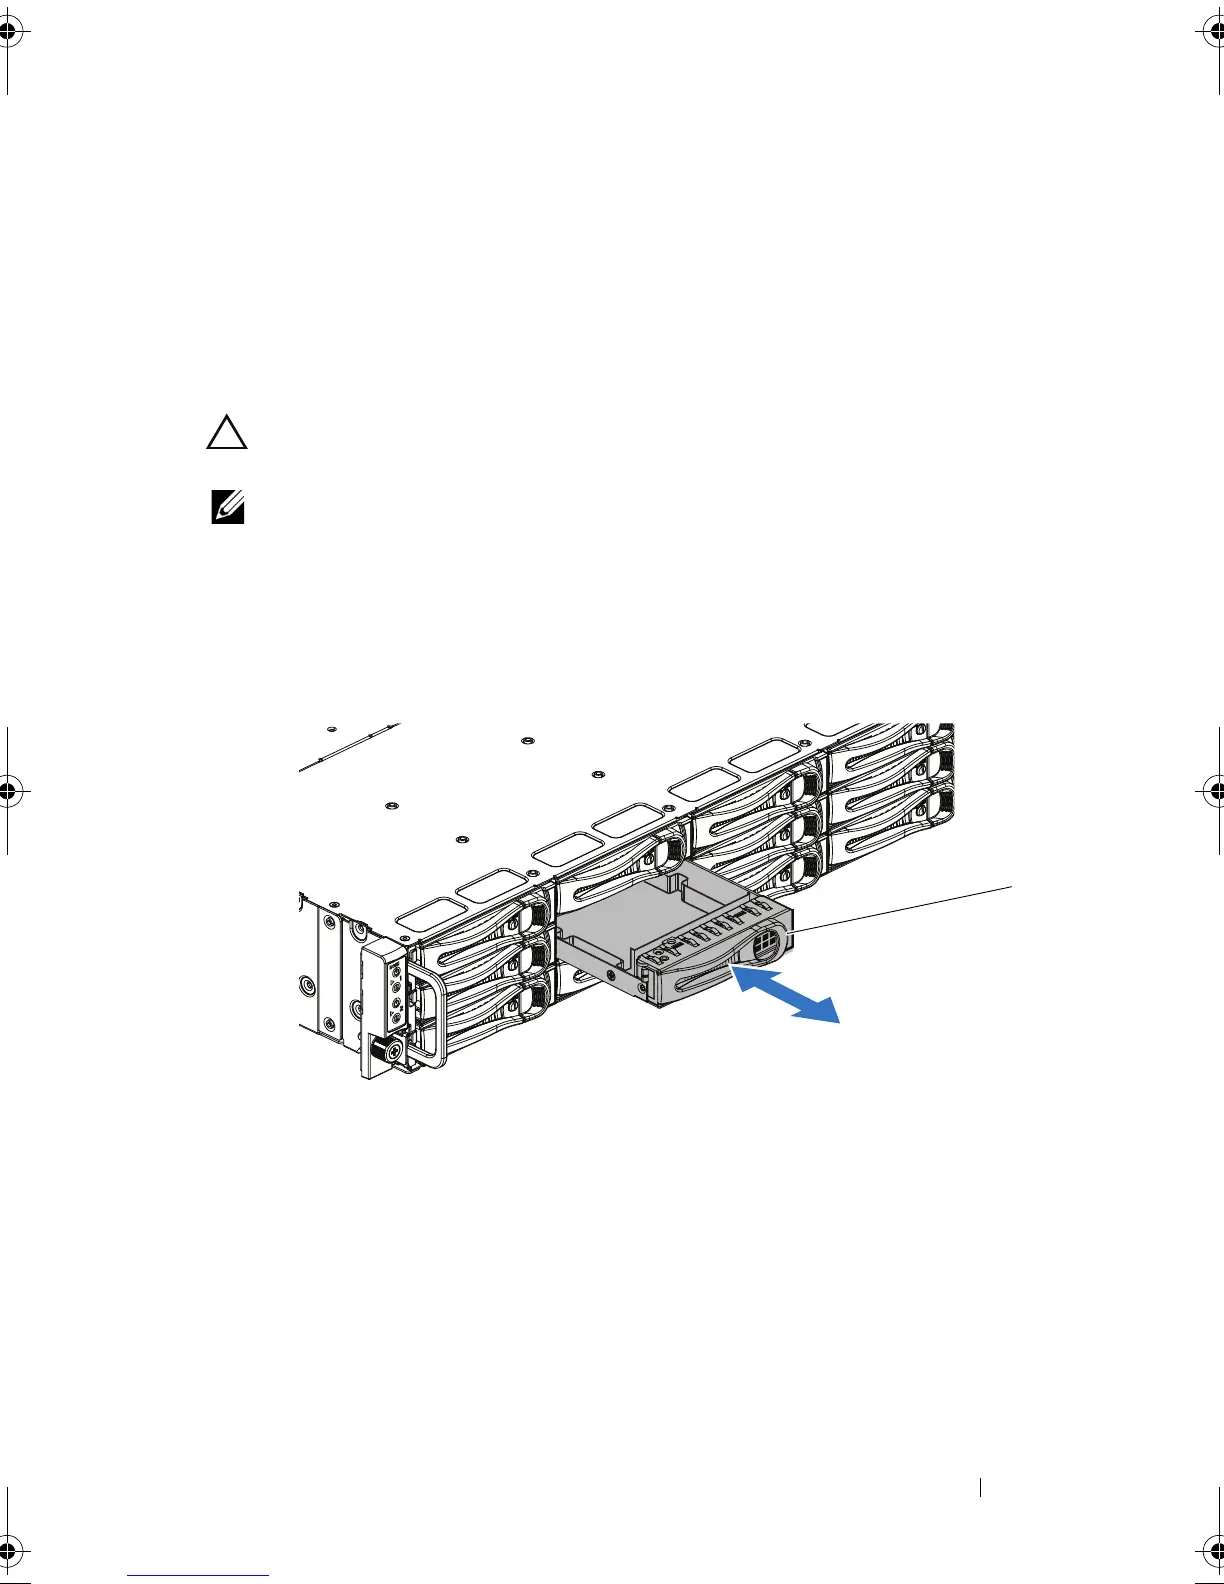
1 Grasp the front of the hard-drive blank, pull and slide the blank out
until it is free of the drive bay. See Figure 3-2.
Figure 3-2. Removing or Installing a Hard-Drive Blank
Installing a Hard-Drive Blank
Align the hard-drive blank with the drive bay and insert the blank into the
drive bay until the retention latch clicks into place. See Figure 3-2.
1 hard-drive blank
book.book Page 55 Thursday, March 4, 2010 4:38 PM
 Loading...