90 Installing System Components
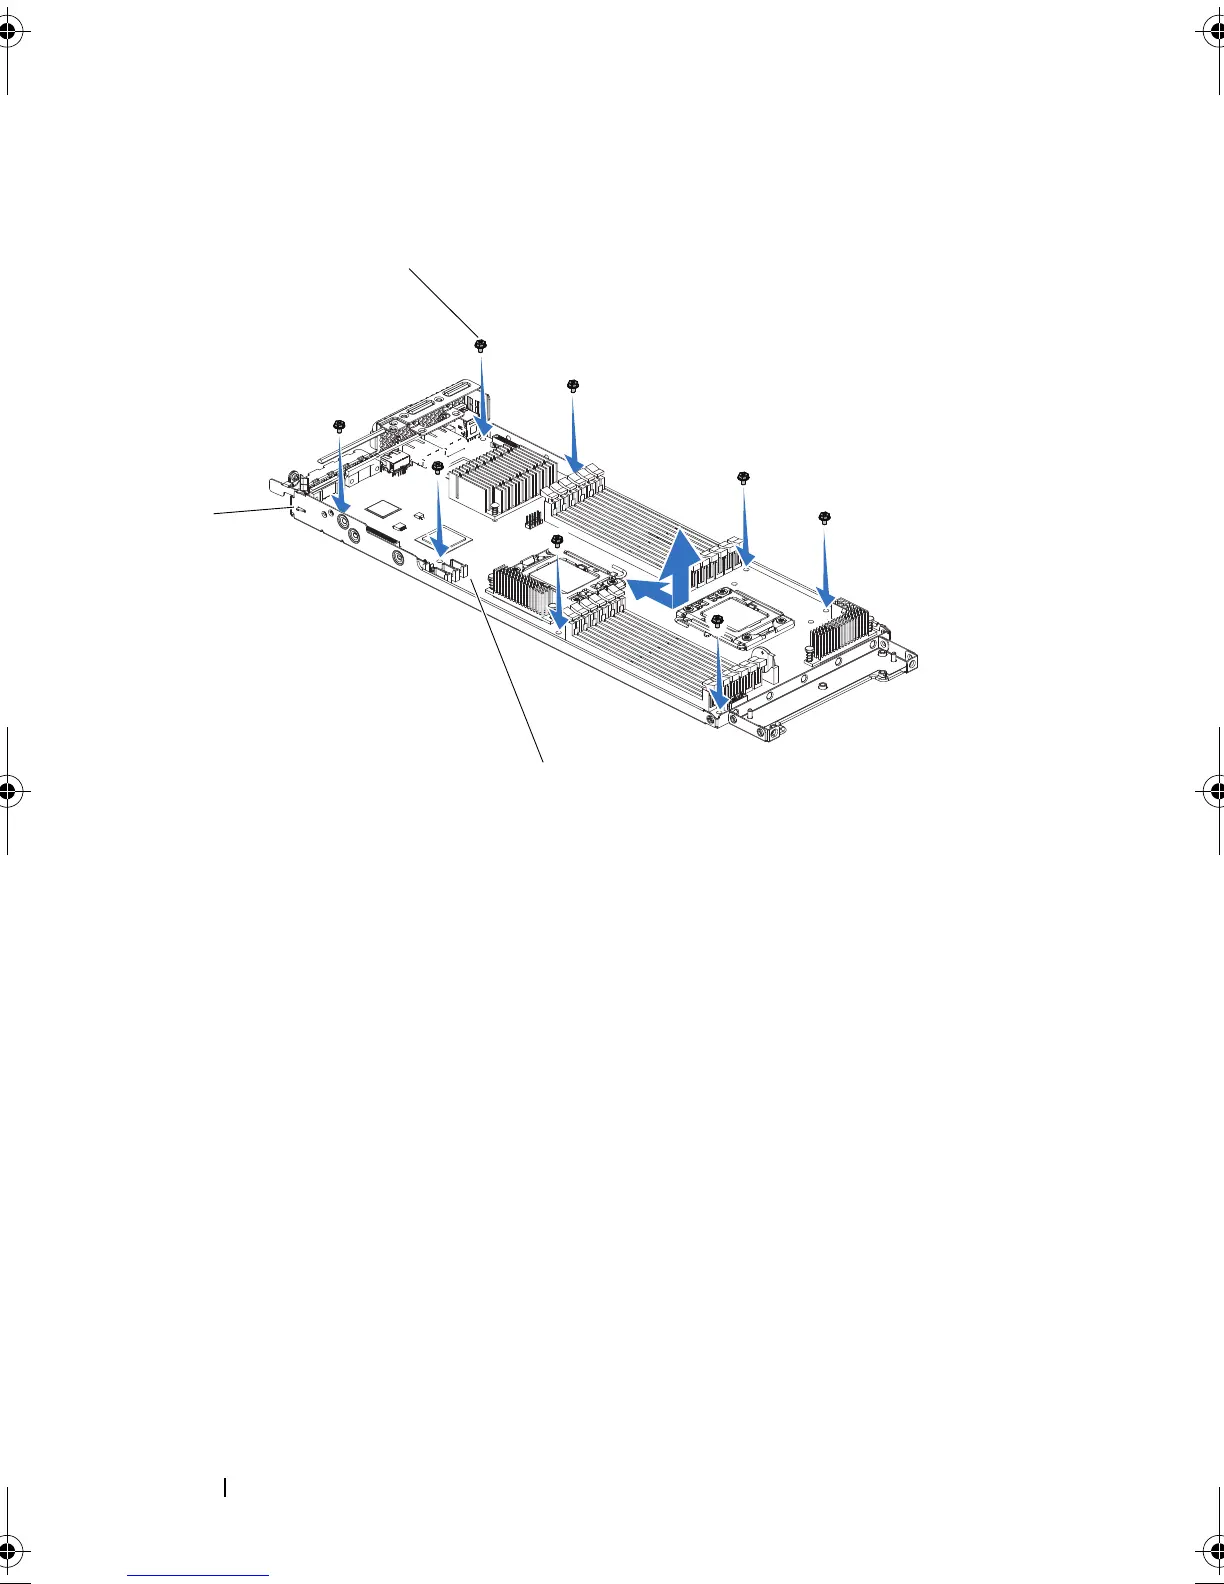
Figure 3-21. Removing and Installing System Board
Installing a System Board
1
Unpack the new system board.
2
Holding the system board by the edges, slide the system board into
the system-board assembly.
3
Replace the eight screws to secure the system board to the system-board
assembly.
4
Transfer the processors to the new system board. See "Removing a
Processor" on page 66 and "Installing a Processor" on page 68.
5
Remove the memory modules and transfer them to the same locations on
the new board. See "Interposer Extenders" on page 82 and "Installing
Memory Modules" on page 80.
6
Replace the cooling shroud, see "Installing the Cooling Shroud" on
page 64.
1 screw (8) 2 system board
3 system-board assembly
book.book Page 90 Thursday, March 4, 2010 4:38 PM
 Loading...